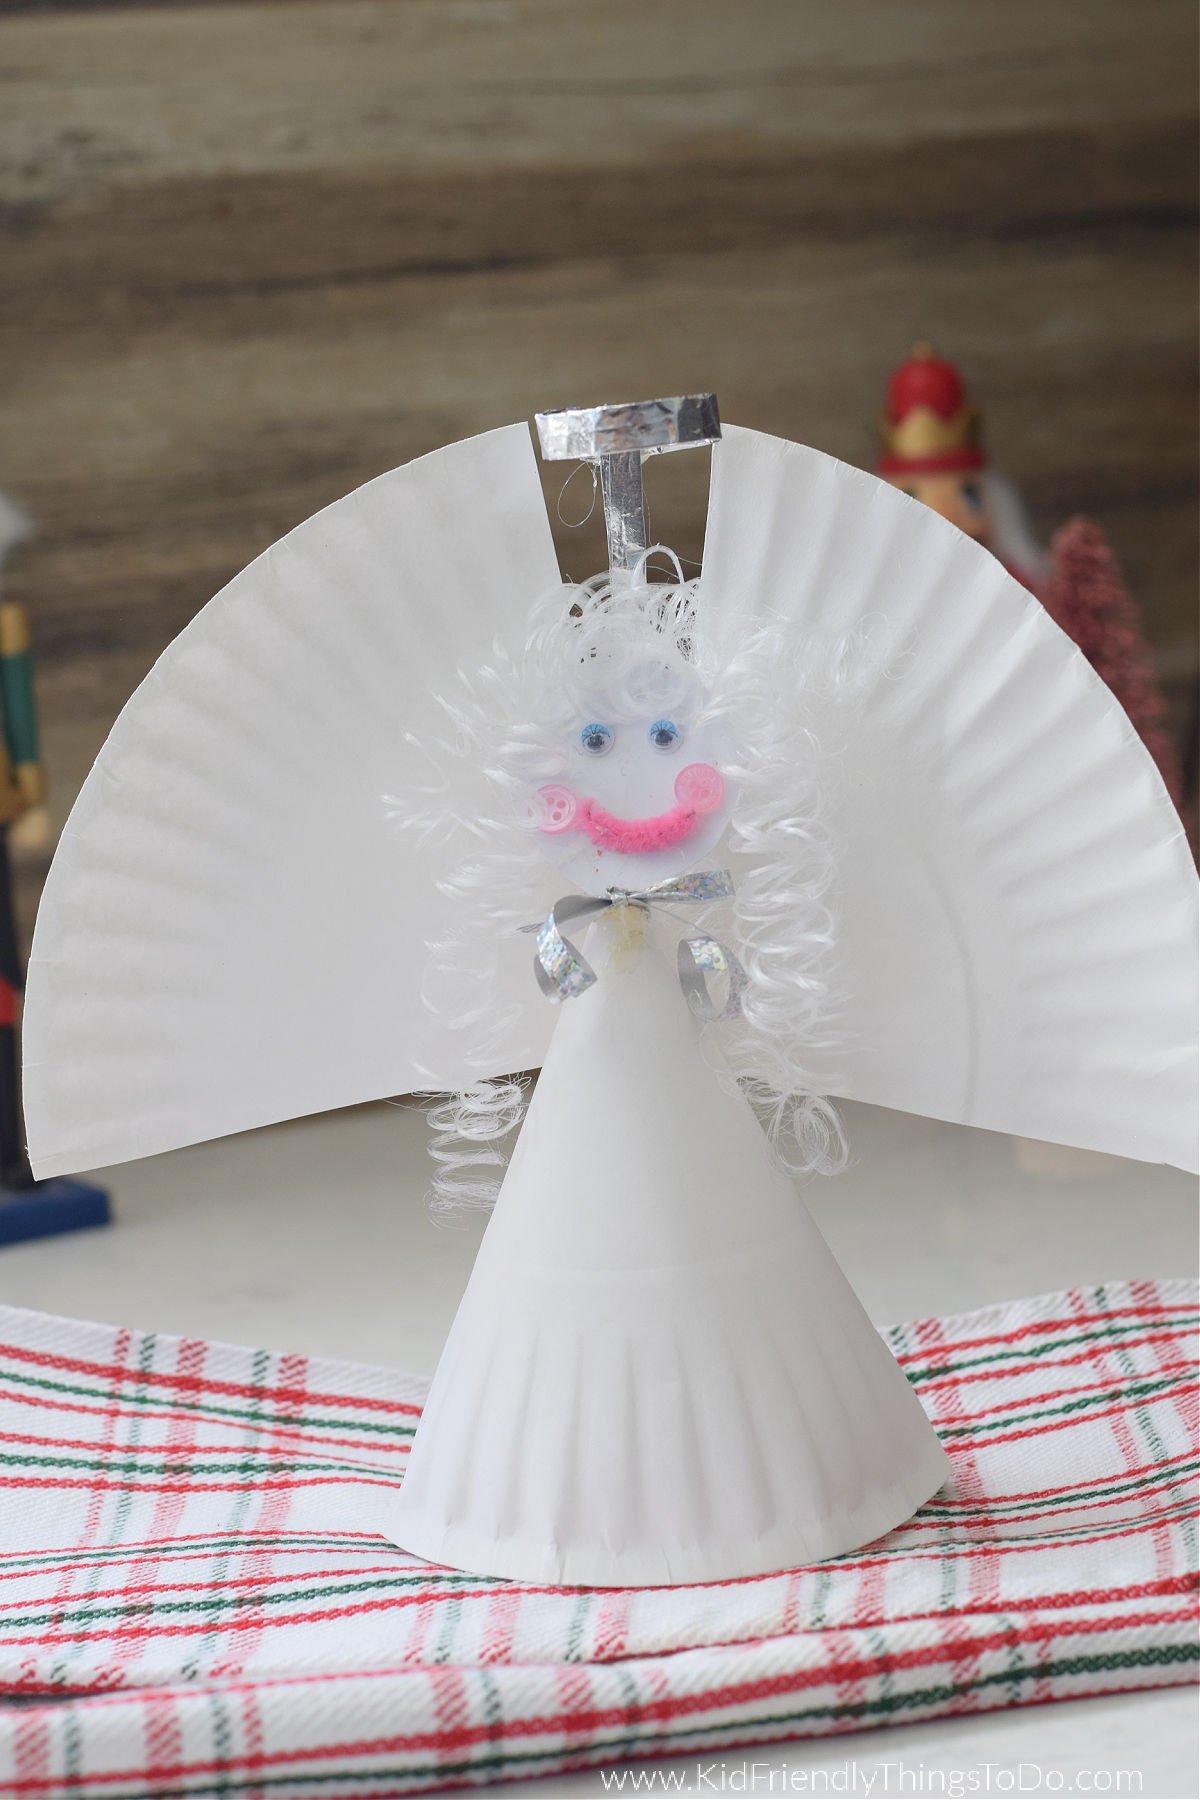
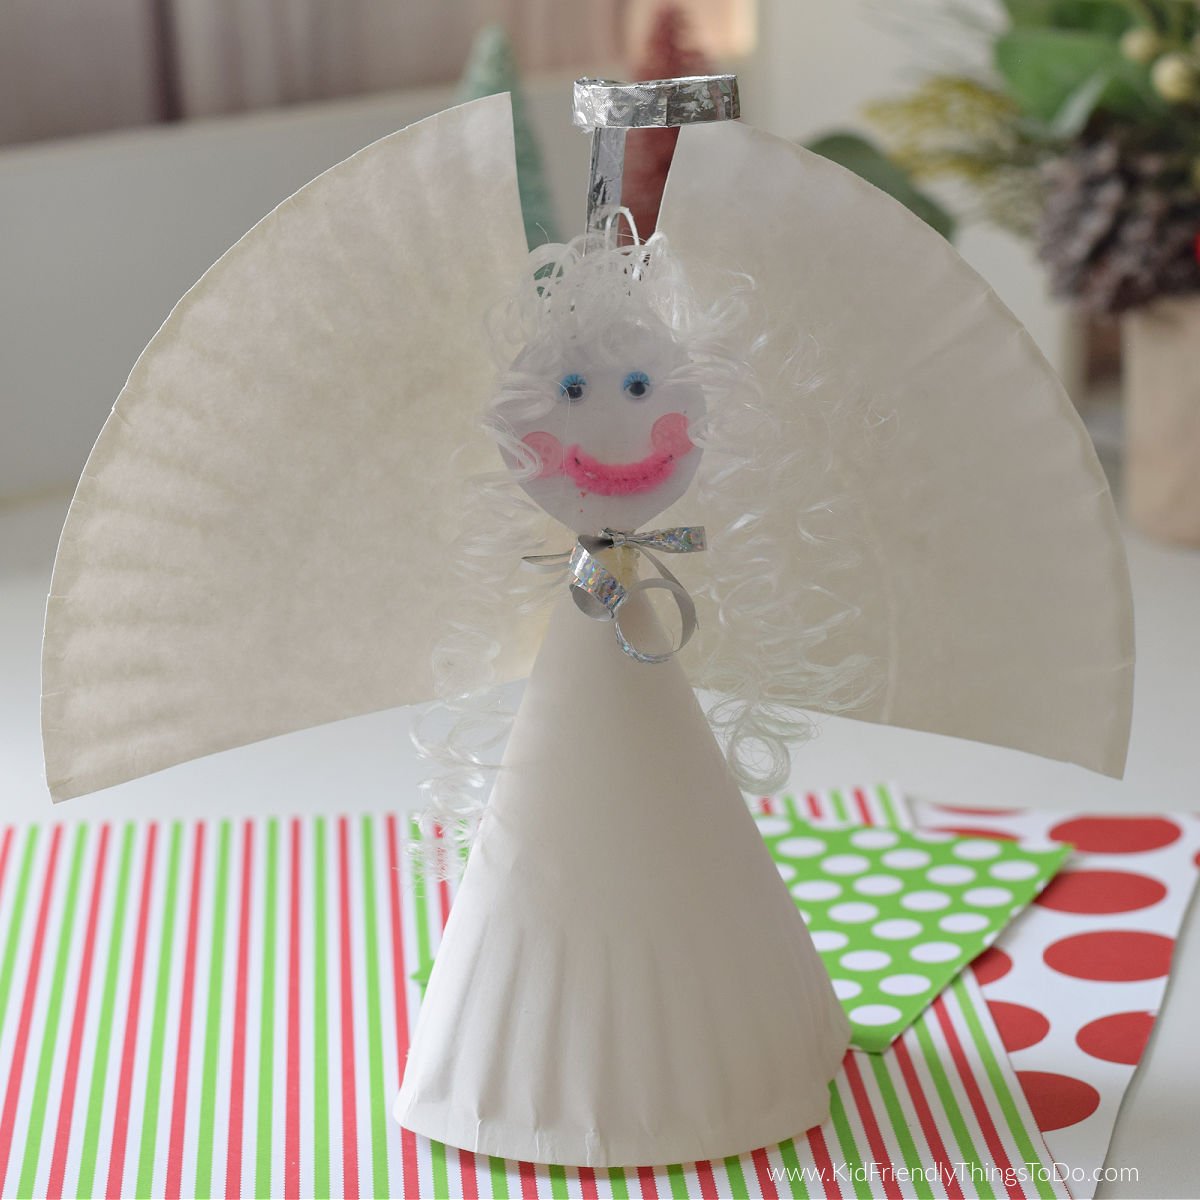
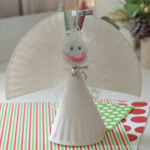
This sweet and simple paper plate angel craft is a great way to share the story of Christmas, or use it as a Christmas tree topper. The kids will love this easy Paper Plate Angel Craft to make at Christmas time.
This post may contain affiliate links. As an Amazon Associate, I earn a small commission from qualifying purchases. See my disclosure policy to read more. Adult supervision is required for each step of activities, recipes, crafts, and games with children. Small parts are a choking hazard. Sharp objects can cause injury.
Paper Plate Angel Craft
Isn’t it exciting to make Christmas crafts with your little ones? I think old-fashioned Christmas crafts like the Candy Cane Felt Christmas Mouse, Popsicle Stick Nativity Ornament, and the paper plate angel are charming and timeless. It’s always heartwarming to see kids enjoy these classic crafts. If you want to add more fun to your Christmas crafting, why not grab some puffy paint and let your creativity run wild with some Christmas Puffy Paint Window Clings?
Here are the Supplies needed for this Angel Craft
- White paper plate – one with ruffles on the edges, This will be used to make the angel’s skirt and the wings for the angel
- Aluminum foil – Make two accordion folded-up strips – about 2 inches long and 1/4 in. wide
- Google eyes – I like the googly eyes with eyeshadow and eyelashes, but simple ones will do the trick
- Little pink dots (2) – you can use a hole puncher to punch out dots from pink paper or use small pink buttons for the rosy cheeks.
- White Paper for the face – I used thick paper like cardstock
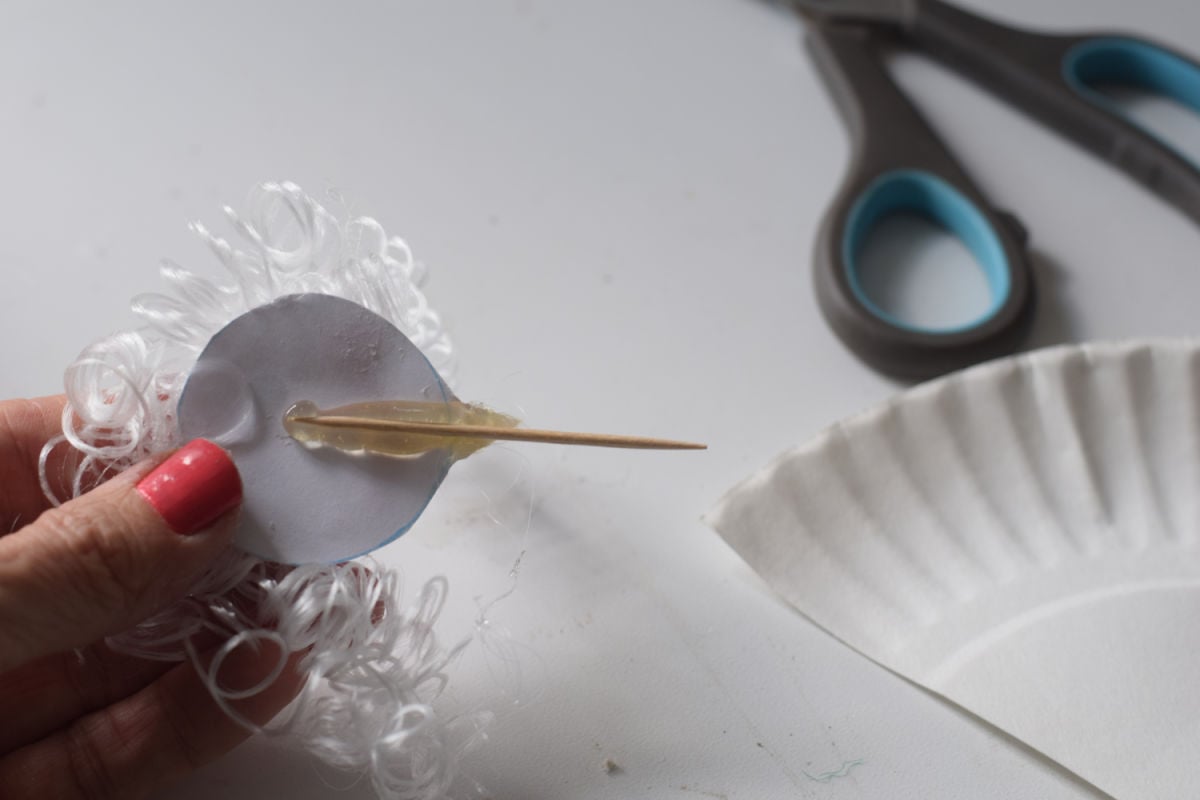
- Doll hair – you can substitute yarn or raffia if you can’t find doll hair. You could use white yarn or yellow yarn for the angel’s hair
- Red or Pink 1/2 piece of chenille strip or pipe cleaner for the mouth
- Toothpick
- Optional: Ribbon for a bow
Equipment Needed
- Low-temperature glue gun – or – strong tacky glue (Fabri-Tac is a nice tacky glue that dries quickly)
- optional: Scotch tape
Instructions for this Angel Paper Plate Craft
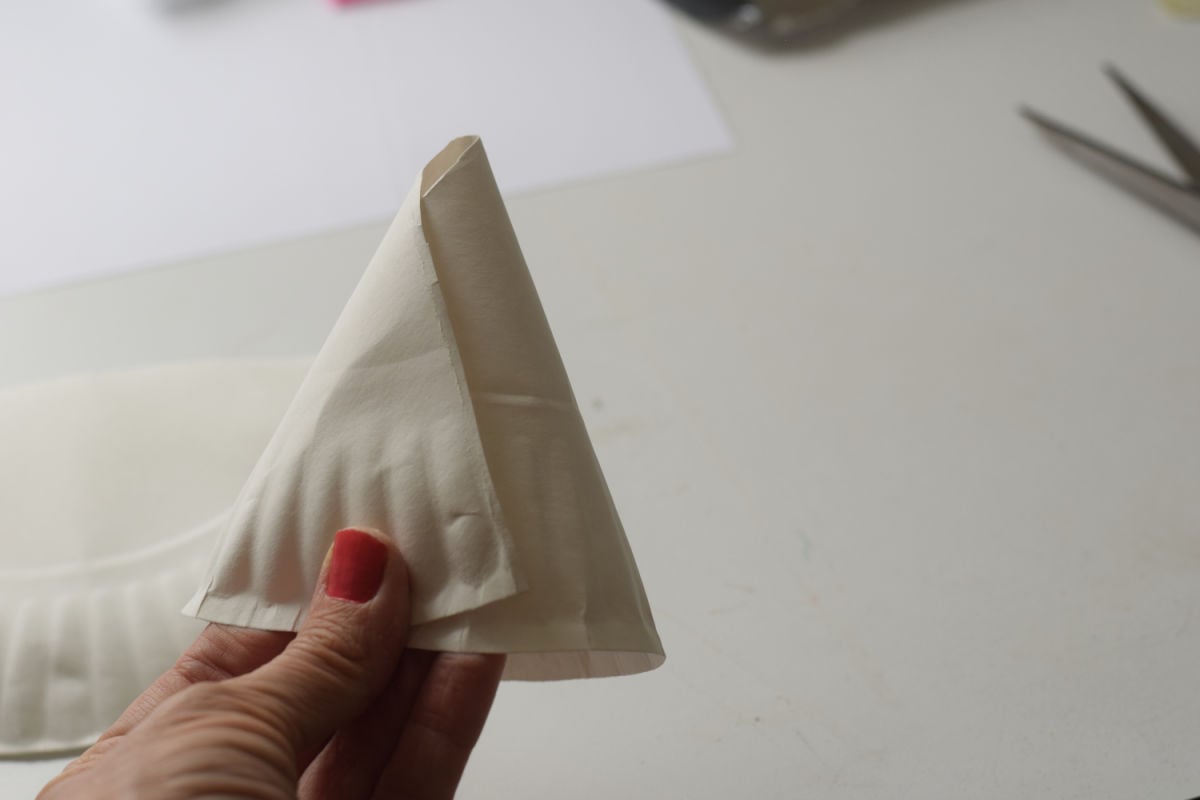
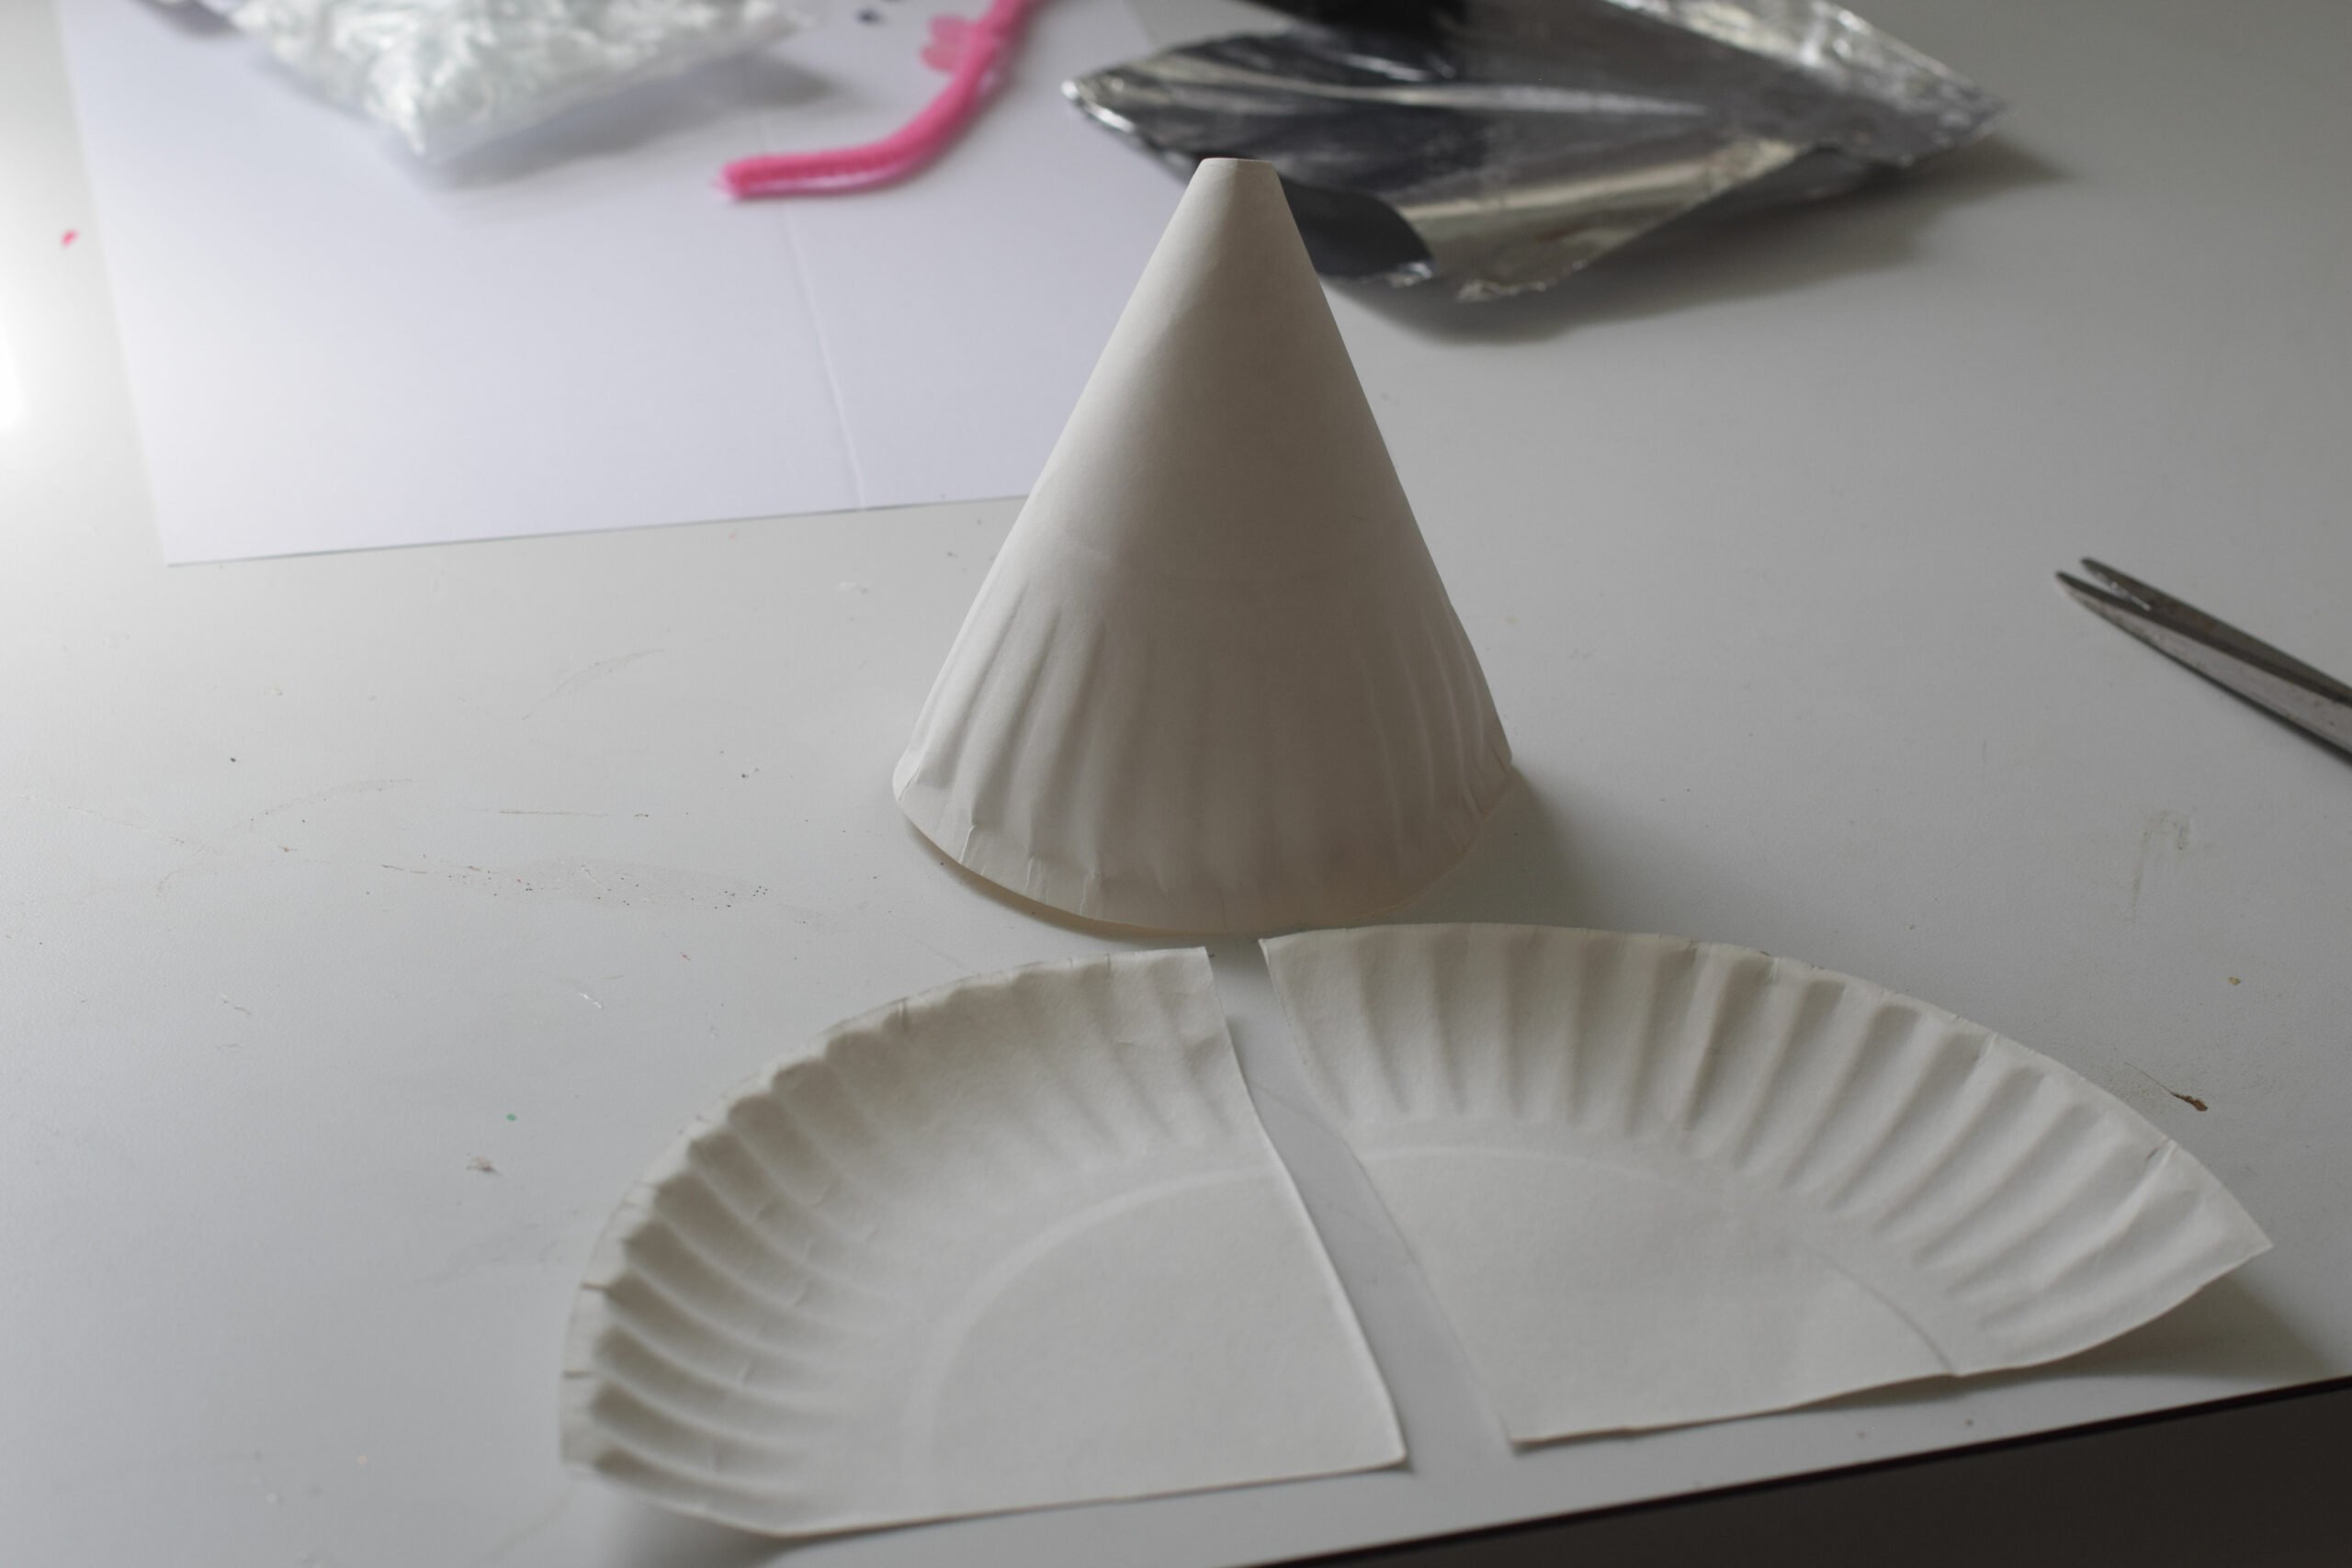
- Cut the plate in half.

- With one half, make a cone shape and glue it. This will be the angel’s dress
- Cut the other half of your plate into two halves – this makes the wings for your angel.
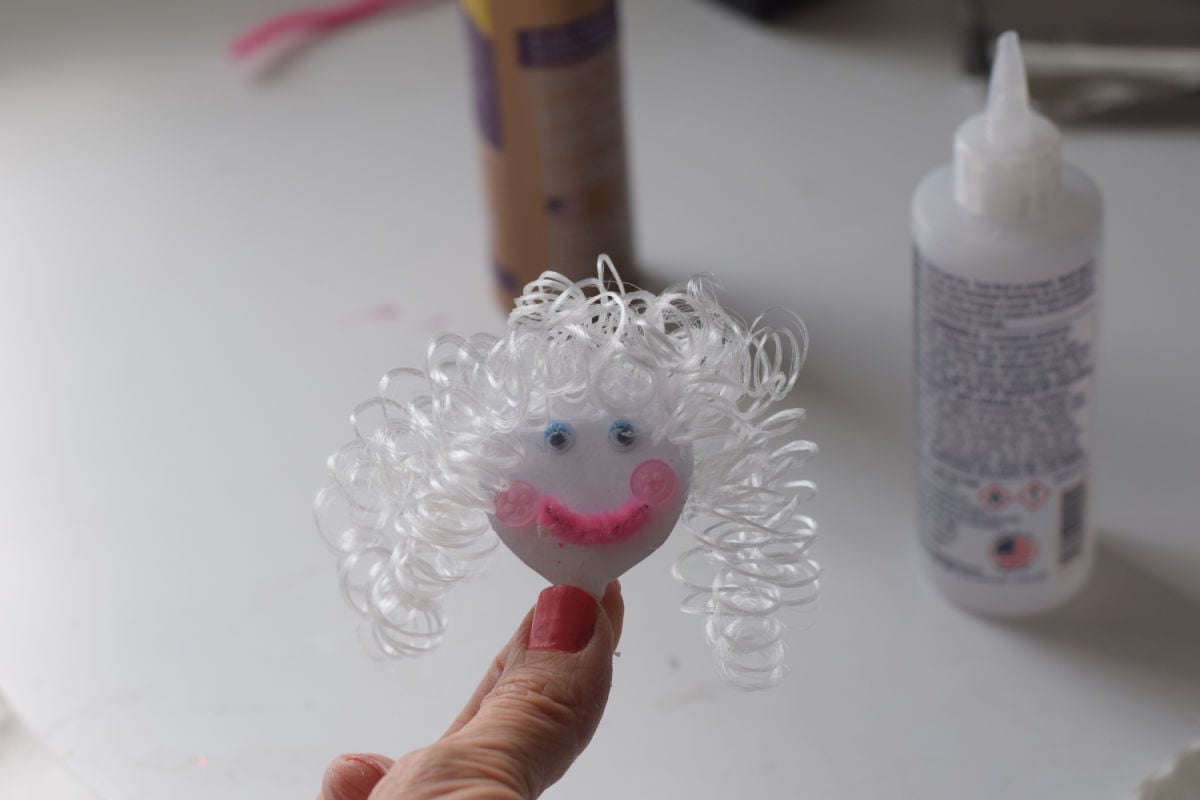
- Cut a face out of white paper. I added a small extension for the neck. Let the kids decorate their angel’s faces with your supplies of Google Eyes, pink dots, pipe cleaner, and optional markers.
- Add hair to the face and glue it to secure.
- Glue a toothpick to the back of the head so it extends downward
- Assemble the angel by, inserting the toothpick into the top of the cone so the head rests on top. Glue it to secure it in place.
- Optional: Tie a bow made out of ribbon to the neck of the angel
- Attach the angel’s wings to the back of the cone
- Use one aluminum strip to make a halo for the angel by shaping it into a circle. Attach the other accordion folded strip to the halo and glue it to the back of the angel’s head
More Easy Christmas Crafts You’ll Enjoy
Let’s Hang Out
Come and find me on Pinterest and Facebook for more recipes, crafts, party treats, and holiday games!
Printable Paper Plate Angel Craft
A Beautiful Paper Plate Angel
Materials
- White paper plate one with ruffles on the edges
- Aluminum foil Make two accordion folded-up strips – about 2 inches long by 1/4 in. wide
- 2 Google eyes
- 2 Little pink dots You can use a hole puncher to punch out dots from pink paper or use small pink buttons for the rosy cheeks
- White Paper for the face I used thick paper like cardstock.
- Doll hair You can substitute yarn or raffia if you can't find doll hair
- ½ inch pipe cleaner for the mouth pink or red
- Low-temperature glue gun Or – strong tacky glue (Fabri-Tac is a nice tacky glue that dries quickly)Scotch tape
Instructions
- Cut the plate in half.
- With one half, make a cone shape and glue it
- Cut the other half of your plate into two halves – this makes the wings for your angel.
- Cut a face out of white paper. I added a small extension for the neck.
- Let the kids decorate their angel's faces with your supplies of Google Eyes, pink dots, pipe cleaner, and optional markers.
- Add hair to the face and glue it to secure.
- Glue a toothpick to the back of the head so it extends downward
- Assemble the angel by, inserting the toothpick into the top of the cone so the head is resting on top.
- Glue it to secure it in place.
- Optional: Tie a bow made out of ribbon to the neck of the angel
- Attach the angel's wings to the back of the cone
- Use one aluminum strip to make a halo for the angel by shaping it into a circle.
- Attach the other accordion folded strip to the halo and glue it to the back of the angel's head
Notes
This post may contain affiliate links. As an Amazon Associate, I earn a small commission from qualifying purchases. See my disclosure policy to read more. Adult supervision is required for each step of activities, recipes, crafts, and games with children. Small parts are a choking hazard. Sharp objects can cause injury.
Come and find me on Pinterest and Facebook for more recipes, crafts, party treats, and holiday games!
~Melissa – KidFriendlyThingsToDo.Com