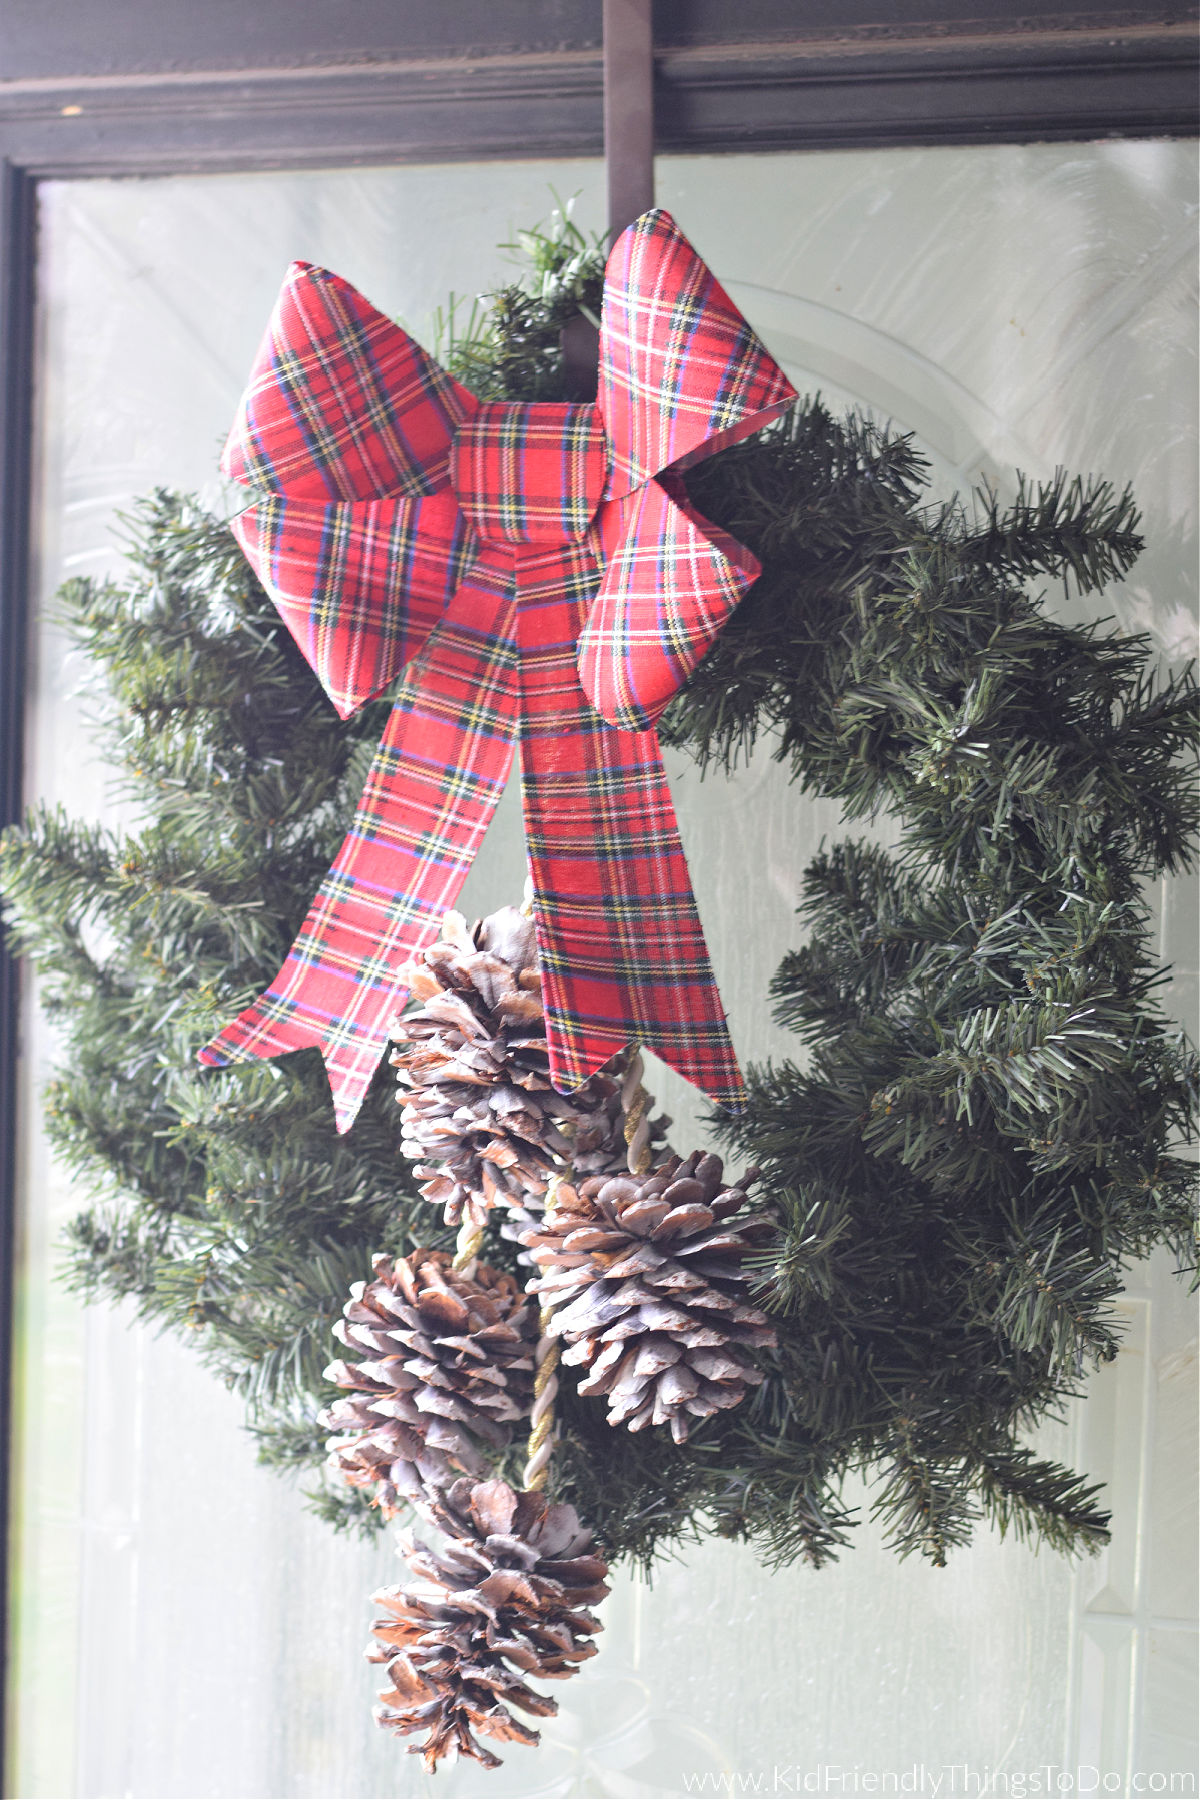
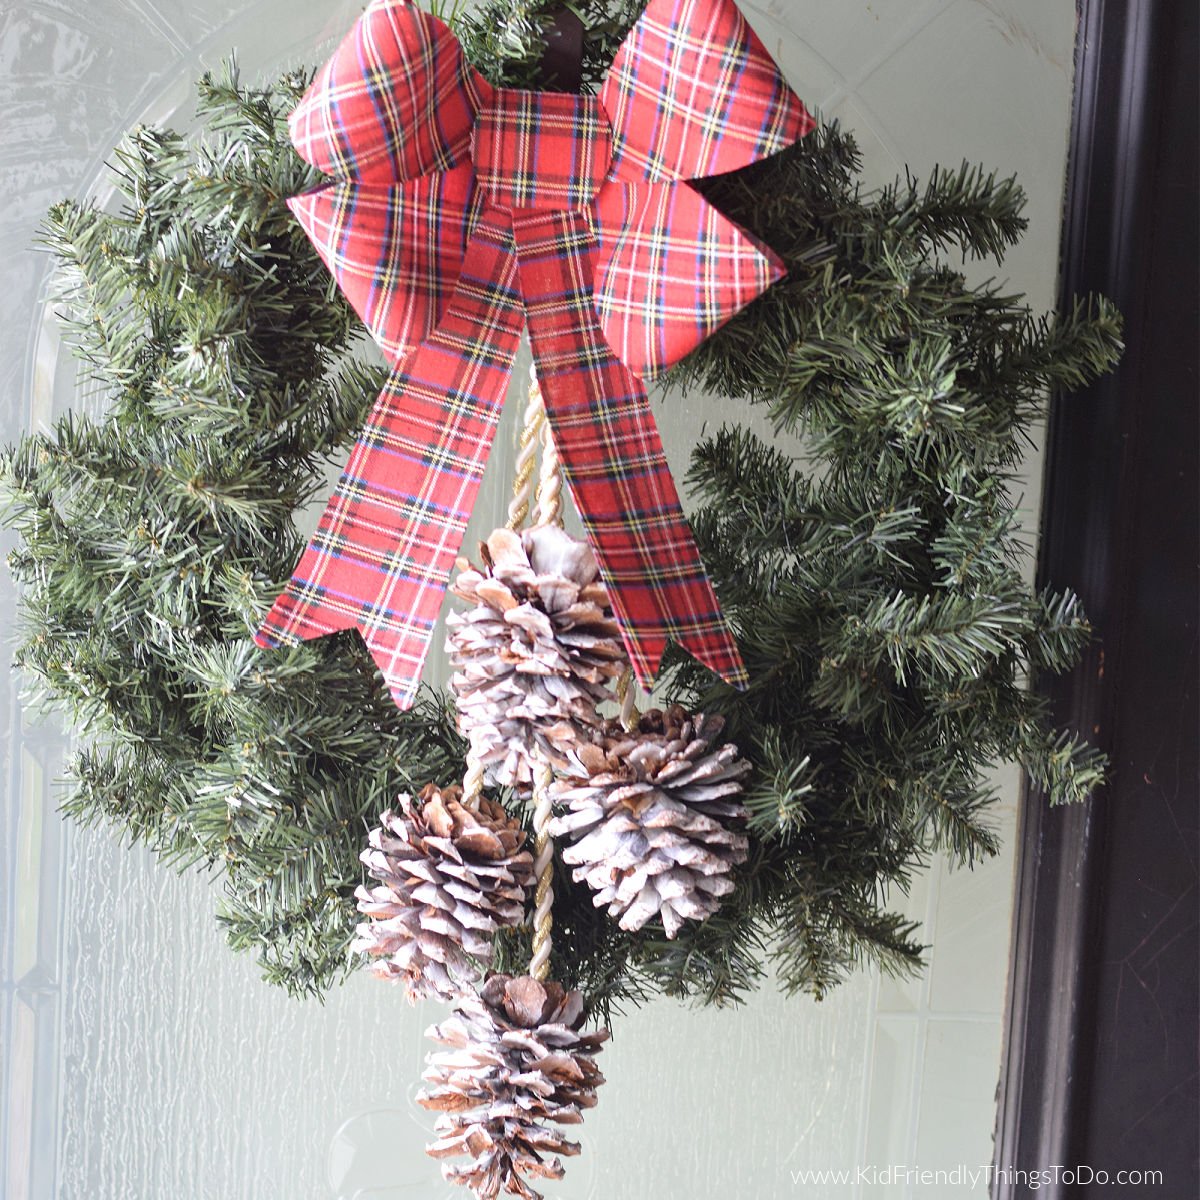
This is a fun and simple holiday Pinecone Door Swag Christmas craft that produces a beautiful Swag or Wreath decoration for your front door for years to come.
This post may contain affiliate links. As an Amazon Associate, I earn a small commission from qualifying purchases. See my disclosure policy to read more. Adult supervision is required for each step of activities, recipes, crafts, and games with children. Small parts are a choking hazard. Sharp objects can cause injury.
Christmas Swag Craft
This Pine Cone Swag has lasted years and years. I originally posted this Christmas craft in 2012. Twelve years later, the only thing I have had to replace is the bow to a newer vibrant bow. I love Christmas crafts that double as decorations, like this Felt Christmas Tree, DIY Reindeer Towels, and Mason Jar Christmas Globes.
Supplies You’ll Need:
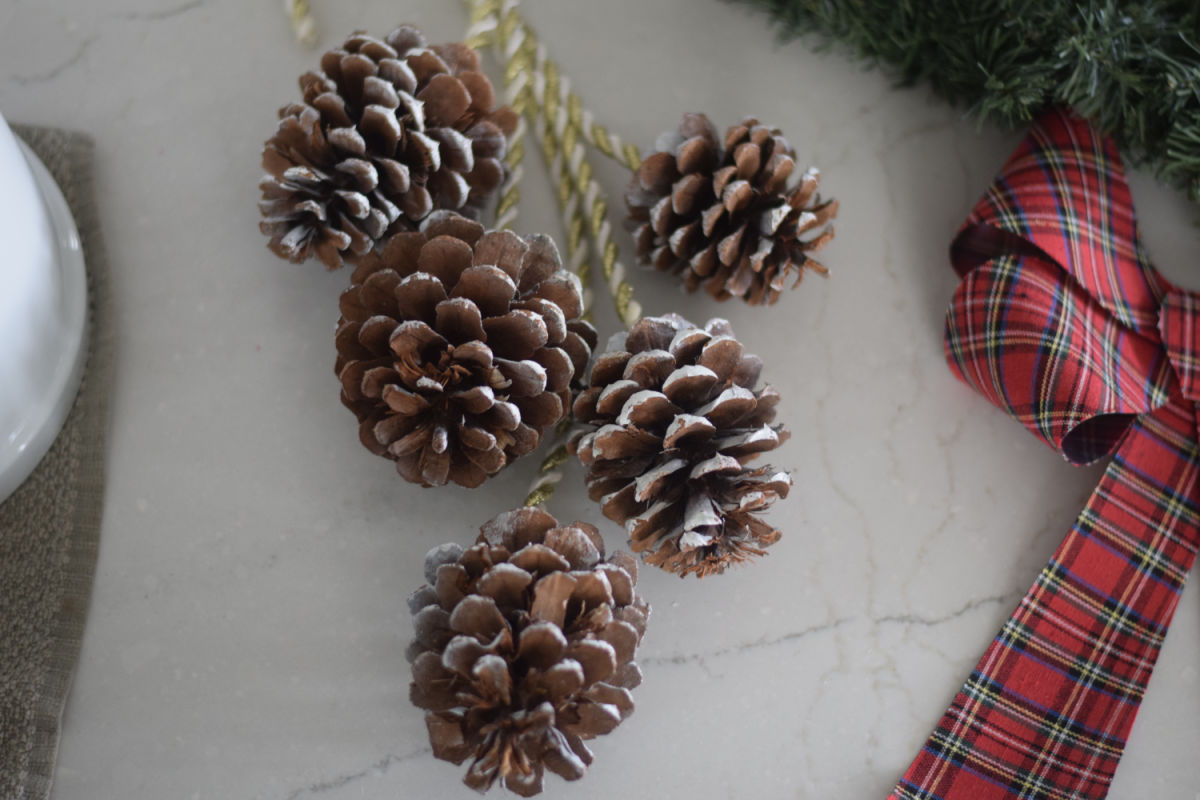
- Six large pine cones – I bought a bag of the cinnamon-scented pine cones that you see in every grocery store around the holidays.
- White Spray Paint or Snow Paint
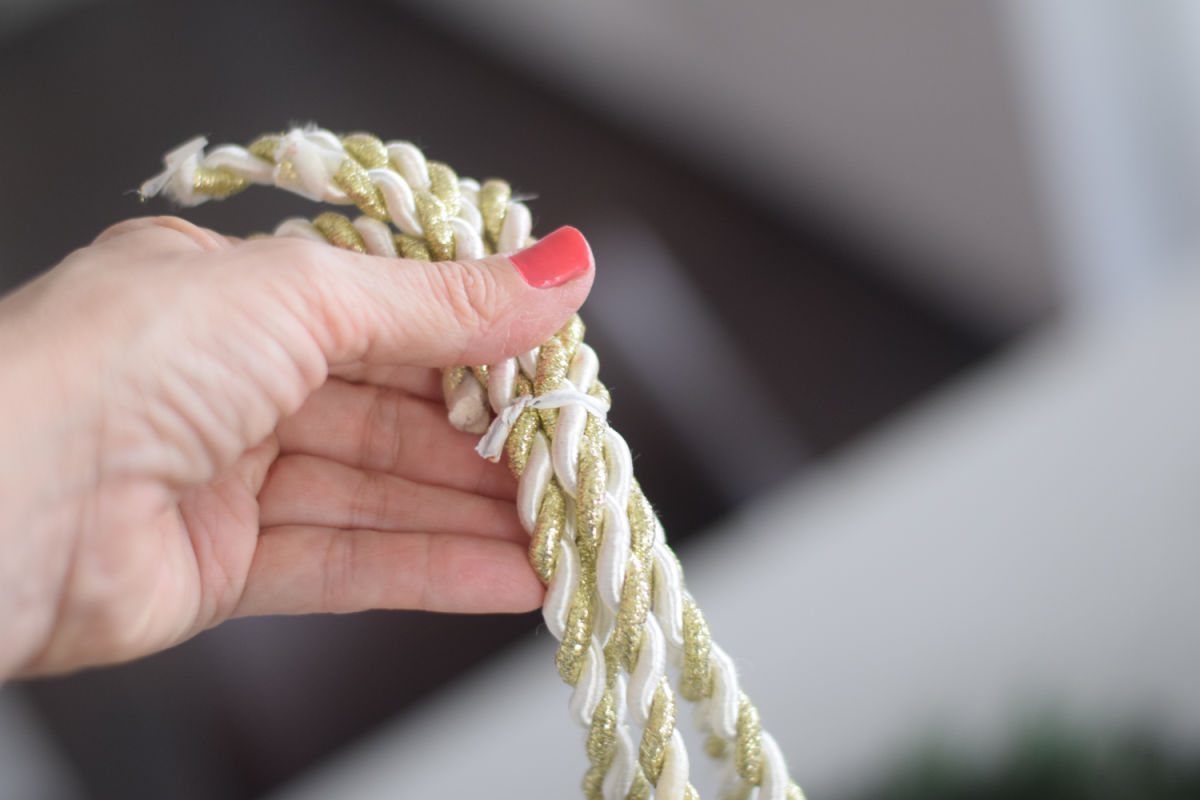
- Twisted Cord – I bought 1&1/2 yards of the cord at JoAnn Fabric Store
- Scotch tape
- Twisty tie
- A pretty bow
- Optional – Adhesive spray and snow glitter
Equipment Needed
- Wreath hanger
- Glue gun
How to Make a Pine Cone Swag for Christmas
Begin by protecting your work surface.
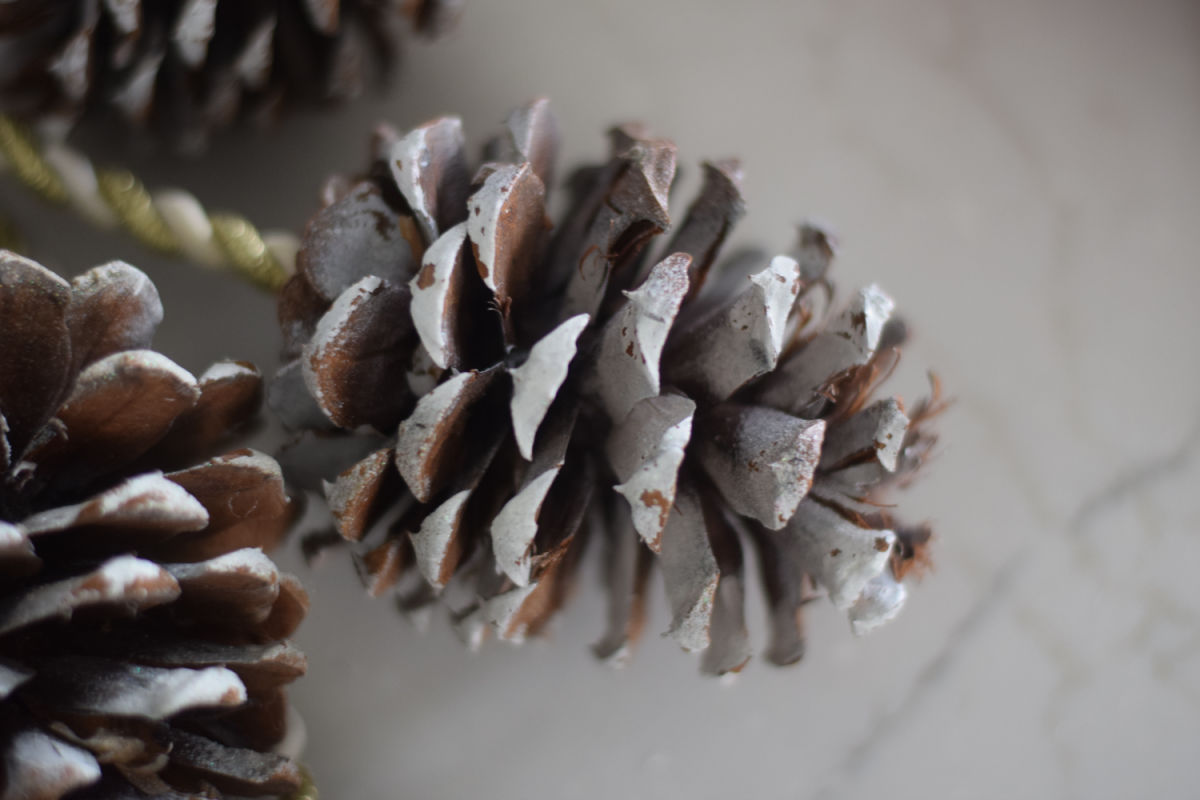
Lightly spray paint the outside of the pine cones to give them the appearance of being snow-covered.
Set the pine cones into a tier formation – I placed three at the top, two in the middle, and finally, one at the bottom
Section off your cord (one long piece for the bottom cone, two medium-length pieces for the middle cones, and three short pieces for the top cones)
Wrap scotch tape around the section you plan on cutting – this is important – the tape keeps the cording from unraveling.

Cut the cord in the center of the scotch tape
Hot glue one end of each cord to the designated pine cones
Gather the cords at the top and secure them with your twist tie – Add glue to secure them further
Add your pretty bow to the top of the cords, and twist the ties from the bow around your cords
Tuck the extra ends of the cording over the twist in the bow and glue
You can use the extra length from the ribbon twist ties to form a circle to hang the swag, or slip a ribbon through the bent cords and tie to make a place to hang the swag from
If you want to add some sparkle, spray the adhesive spray onto the pine cones and sprinkle snow glitter
Hang on the wreath hanger or tie it to a wreath to hang on your door at Christmas time
More Christmas Crafts You’ll Love
Let’s Hang Out
Come and find me on Pinterest and Facebook for more recipes, crafts, party treats, and holiday games!
Printable for DIY Pine Cone Swag

A Holiday Pine Cone Door Swag Christmas Craft
Materials
- Six large pine cones – I bought a bag of the cinnamon-scented pine cones that you see in every grocery store around the holidays
- White Spray Paint or Snow Paint
- Twisted Cord – I bought 1&1/2 yards of the cord at JoAnn Fabric Store
- Scotch tapeTwisty tie
- A pretty bow
- Optional – Adhesive spray and snow glitter
Instructions
- Begin by protecting your work surface.
- Lightly spray paint the outside of the pine cones to give them the appearance of being snow-covered.
- Set the pine cones into a tier formation – I placed three at the top, two in the middle, and finally, one at the bottom
- Section off your cord (one long piece for the bottom cone, two medium-length pieces for the middle cones, and three short pieces for the top cones)
- Wrap scotch tape around the section you plan on cutting – this is important – the tape keeps the cording from unraveling.
- Cut the cord in the center of the scotch tape
- Hot glue one end of each cord to the designated pine cones
- Gather the cords at the top and secure them with your twist tie – Add glue to secure them further
- Add your pretty bow to the top of the cords, and twist the ties from the bow around your cords
- Tuck the extra ends of the cording over the twist in the bow and glue
- You can use the extra length from the ribbon twist ties to form a circle to hang the swag, or slip a ribbon through the bent cords and tie to make a place to hang the swag from
- If you want to add some sparkle, spray the adhesive spray onto the pine cones and sprinkle snow glitter
- Hang from the wreath hanger
Notes
This post may contain affiliate links. As an Amazon Associate, I earn a small commission from qualifying purchases. See my disclosure policy to read more. Adult supervision is required for each step of activities, recipes, crafts, and games with children. Small parts are a choking hazard. Sharp objects can cause injury.
~Melissa – KidFriendlyThingsToDo.Com