Crescent Roll Cornucopias {A Thanksgiving Snack for Kids}
This post may contain affiliate links – please read my disclosure statement.
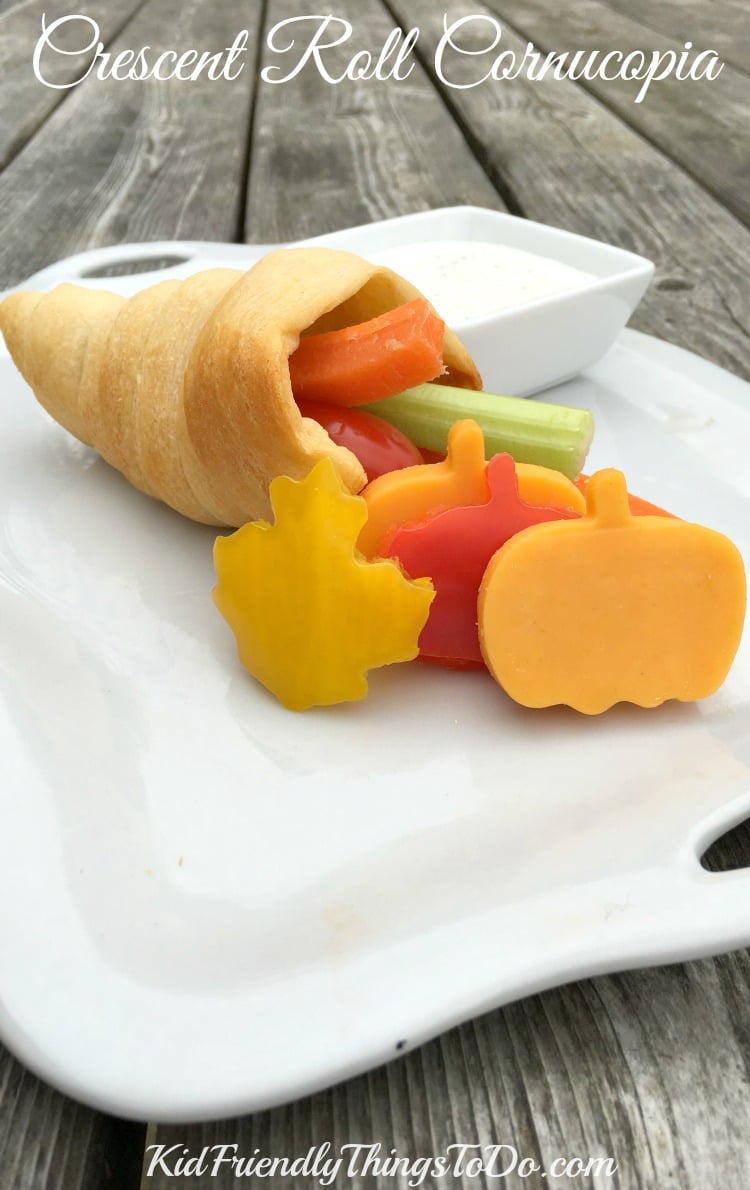
Crescent Roll Cornucopias are the perfect Thanksgiving healthy snack to make for the kids. They are so cute and easy to make, you might even want to make them for the adults as an appetizer for Thanksgiving dinner.
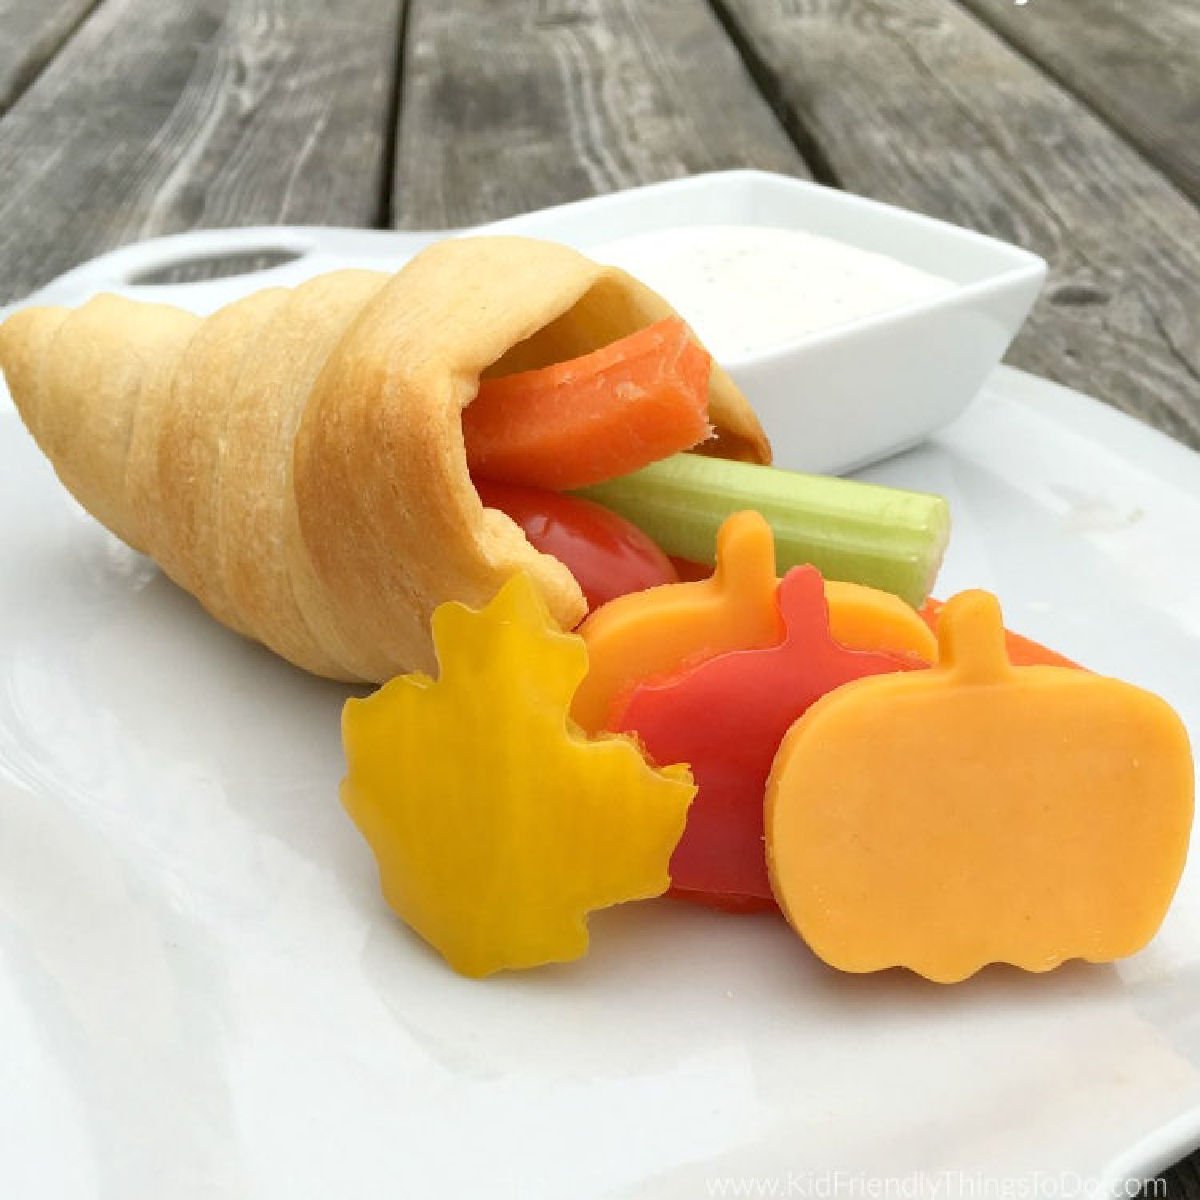
Crescent Roll Cornucopias
I love, love, love how these Crescent Roll Cornucopias turned out. The kids were equally as excited to come home from school to these yummies waiting on the kitchen counter. I might just have to make this more often. It’s so simple, and good for them, so why not? It was very nice to see them filling up on veggies.
What I love about this recipe
- An easy recipe to make
- A great way to get your kids to eat vegetables
- This is a fun appetizer idea for each person at Thanksgiving
Table of contents
Here’s what you’re going to need for these Crescent Roll Cornucopia:
For this recipe: 1 package of crescent dough makes about 8-10 cornucopias
- Refrigerated Crescent Roll Sheet – A Roll of Seamless Dough (if you can’t find this, just grab some original refrigerated crescent dough)
- Foil – You’ll probably want a new package just so you have enough
- Vegetables – such as carrot sticks, celery sticks, cherry tomatoes, broccoli florets, cauliflower florets, colored peppers, etc.
- Cheese bricks – such as cheddar, Colby-jack, etc.
- Sour Cream – You’ll probably want full fat for the best flavor
- Ranch Dry Mix Packet
Instructions
Step One
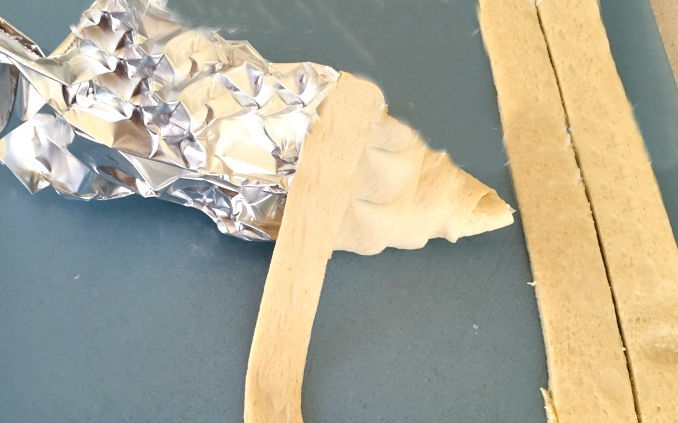
Unroll the dough, and along the long side of the rectangle, slice it into about 1/2-inch long strips
*If you are using regular crescent dough, you should prep it now. Unroll, and seal the seams so it becomes 1 big sheet of dough, before slicing it into strips
Shape foil into a cone shape (about 4 inches long, about 1/2 inch wide at the point, and 2 inches wide at the top)
Shaping Foil
- Here’s how you can do that: Cut a square of foil, and start by pushing your fingers into the center of the square, and fold the foil up and around your hand.
- Starting at the bottom of your corn, start wrapping a strip around the foil overlapping each time by a little bit, and pressing to seal where needed
- Pull the tip up a little for a curved shape
Step Two
- Bake according to the package directions, or until the dough is turning nice and golden in color – about 10 minutes
- Let cool
- Now…here’s a trick I learned to get the foil out – squeeze the foil together so it’s a little smaller at the top, and while holding onto the crescent roll, gently twist the foil back and forth until it loosens from the sides and pulls it out
- You can store the crescent rolls in an air-tight container for a couple of days before filling them
Step Three
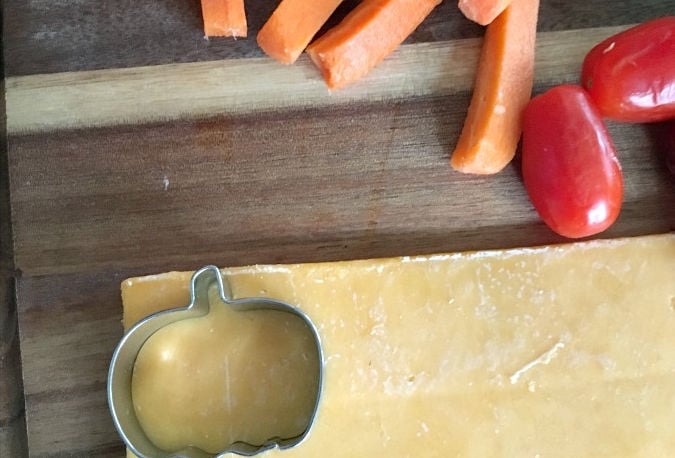
Cut cheese into thin strips so your cookie cutters can push through them
Use miniature cookie cutters that are fall shapes to cut cheese, peppers, and anything else you think might work
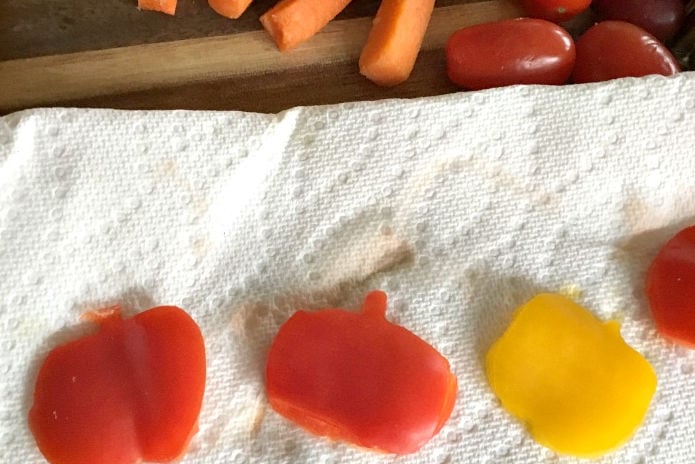
Dry any vegetables that are a little moist on a paper towel so the veggies don’t make your cornucopia soggy
Fill your cornucopia with prepared vegetables
Mix the sour cream and ranch packet in a small bowl
Serve the cornucopias your ranch dressing or your favorite vegetable dip
Expert Tips
- spray the foil or use non-stick foil to prevent the bread from sticking to it
- hold onto the cornucopia while you gently tug on the foil and twist it to remove it
- do not overstuff the cornucopia to prevent it from breaking open
Basically, you’ll need to unroll a can of crescent roll dough sheet, cut the dough into strips, and wrap the strips around a cone shape mold. The mold is baked with the dough and then removed from the baked crescent roll. Then, it is filled with vegetables, cheese, and/or fruit
Fill it with vegetables, fruit, or cheese
Bake it according to the crescent roll package, which usually according to the package is usually baked in an oven at 375 degrees for about 10 minutes. Make sure the dough is turning golden brown and not doughy
More Thanksgiving Recipes to Try
Here are my top Amazon Picks for this Recipe
(affiliate links)
[box]  Miniature Turkey Cookie Cut...Shop on Amazon
  Miniature Pumpkin Cookie Cu...Shop on Amazon
 [/box]

Crescent Roll Cornucopias {A Thanksgiving Snack for Kids}
Equipment
- foil
Ingredients
- 1 8 oz. Crescent Roll Sheet A Roll of Seamless Dough (if you can't find this, just grab some original refrigerated crescent dough)
- Foil
- Vegetables such as carrot sticks, celery sticks, cherry tomatoes, broccoli florets, cauliflower florets, colored peppers, etc.
- Cheese bricks such as cheddar, Colby-jack, etc.
- 1 16 oz. Sour Cream
- 1 oz. Ranch Dry Mix Packet
Instructions
- Unroll the dough, and along the long side of the rectangle, slice it into about 1/2 inch long strips
- *If you are using regular crescent dough, you should prep it now. Unroll, and seal the seams so it becomes 1 big sheet of dough, before slicing it into strips
- Shape foil into a cone shape cornucopia (about 4 inches long, about 1/2 inch wide at the point, and 2 inches wide at the top)
- Here's how you can do that: Cut a square of foil, and start by pushing your fingers into the center of the square, fold the foil up and around your hand.
- Continue to shape it until you get your desired size. This will be your foil mold. Make one for each person
- Starting at the bottom of your foil cone shape, start wrapping a strip of crescent dough around the foil overlapping each time by a little bit, and pressing to seal where needed
- Pull the tip up a little for a curved shape
- Bake according to the package directions, or until the dough is turning nice and golden in color – about 10 minutes
- Let cool
Pulling foil out of baked cornucopia
- Now…here's a trick I learned to get the foil out – squeeze the foil together so it's a little smaller at the top, and while holding onto the crescent roll, gently twist the foil back and forth until it loosens from the sides and pulls it out
- You can store the crescent rolls in an air-tight container for a couple of days before filling them
Filling the Cornucopia
- Prep cheese by cutting it into thin strips
- when you are ready, you can use miniature cookie cutters – (fall shapes), to cut cheese, peppers, and anything else you think might work
- You can also cut vegetables into strips for dipping so you have a mixture
- Dry any vegetables that are a little moist on a paper towel so they don't make your bread cornucopia soggy
- Fill your cornucopia with prepared vegetables
- Mix the sour cream and ranch packet in a small bowl
- Serve the cornucopias your ranch dressing or your favorite vegetable dip
Notes
Nutrition
~Melissa – KidFriendlyThingsToDo.com





This is absolutely adorable!
Thank you so much for the mini cornucopia idea! I made these extremely last minute for my son’s preschool class, and they worked out great. I didn’t bother seaming together the pre-scored dough and just cut strips starting on the long side of the triangle. Worked out perfect! Since they wouldn’t be eaten for a few hours, I stuffed them with goldfish and fruit-shaped gummies. The kiddos loved them, and so did the teachers. (Turns out they talked about cornucopias that day! haha) I might try these again for Thanksgiving as little appetizers and stuff them with something like cubes of brie and pears. Thank you again!
That is so awesome to hear! How neat that they talked about Cornucopias without even knowing what you were bringing as a treat. I love it when things work out like that. Cubed brie and pears sound amazing. Thank you so much for coming back to tell me about your good experience with the recipe.