How to Make Colorful Corn Husk Dolls
This post may contain affiliate links – please read my disclosure statement.
Learn how to create unique and vibrant corn husk dolls using simple materials and techniques. Perfect for a fun and creative craft project with the kids. Making your own DIY corn husk dolls is a fun and easy craft to make with the kids. A perfect Thanksgiving craft and activity.
All activities, recipes, crafts, and games with children should be supervised by an adult. Small parts are a choking hazard.
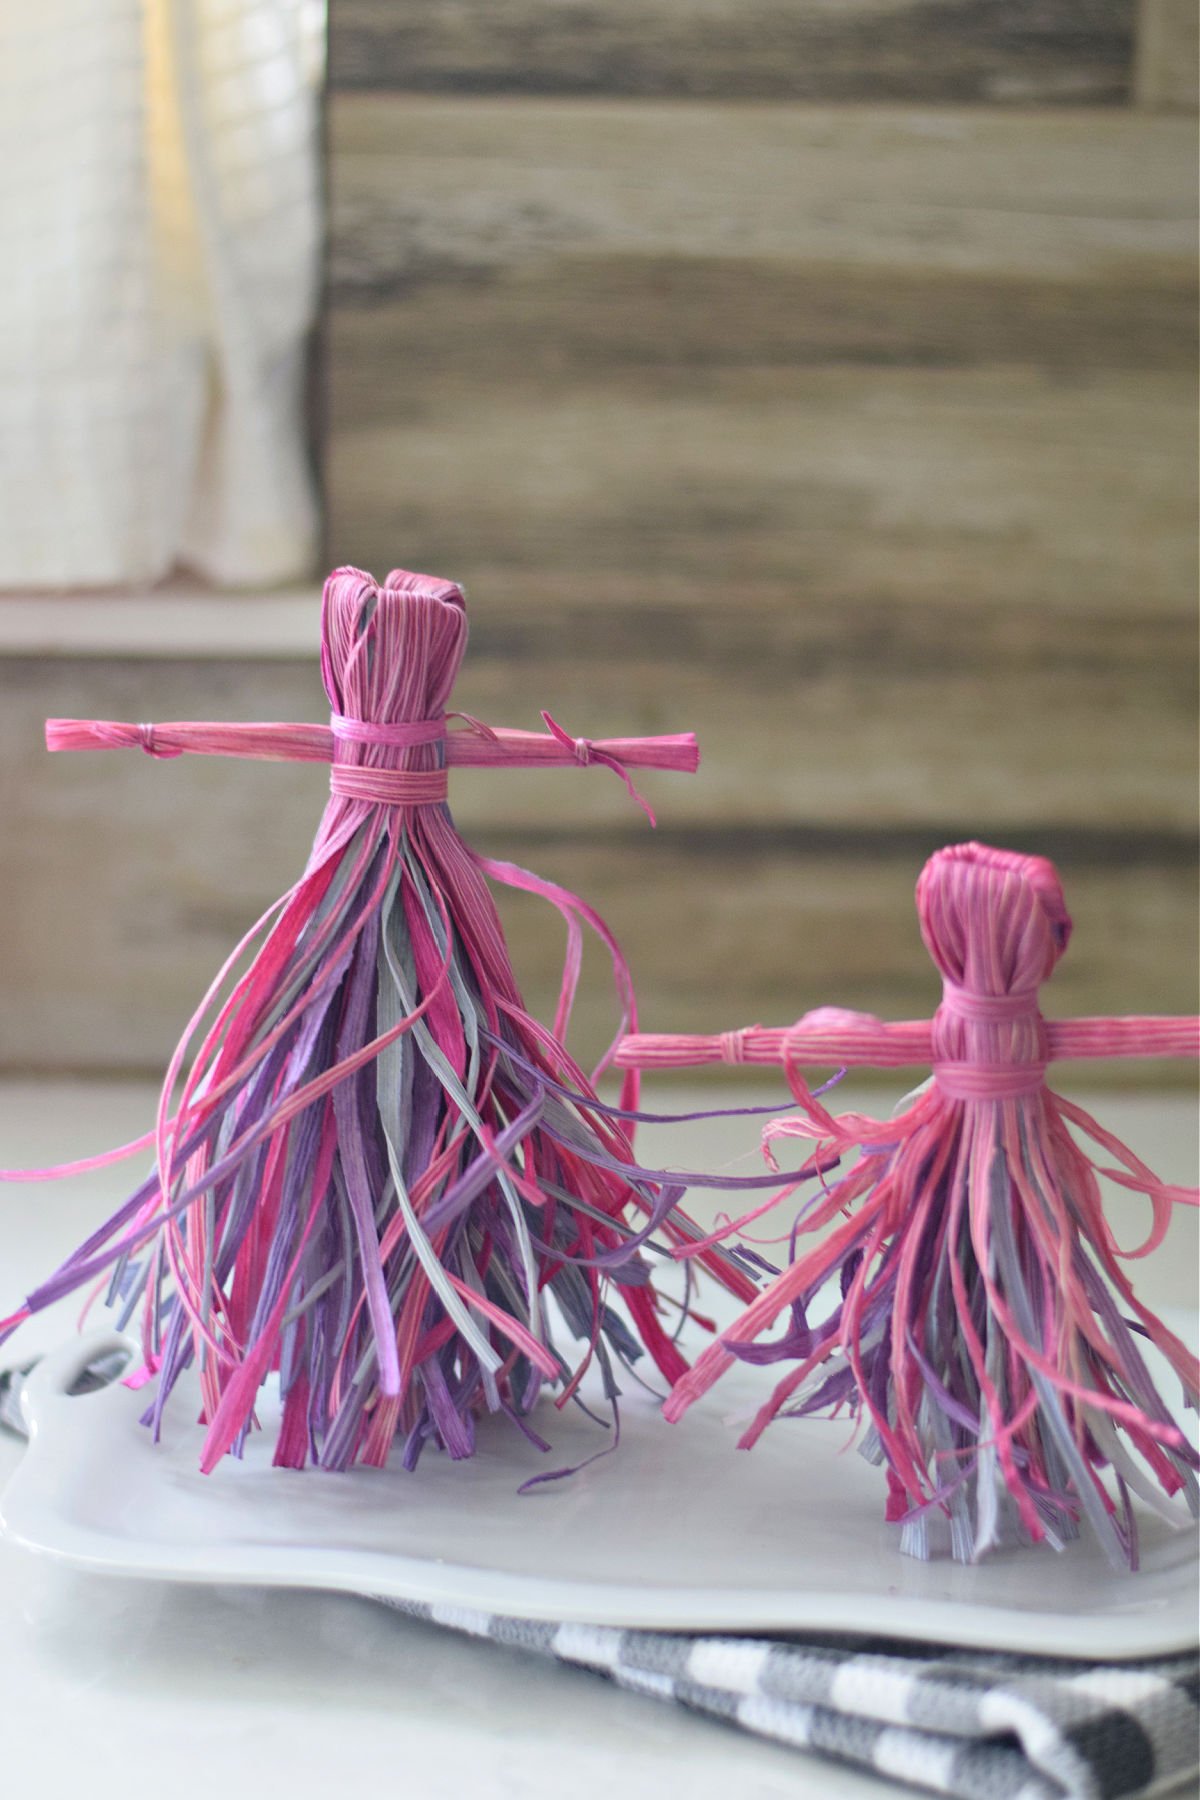
Colorful Corn Husk Dolls
Making crafts like this one with the kids are a great way to make memories. I love crafts that are also an activity. After the kids make this, they can play with this corn husk doll for many years. I would officially classify corn husk dolls as a fall craft like this turkey crayon holder, and this paper plate turkey puppet, but this corn husk doll can be made any time of the year.
What You’ll Love About this Fall Craft
- It is a great Thanksgiving craft for the kids to make at school or at home
- This is a fun craft to make and to play with
- You can make girl dolls and boy dolls for everyone
- These corn husk dolls hold up well. I’ve had dolls of over a decade and they are still in perfect condition
- Easy to find supplies
Supplies Needed for a Cornhusk Doll:
- Eight pieces of corn husks – You can find corn husks online, in the ethnic aisle of a grocery store, or dry them yourself at the end of summer from fresh corn
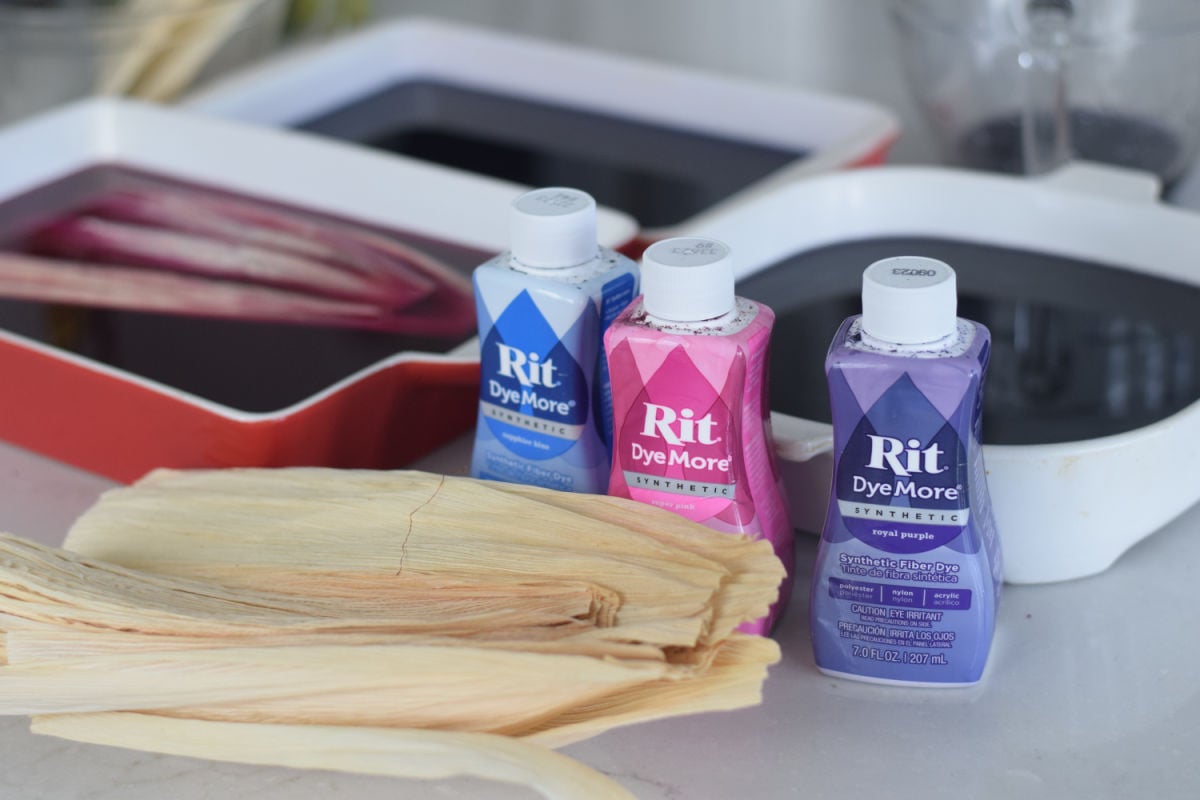
- Fabric Dye: I used RIT Dye More fabric dye. In the past, I have used a tie-dye kit that I had sitting around.
- Water – You’ll make large containers of water mixed with the dye
- Optional: Twine or Twist Ties. If you are having trouble using the corn to tie, you can substitute it with twine or twist ties.
How to Make Corn Husk Dolls
Warning: This is a wet craft and messy. Make sure your surface is protected from the water and fabric dye and you have plenty of paper towel.
Add warm water to large containers or pans
Add dye to each container and mix in
Put the husks in the pool of water dye to soak for at least an hour, if you can leave them in the dye for a day, the color will be more brilliant.
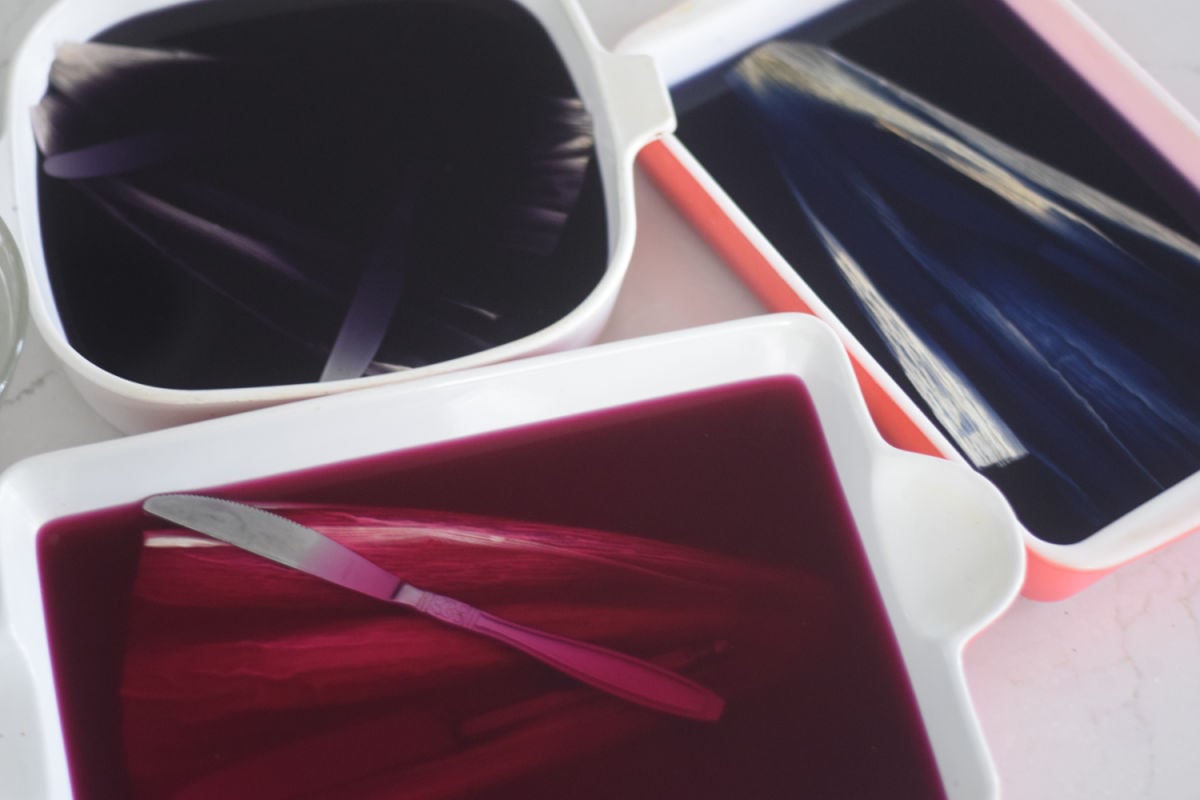
Once your husks have soaked, pick eight husks to make your doll.
Squeeze out the excess water, and place them on a protected work surface so the dye does not ruin your work surface.

Stack 6 of your husks – matching the ends up with all of the pointed ends to one side and the wide straight ends on the other. Use your best and widest pieces to stack.
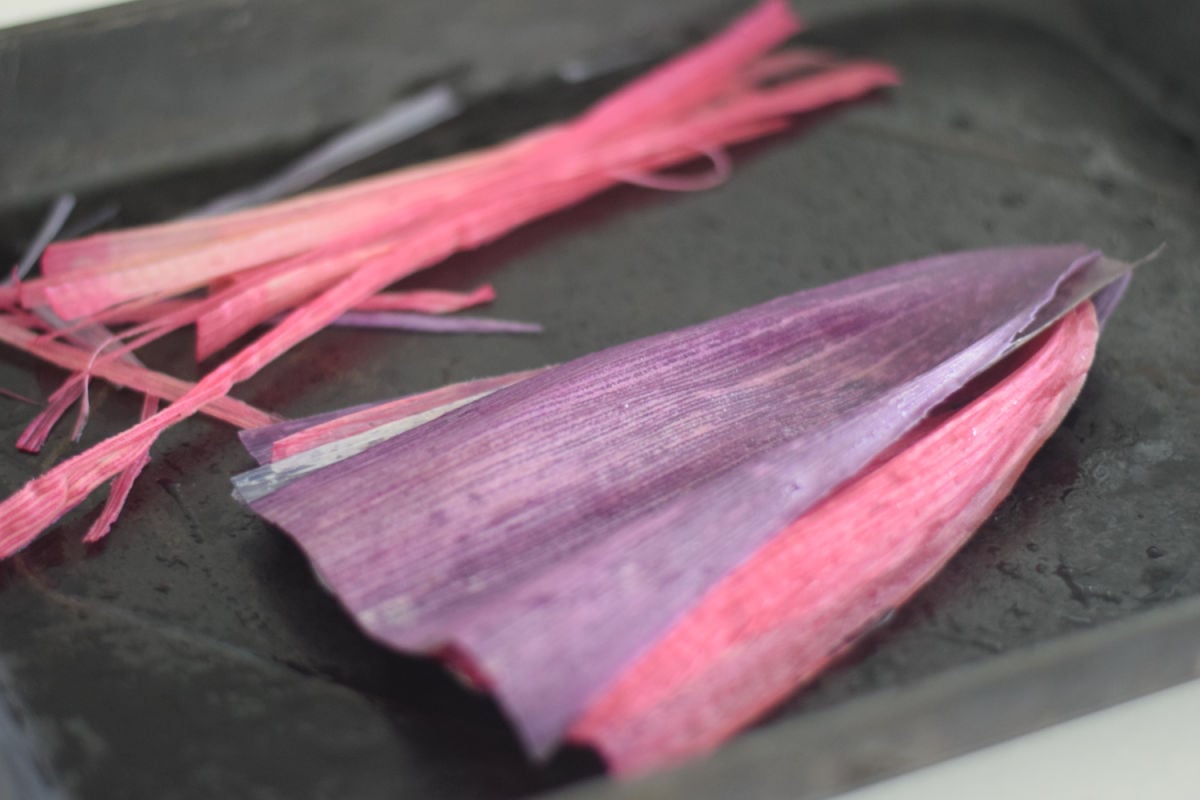
Stacking Order for Colors:
Alternate colors, except for the two in the middle. Those should be the same color as they will be the head and arms of the doll. My middle pieces were pink, as you can see.
With one of your remaining two husks (your longest one) – tear one of them into thin strips – which will act as your ribbons to tie the arms and clothes
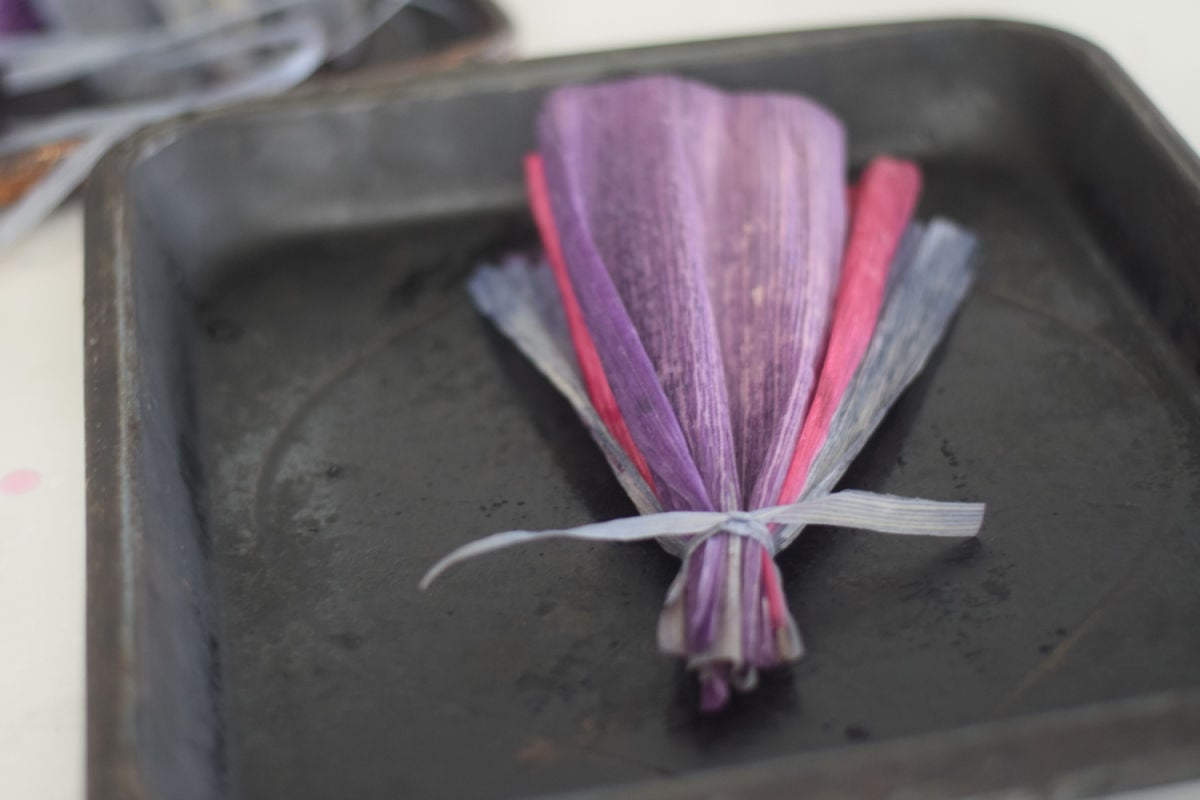
Use one of your thin strips to tie a knot around your stacked 6 husks together, about an one-half inch from the top. The top is the pointed part of the husks-narrow end. Make sure it is a tight fit.
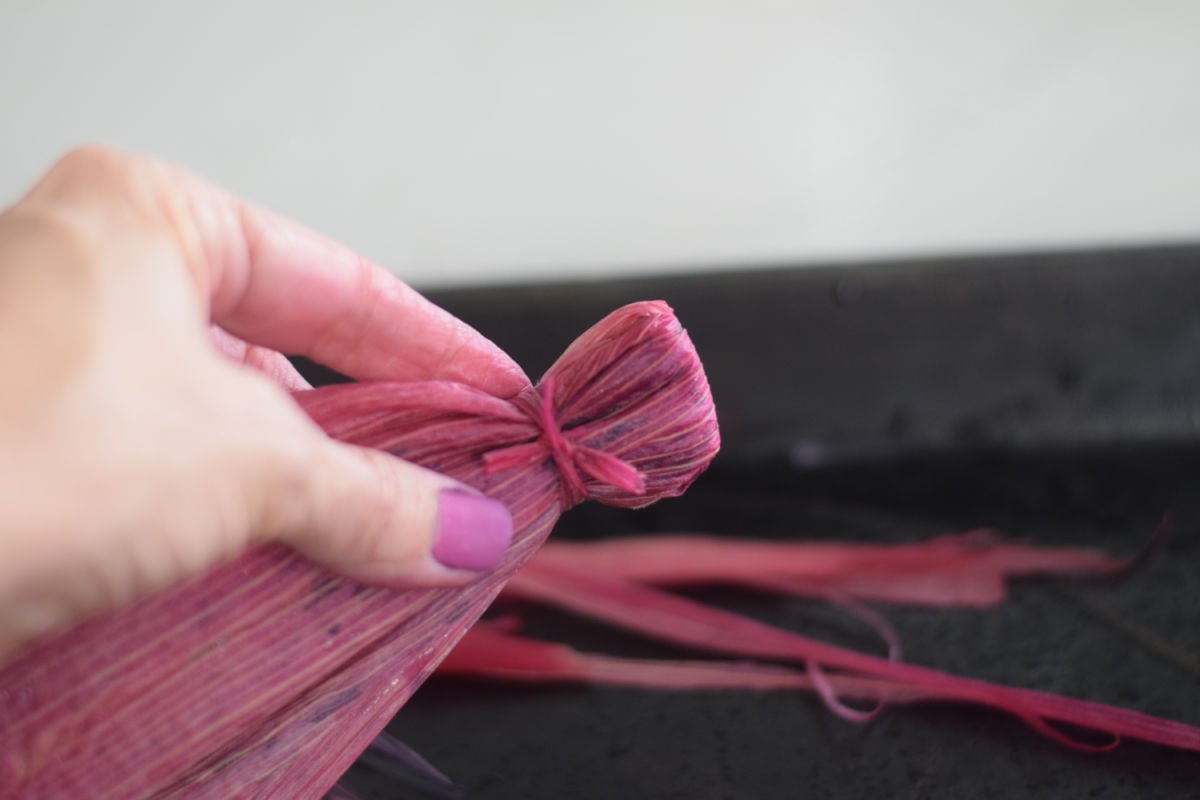
Pull the corn husks apart in the center and fold them over the tied end
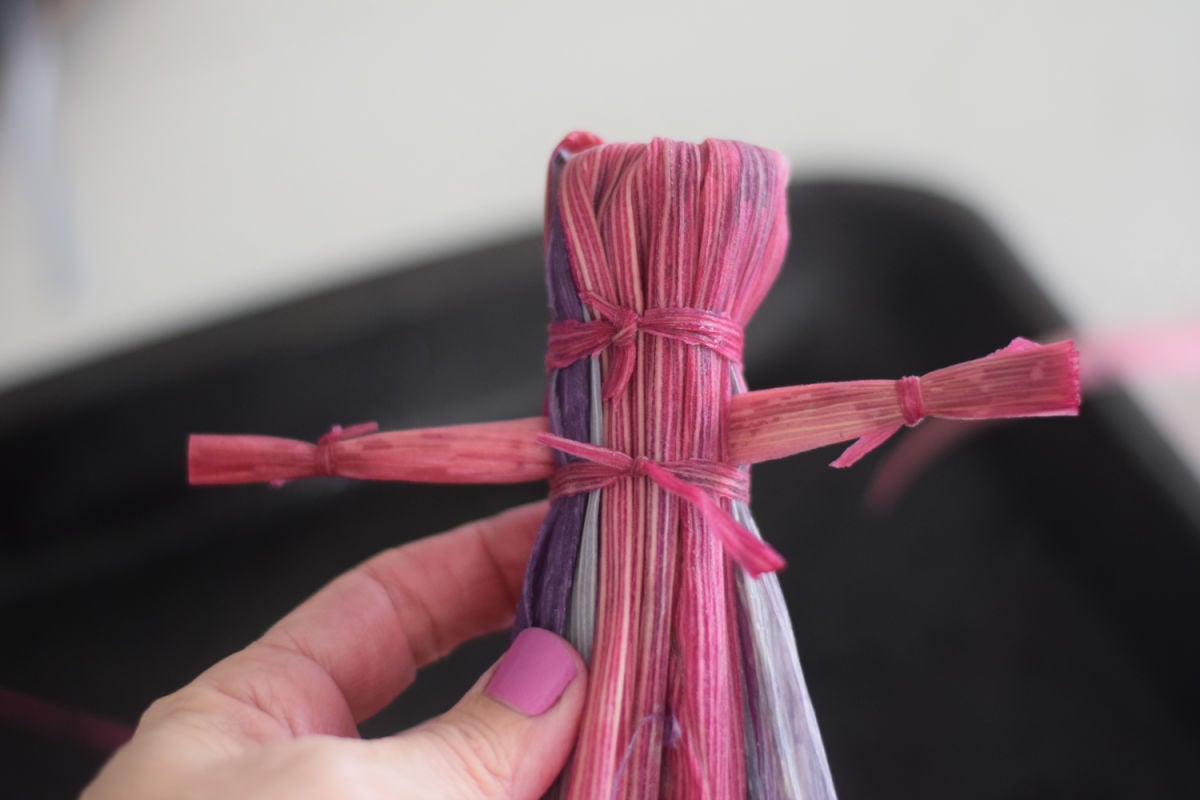
About one inch from the top of the folded pieces, use another strip to tie around it – making sure that is is a tight fit. This will form the head.
Arms
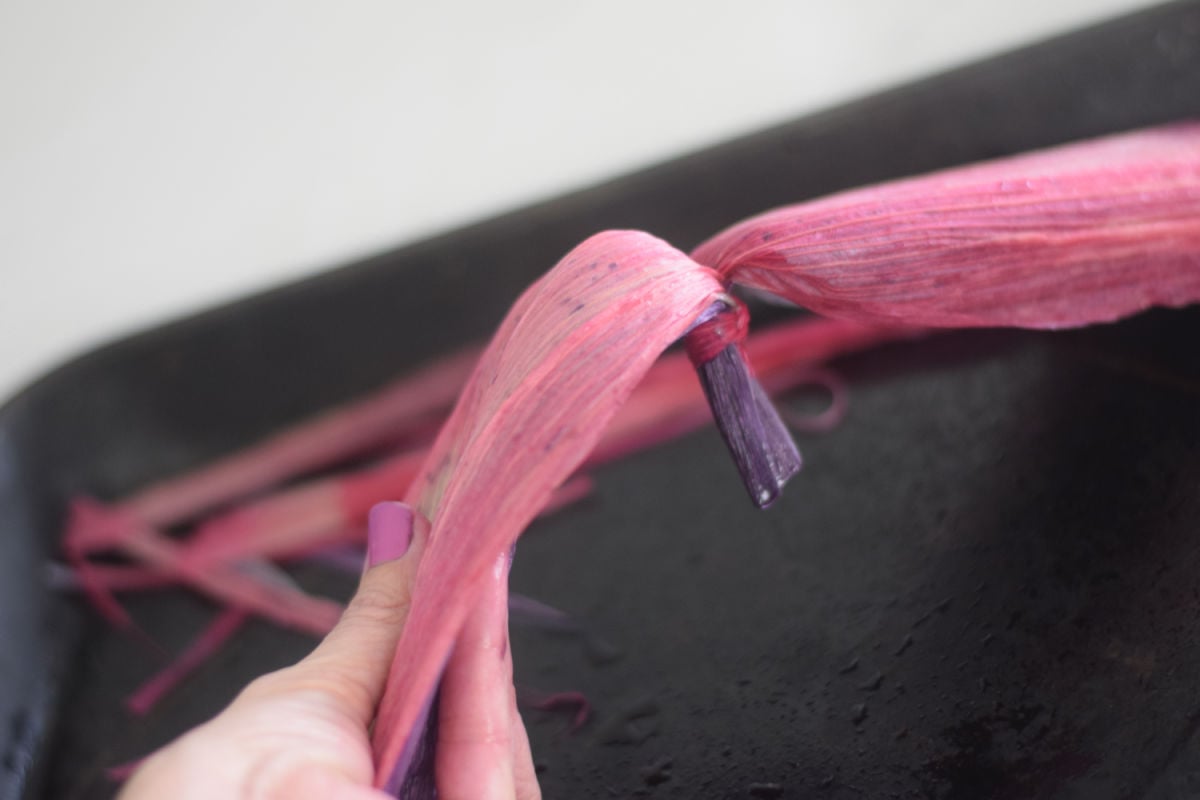
Take your last corn husk that is sitting on the side, and roll it up to form a long tube. Tie both ends with your thin strips of husk.
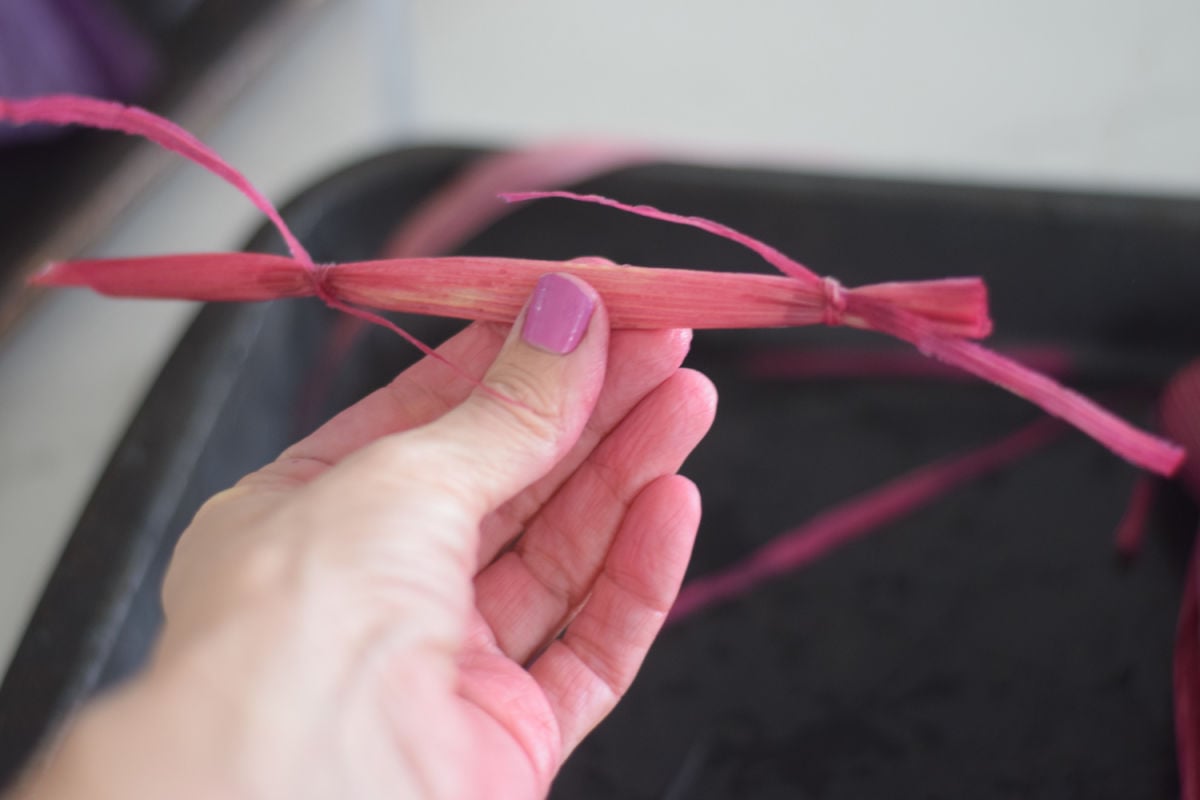
Slide this arm/tube into the split of the dress (the middle part of the stack of 6), sliding it all the way up to the head.
Tie another strip under the arms to keep them in place. You can adjust the arms by sliding them to the center and trim them if necessary.
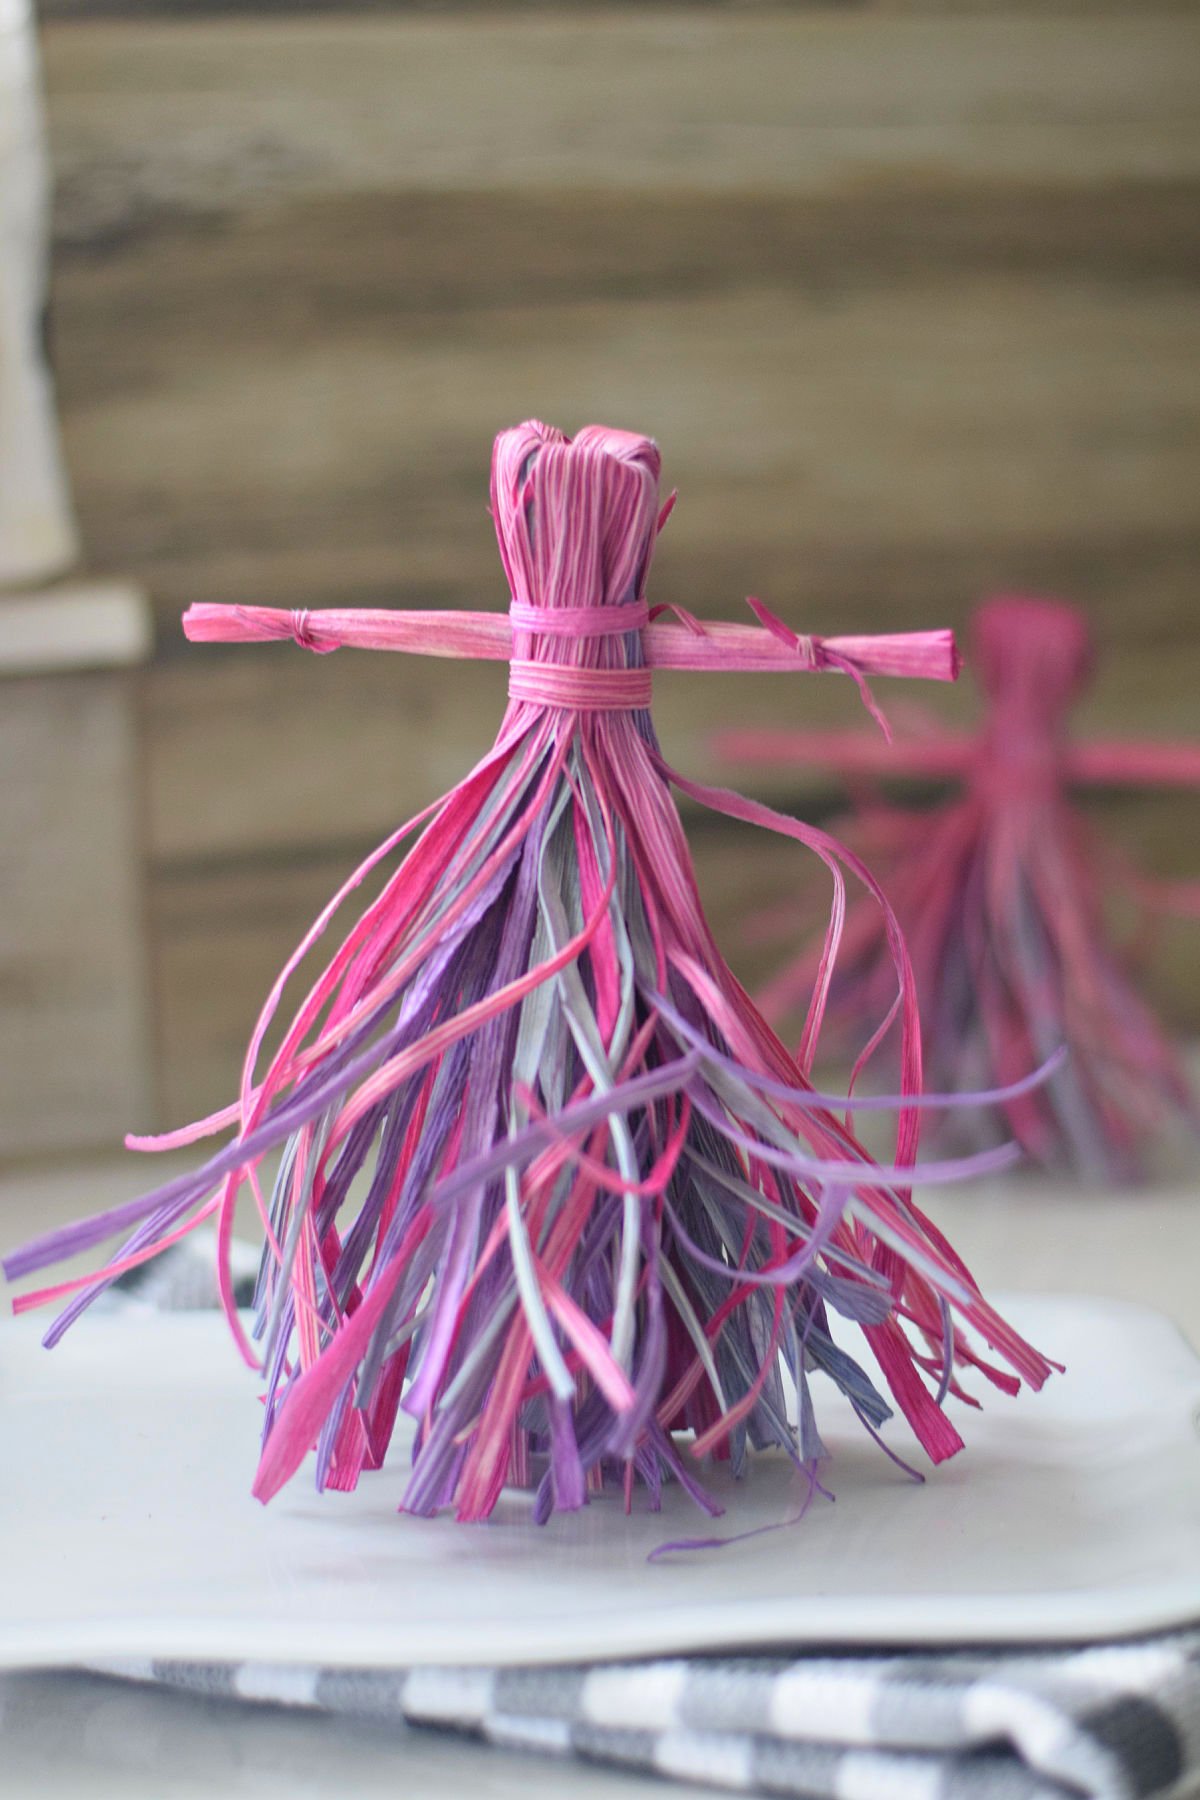
Pull the corn husks into tiny strips from the bottom of the dress to the waist to make the colorful and full corn dress. The more strips you make, the fuller and more vibrant the dress will be.
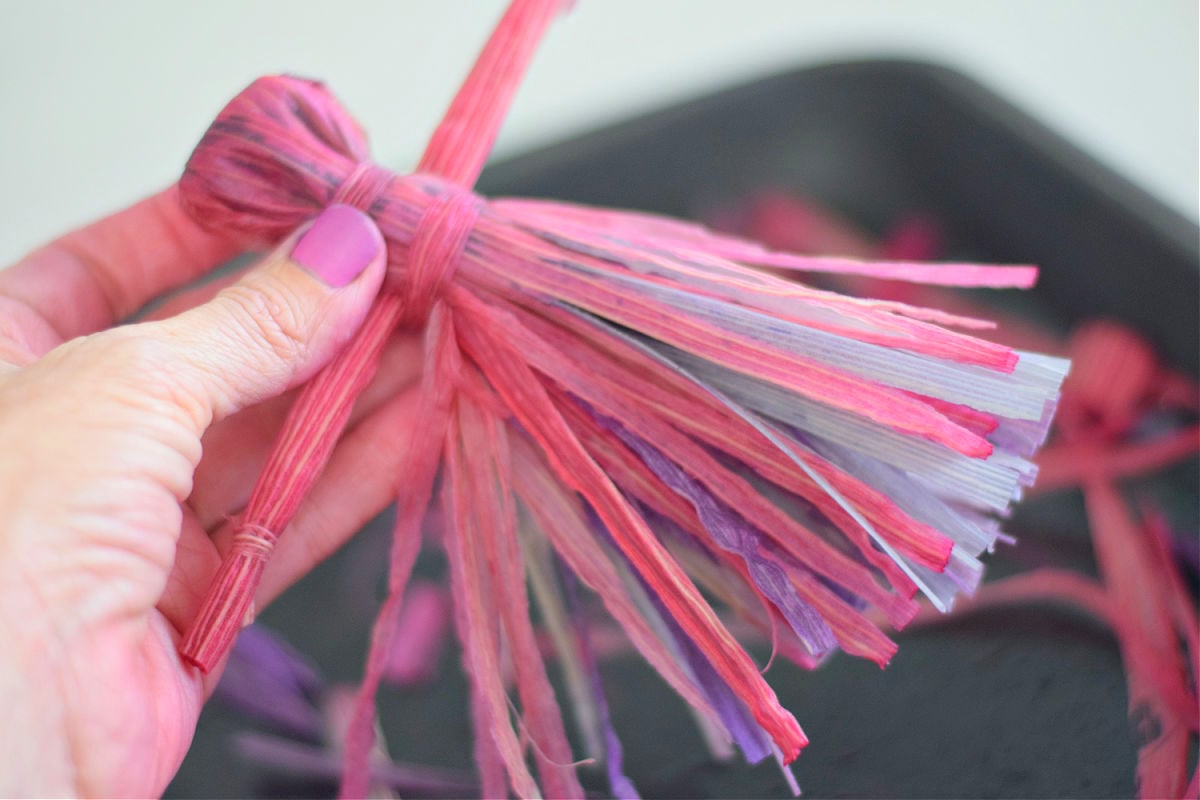
Trim anything that needs it. If they are wet, let them dry for a day, and them enjoy your new doll.
Boy Dolls
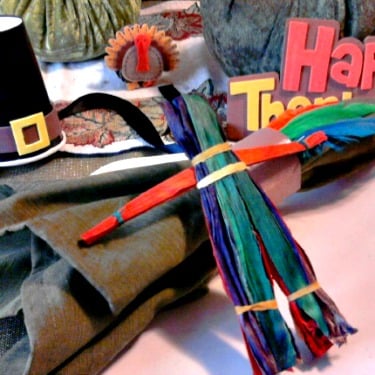
Instead of tearing strips from the dress, split the corn husks in half to make two legs. Use the corn strips to tie each leg.
Children Corn Husk Dolls
Make a shorter doll for a little girl or boy
Accessories for your Corn Husk Doll
Use another strip of colorful corn husk to make a shawl. Tuck the shawl into the waistband.
Make bonnets out of pieces of felt for your dolls.
If you’d like to, you can draw a face on your doll’s face, but that is not traditional.
Raffia makes great hair for the dolls
Picking Out the Right Corn Husks to Use and Tips
- Get ones that are about two inches wide at the bottom of the corn husk
- Try to get ones that are similar in length because you’ll be stacking them up together.
- Don’t worry about getting perfect ones, you’ll end up tearing them in a later step.
- Unless you are fortunate enough to have a great ethnic food section at your supermarket, Order these tamale wrappers in advance.
- If you can’t find corn husks, buy a set of Indian Corn and use the husks from those. I’ve used them in jam, and they work just the same. I’ve also used the corn from the stalks used in Fall Decorations.
Tips for an “in-school” craft or Thanksgiving school party craft
- Use plastic tablecloths to protect your tables, and have lots of paper towels handy
- Before your party, squeeze the excess water out of the corn husks and store each color in separate zip-tight bags
- Your younger kids should only do the last couple of stages. If parents attend the party, have this as a parent/child activity. Older kids can participate in making the whole doll.
- Have plastic bags ready to carry these home in. They will be wet.
- Have a paper towel on hand.
Why Are Corn Husk Dolls a Fall Craft?
Corn husk are readily found at the end of harvest. Corn, a grain crop, which is one of the famous three sisters consisting of corn, beans, and squash in Native American crop planting, is usually harvested at the end of summer and early fall. After the final harvest, people would bring these corn dolls into their home to keep the corn spirit alive.
Did Native Americans Play with Corn Husk Dolls?
Yes. Native American children played with corn husk dolls before the colonial children did. Every part of the corn that was harvested was used. As the kids played nearby, the parents would construct dolls out of cornhusks. Horse hair was used as hair, and sometimes colorful beading was used to decorate the corn husk dolls.
Let’s Hang Out!
Come and find me on Pinterest and Facebook for more recipes, crafts, party treats, and holiday games!
Printable for Corn Husk Dolls
How to Make Colorful Corn Husk Dolls
Equipment
- 3 or more deep dish baking dishes or containers
- Scissors
Materials
- 8 pieces corn husks
- Fabric Dye
- water
Instructions
- Add warm water to large containers or pans
- Add dye to each container and mix in
- Put the husks in the pool of water dye to soak for at least an hour, if you can leave them in the dye for a day, the color will be more brilliant.
- Once your husks have soaked, pick 8 husks to make your doll.
- Squeeze out the excess water, and place them on a protected work surface so dye does not ruin your work surface
- Stack 6 of your husks – matching the ends up with all of the pointed ends to one side and the wide straight ends on the other. Use your best and widest pieces to stack.
Color Order
- Alternate colors, except for the two in the middle. Those should be the same color as they will be the head and arms of the doll. My middle pieces were pink, as you can see.
- With one of your remaining two husks (your longest one) – tear one of them into thin strips – which will act as your ribbons to tie the arms and clothes
- Use one of your thin strips to tie a knot around your stacked 6 husks together, about an one-half inch from the top. The top is the pointed part of the husks-narrow end. Make sure it is a tight fit.
- Pull the corn husks apart in the center and fold them over the tied end
- About one inch from the top of the folded pieces, use another strip to tie around it – making sure that is is a tight fit. This will form the head.
Arms
- Take your last corn husk that is sitting on the side, and roll it up to form a long tube. Tie both ends with your thin strips of husk.
- Slide this arm/tube into the split of the dress, (the middle part of the stack of 6) sliding it all the way up to the head.
- Tie another strip under the arms. to keep them in place. You can adjust the arms by sliding them to the center and trim them if necessary.
- To make the colorful and full corn dress, pull the corn husks into tiny strips from the bottom of the dress to the waist. The more strips you make, the fuller and more vibrant the dress will be.
- Trim anything that needs it. If they are wet, let them dry for a day and them enjoy your new doll
Boy Dolls
- Instead of tearing strips from the dress, split the corn husks in half to make two legs. Use the corn strips to tie each leg.
Notes
This post may contain affiliate links. As an Amazon Associate, I earn a small commission from qualifying purchases. See my disclosure policy to read more. Adult supervision is required for each step of activities, recipes, crafts, and games with children. Small parts are a choking hazard. Sharp objects can cause injury.
Possible Accessories for your doll Use a wide strip of colorful corn husk to make a shawl. Tuck the shawl into the waistband. Make bonnets out of pieces of felt for your dolls. If you’d like to, you can draw a face on your doll’s face, but that is not traditional. Raffia makes great hair for the dolls.[box] ![]()
![]()
![]()
![]() [/box]
[/box]