Paper Witch Hat Craft
This post may contain affiliate links – please read my disclosure statement.
How to make a witch hat craft from paper. Easy to make and such a cute Halloween decoration and craft to do with the kids.
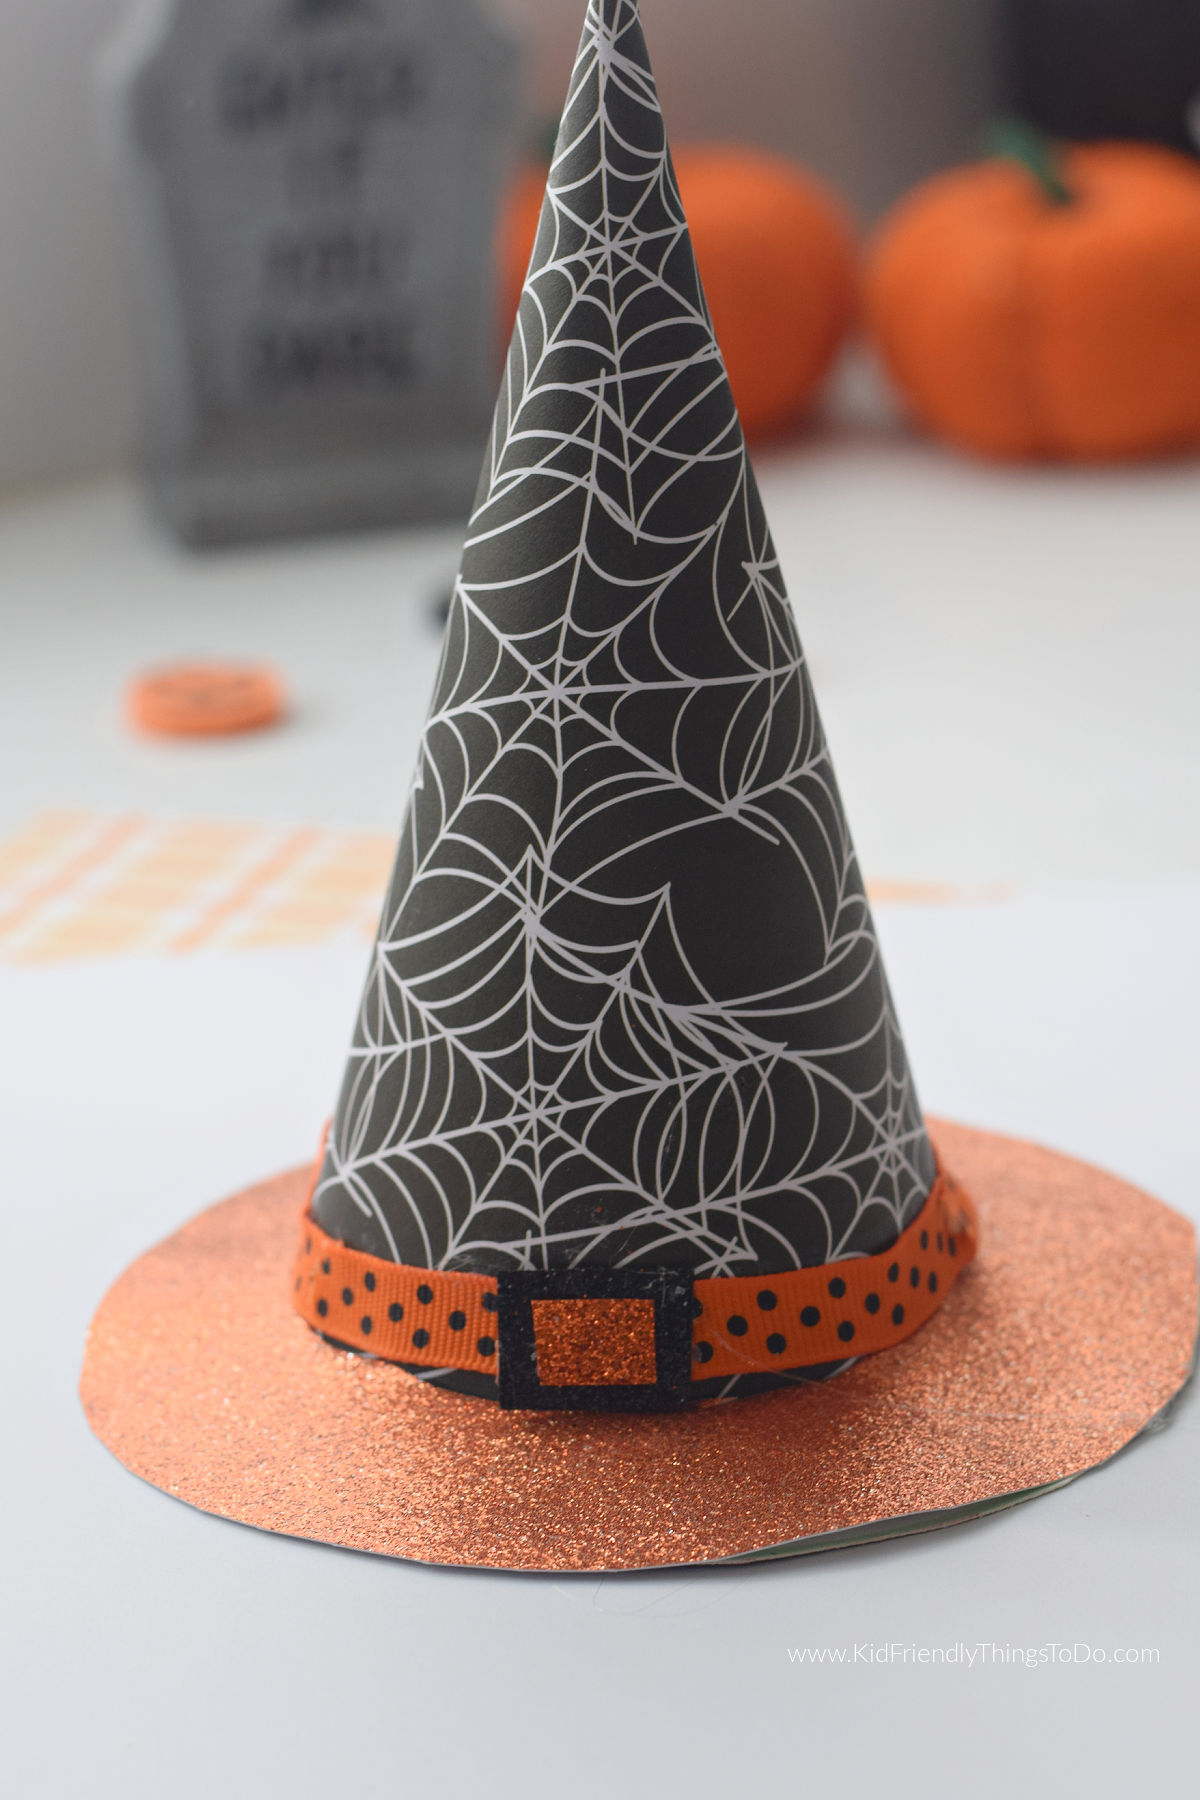
Paper Witch Hat Craft
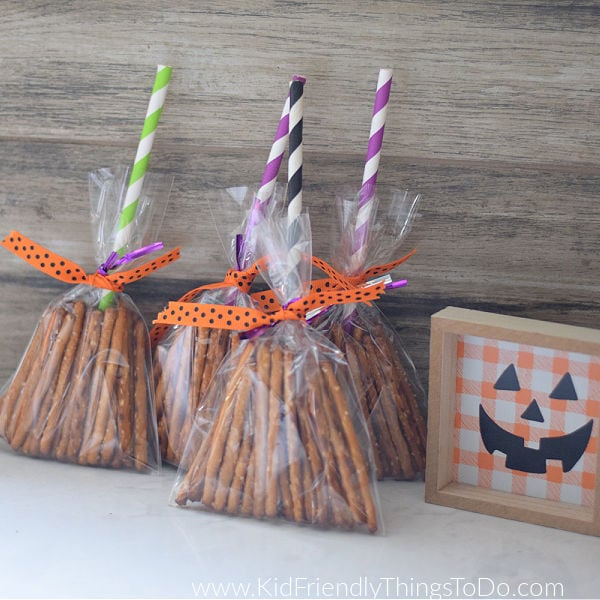
When Halloween rolls around, you’ll find me crafting in the kitchen with food crafts or at the craft table making fun Halloween crafts like Pretzel Broomstick Halloween Treats, Halloween Window Clings, and this cute Tape Mummy Craft.
Supplies:
- Halloween Designed Scrapbook Paper – 1 sheet for the cone.
- Glitter Paper – 1 or 2 contrasting colored sheets like orange and black for the bottom of the hat, the brim, and the buckle
- Ribbon – A fun Halloween colored ribbon
- Low Temp glue gun and glue sticks – You can use tacky glue, but you might have to use paper clips and rubberbands to hold the cone together while the glue dries.
- Scissors
Extra Equipment:
- A round object for drawing a circle that is one inch wider than the cone hat bottom
Instructions on How to Make a Paper Witch Hat Craft out of Paper
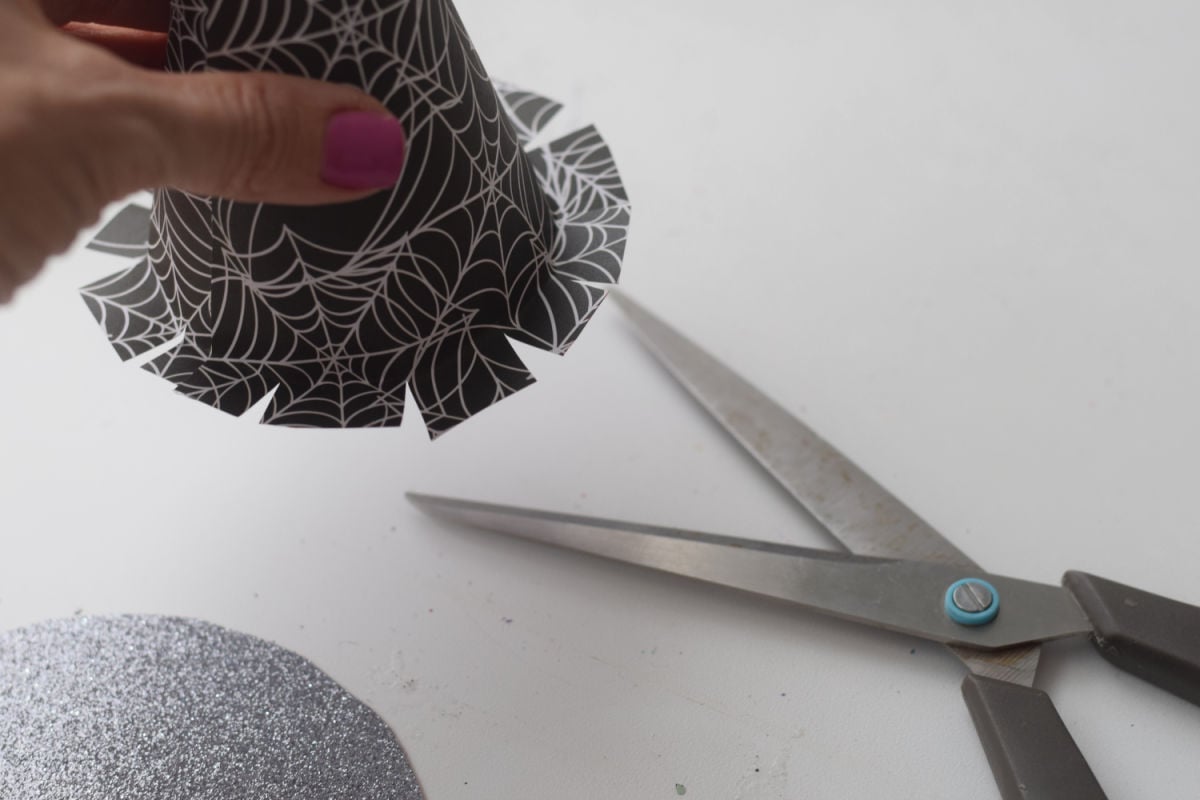
- Start by making a large pie-piece shape from the scrapbook paper. It should be in the shape of a triangle with a curved bottom.
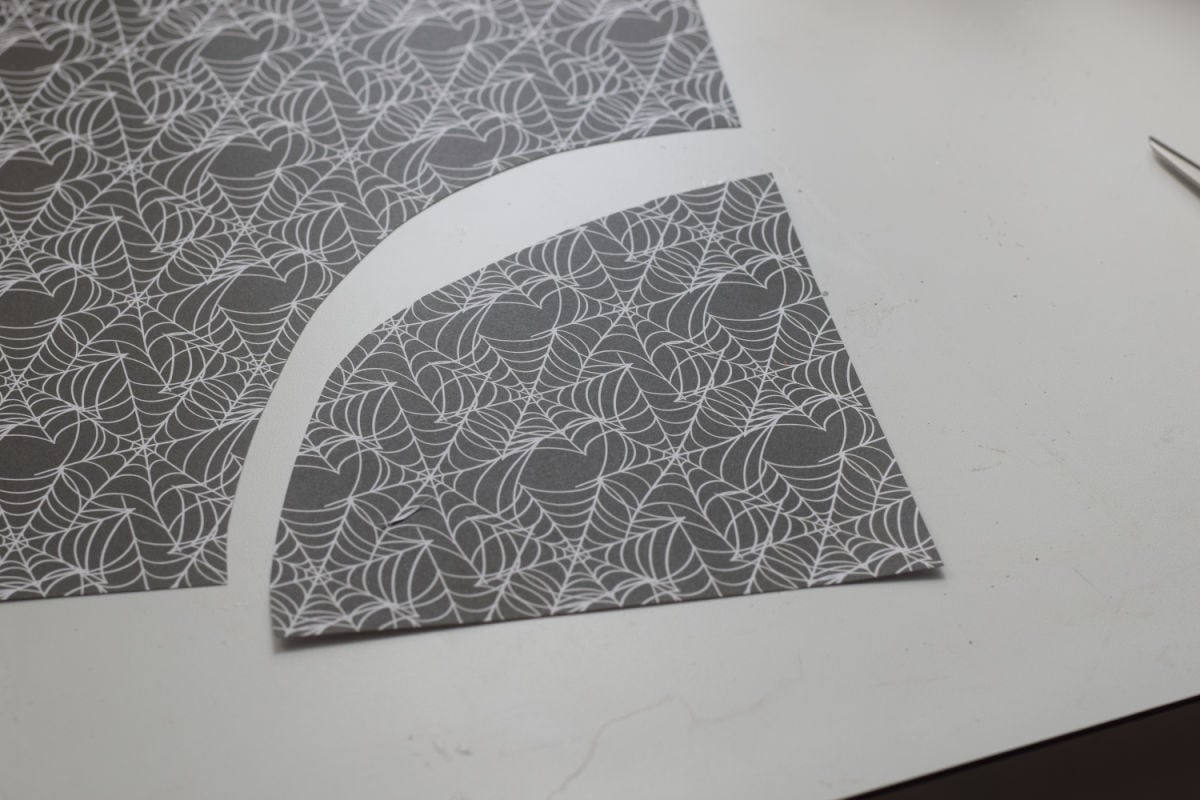
- Roll it up into a cone, securely it with glue, and trim the uneven ends.

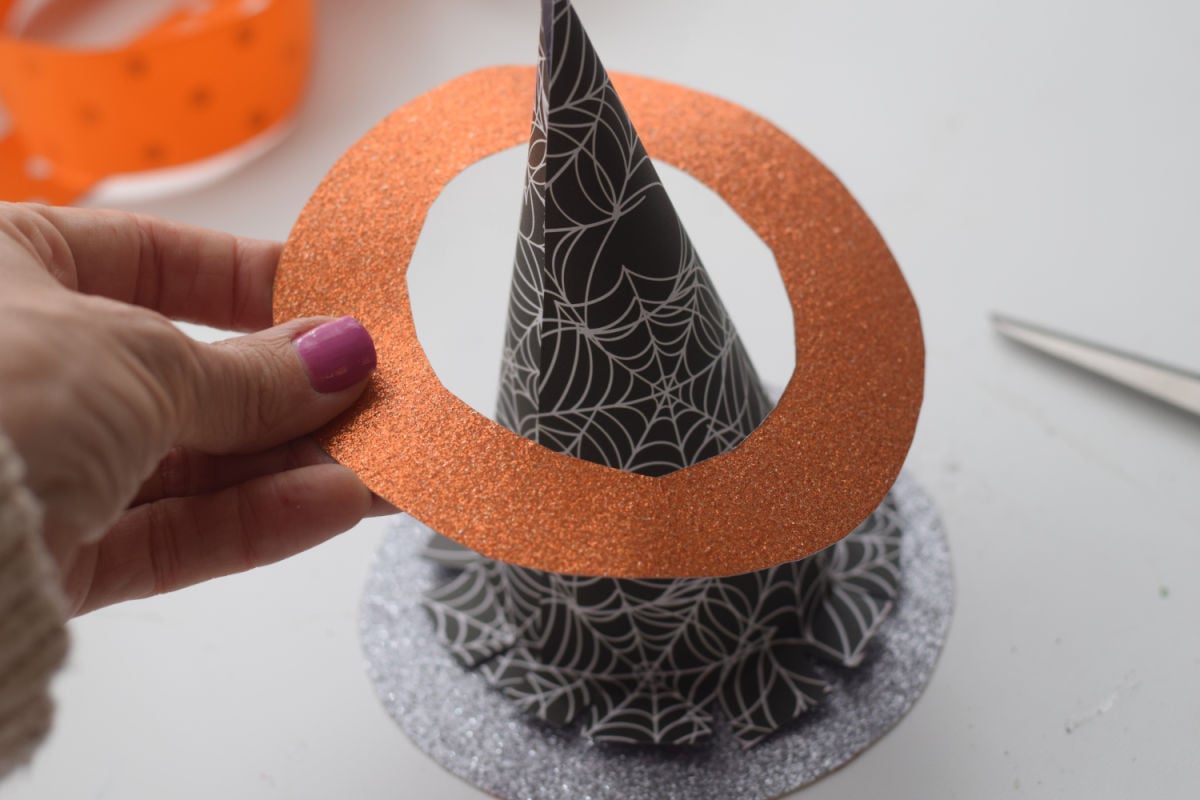
- Using a round object about an inch larger than the diameter of the cone circle, draw a circle on one of the glittery pieces of paper for the hat bottom.
- Using the same round object, draw another circle on the other glitter paper (you can use the same paper if that is all you have). Use the cone to draw a circle in the center of the larger circle.
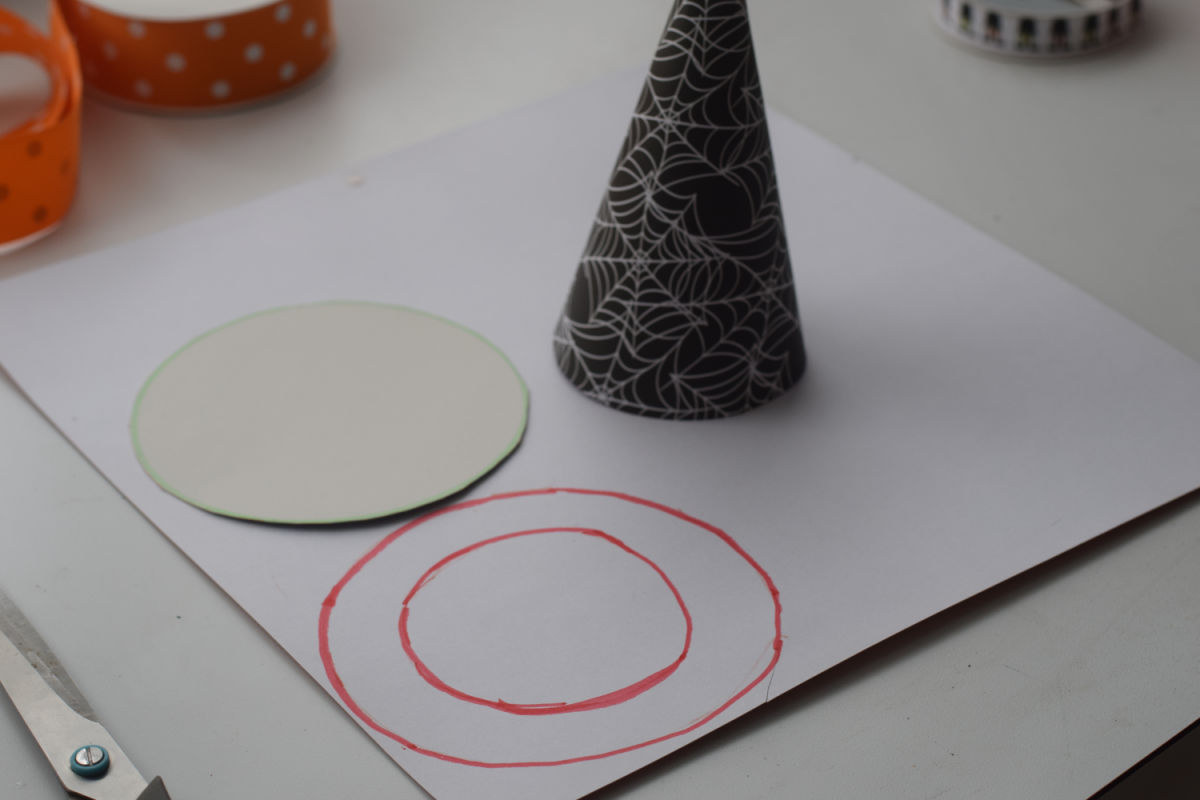
- Cut the middle circle out
- Cut small slits all around the bottom of the cone and fold the tabs outward.
- Slide the circle with the center cut out over the cone and glue it to the outward tabs.
- Glue that onto the other circle cutout for the bottom of your hat.
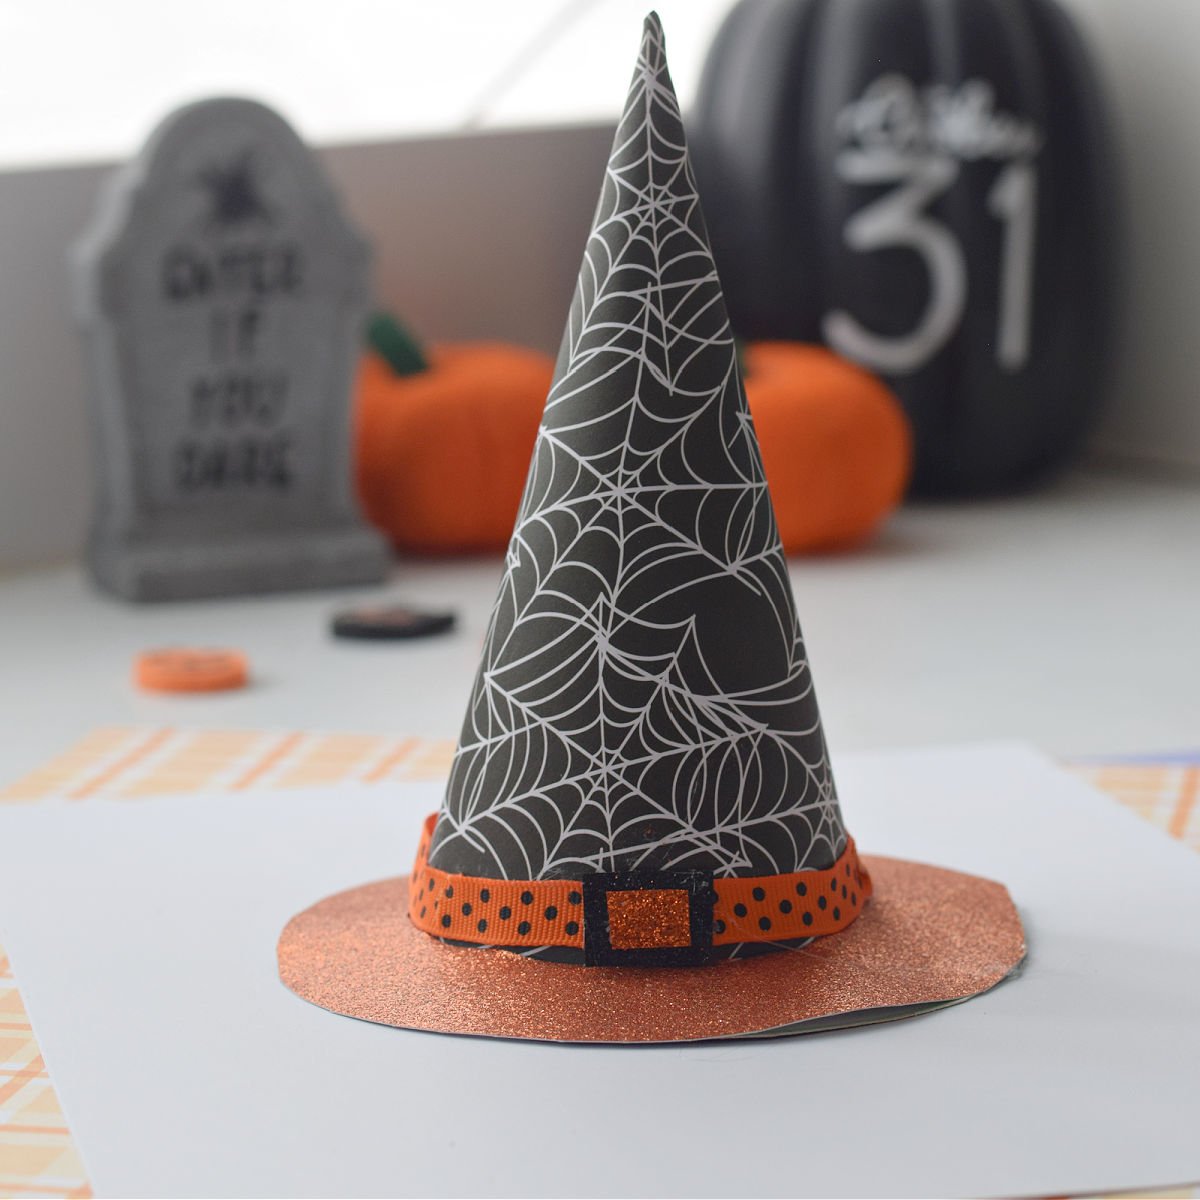
- Cut a piece of ribbon to fit around the bottom of the hat
- Cut slits into the ribbon so you can shape it to the hat by overlapping the cut pieces until it fits snugly around the hat.
- Cut out a square out of one of the pieces of paper for the witch hat buckle to fit over the ribbon.
Variation
Turn this witch hat craft into a witch hat treat holder. Simply insert a bag of treats under the cone hat. Do not glue the hat to the bottom piece
Make a full-sized paper witch hat to fit over a child’s head. Cut a large pie piece shape from a 12×12 inch sheet of scrap paper and roll it into a large cone. Use the instructions above to make your child-sized paper witch hat
More Halloween Crafts You’ll Love
Let’s Hang Out
Come and find me on Pinterest and Facebook for more recipes, crafts, party treats, and holiday games!
Watch My Witch Hat Video
Printable Instructions for Witch Hat

Paper Witch Hat Craft
Equipment
- A round object for drawing a circle that is one inch wider than the cone hat bottom
Materials
- Halloween Designed Scrapbook Paper 1 sheet for the cone.
- Glitter Paper 1 or 2 contrasting colored sheets like orange and black for the bottom of the hat, the brim, and the buckle Ribbon
- Halloween colored ribbon
- Low Temp glue gun and glue sticks You can use tacky glue, but you might have to use paper clips and rubberbands to hold the cone together while the glue dries.
- Scissors
Instructions
- Start by making a large pie-piece shape from the scrapbook paper. It should be in the shape of a triangle with a curved bottom
- Roll it up into a cone, securely it with glue, and trim the uneven ends.
- Using a round object that is about an inch larger than the diameter of the cone circle, draw a circle on one of the glitter paper for the hat bottom.
- Using the same round object, draw another circle on the other glitter paper (you can use the same paper if that is all you have).
- Use the cone to draw a circle in the center of the larger circle.
- Cut the middle circle out
- Cut small slits all around the bottom of the cone and fold the tabs outward.
- Slide the circle with the center cut out over the cone and glue it to the outward tabs
- Glue that onto the other circle cutout for the bottom of your hat
- Cut a piece of ribbon to fit around the bottom of the hat
- Cut slits into the ribbon so you can shape it to the hat by overlapping the cut pieces until it fits snugly around the hat
- Cut out a square out of one of the pieces of paper for the witch hat buckle to fit over the ribbon.
~Melissa – KidFriendlyThingsToDo.Com