Build a Snowman Sensory Bag (Easy Winter Activity for Kids)
This post may contain affiliate links – please read my disclosure statement.
Build a snowman sensory bag is a fun, hands-on winter sensory activity for kids that encourages fine motor skills, creativity, and calm play—all with minimal prep and mess. Using a clear zip-top bag, simple snowman pieces, and sparkly gel “snow,” kids can move the objects around to build their very own snowman again and again.
This snowman sensory bag activity is perfect for preschoolers, toddlers (with supervision), and early elementary kids, whether you’re crafting at home, in the classroom, or during a winter-themed unit.

This activity fits perfectly in our Winter Crafts for Kids category and pairs well with other cold-weather favorites like our Penguin Sensory Craft, Catching Snowflakes Craft with Free Printable, and Make a No-Sew Sock Snowman. These winter crafts are simple, engaging, and great for indoor play when it’s chilly outside.
Why You’ll Love This Snowman Sensory Bag
- Mess-free sensory play (everything stays sealed in the bag)
- Encourages fine motor skills and hand strength
- Great for calm-down time or quiet play
- Uses budget-friendly Dollar Tree supplies
- Perfect for winter learning themes
- Reusable and durable with proper sealing
Supplies Needed
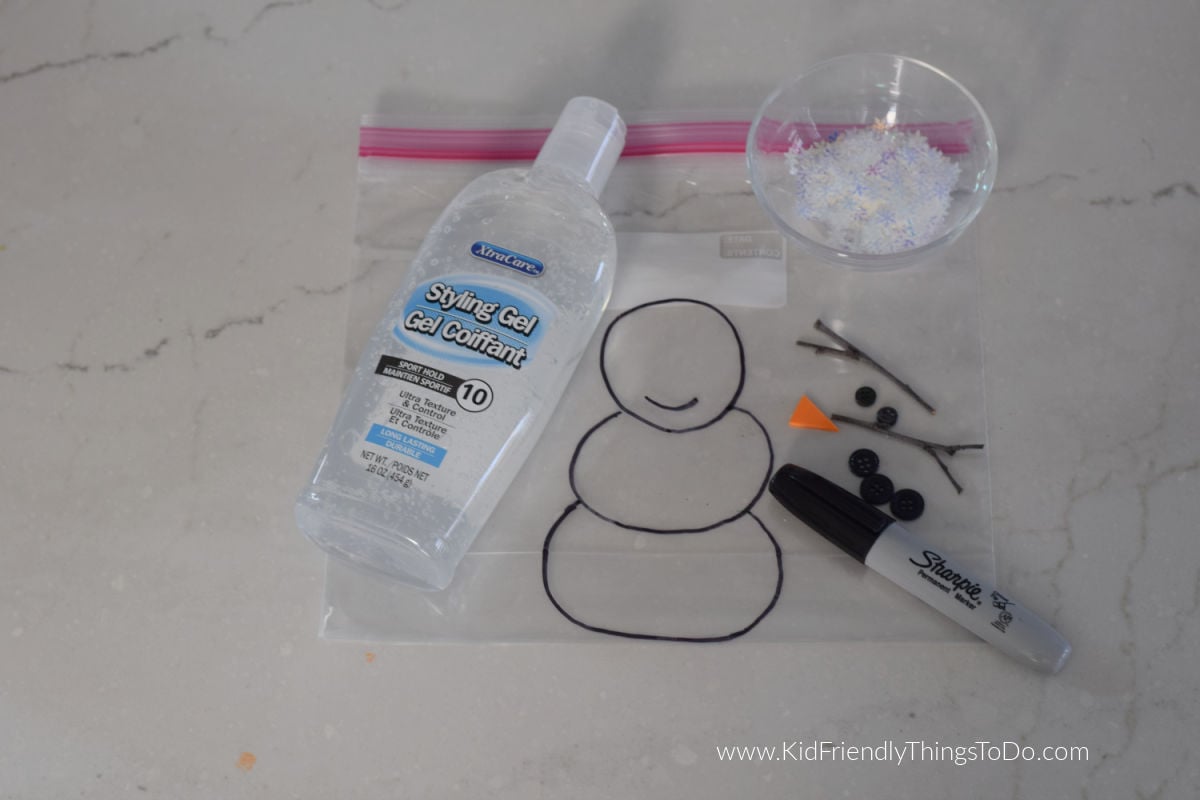
- Clear zip-top bag (quart or gallon size)
- Black permanent marker (Sharpie)
- Clear hair gel or clear gel (Dollar Tree works great)
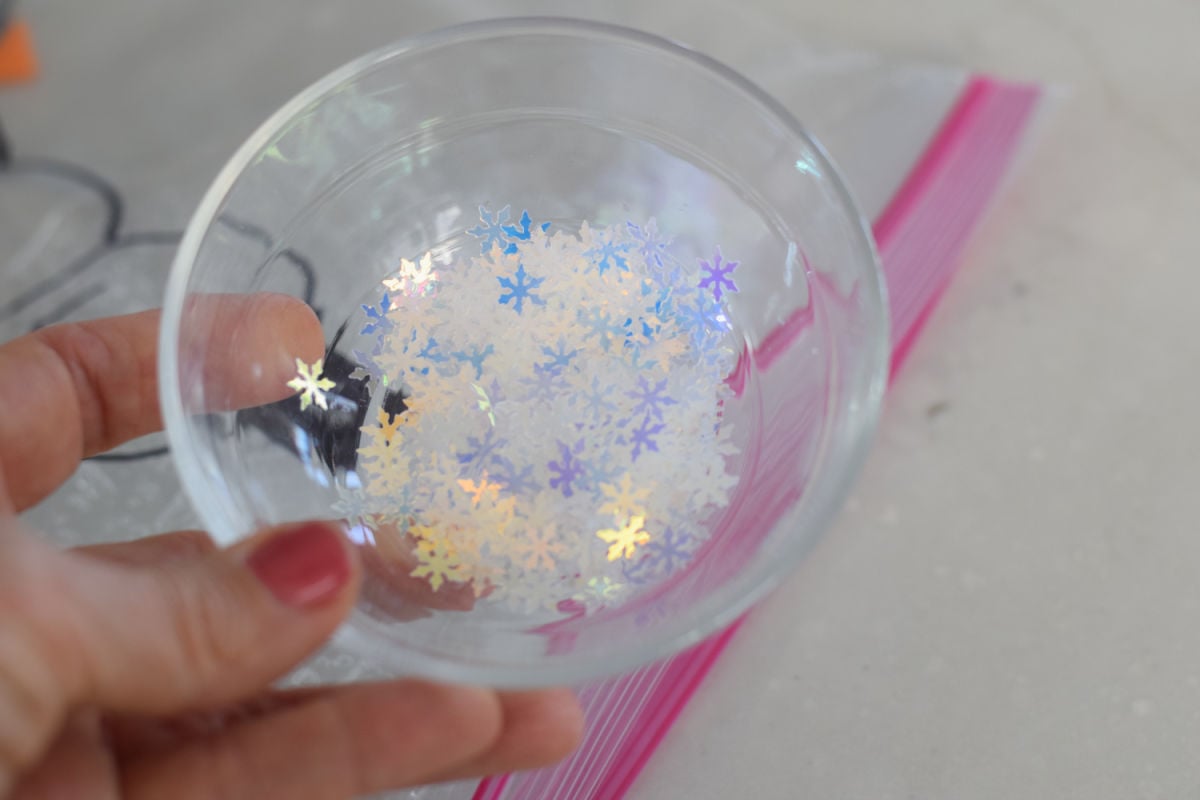
- Snowflake glitter or white/silver glitter
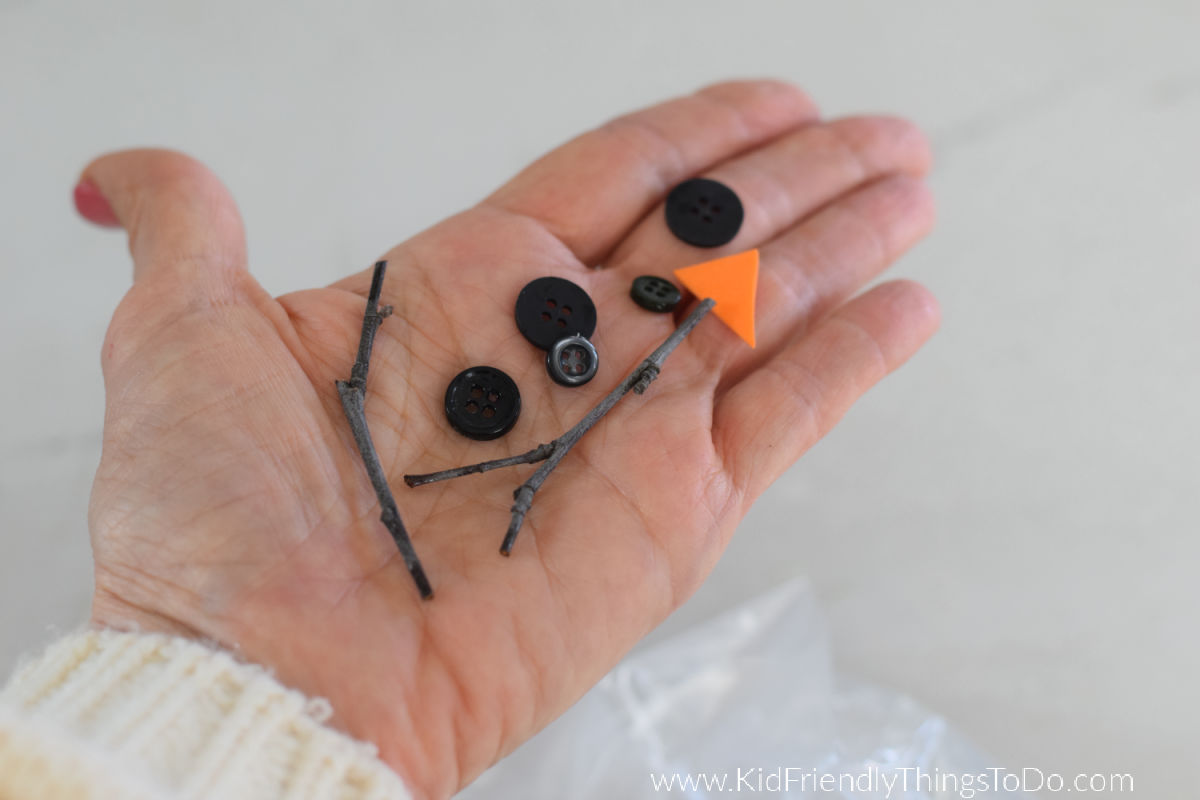
- 5 small buttons – I used various sizes
- 2 small sticks (collected from outside) – I found some from a Willow tree that weren’t too jagged and didn’t make me worry they would poke through the bag with extended play.
- Foam carrot nose (or orange foam triangle)
- Tape (optional but recommended)
- Baking sheet or tray (for play surface)
How to Make a Snowman Sensory Bag
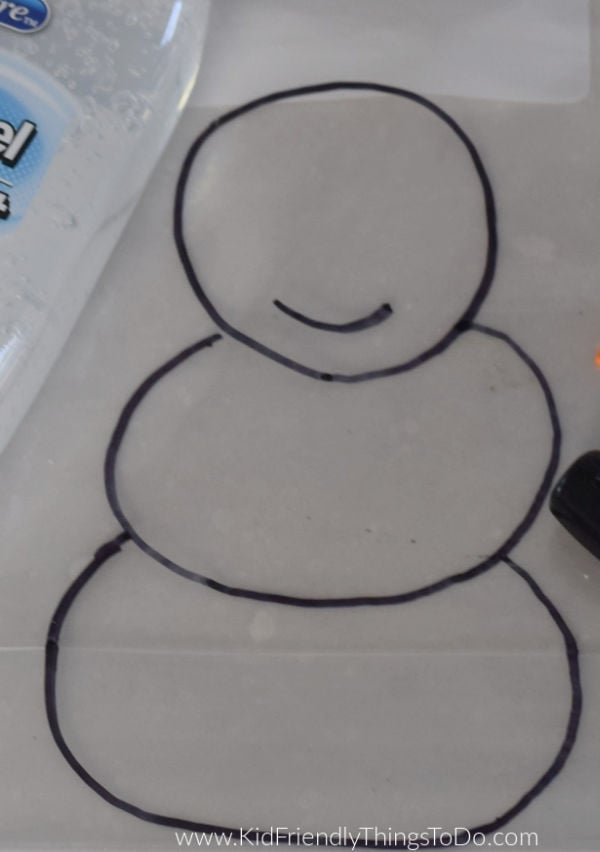
Draw the Snowman
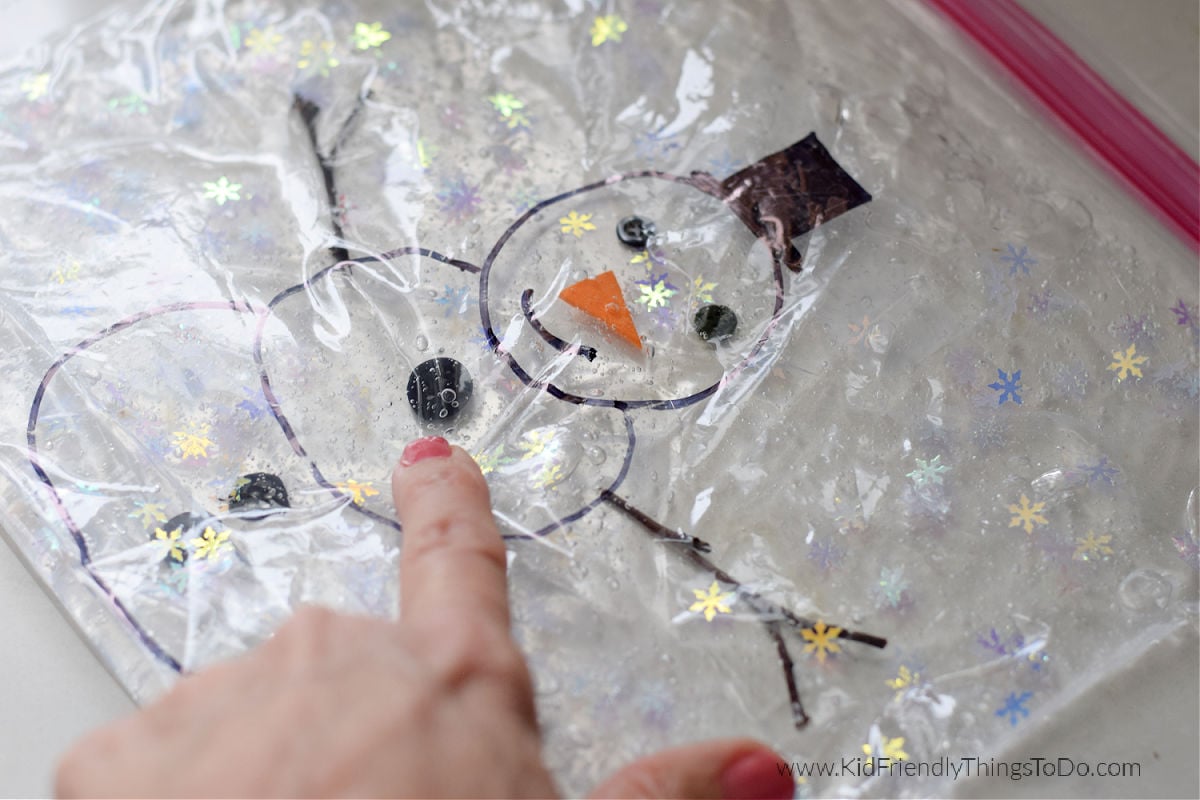
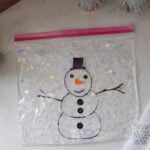
On the outside of a clear zip-top bag, use a permanent marker to draw a snowman’s body, head, and hat. Do not include details like facial features, arms, or buttons on the belly.
Add Snowman Pieces
Place 5 buttons, 2 small sticks, and a foam carrot nose into the bag.
Fill with Gel
Squeeze clear gel into the bag, filling it about halfway.

Add the Snow
Sprinkle snowflake glitter on top of the gel to create a snowy effect.
Remove Air & Seal
Gently press out as much air as possible before sealing the bag tightly.
Extra Protection (Recommended)
Place the sealed bag inside a second zip-top bag to help prevent leaks.
Secure for Kids
Tape across the top of the bag so little hands can’t open it.
Play & Explore
Let kids move the pieces around to build the snowman and swirl the glitter to make it “snow” inside the bag.
Tips for Success
- Try to remove as much air as possible before sealing the bag.
- Play with the bag yourself first to release any trapped air bubbles.
- Double-bag to prevent leaks from sharp sticks.
- Place bags on a baking sheet or tray to protect surfaces.
- Always supervise young children during sensory play.
Variations
- Use blue-tinted gel for an icy look
- Add mini pom-poms for earmuffs
- Swap glitter for confetti snow
- Create a snowman face-only sensory bag for younger kids
- Pair with a winter book for a literacy + sensory activity
FAQs
Is this snowman sensory bag safe for toddlers?
Yes, with supervision. Make sure the bag is sealed, taped, and double-bagged.
What gel works best?
Clear hair gel works perfectly for this craft.
Can this be used in the classroom?
Absolutely! It’s a great winter sensory station or quiet-time activity.
How long does it last?
When sealed properly, sensory bags can last weeks or even months.
Approximate Time
- Prep Time: 10 minutes
- Active Time: 15–30 minutes (or longer—kids love this!)
Final Thoughts
This build a snowman sensory bag is a simple, engaging winter craft for kids that combines creativity, sensory exploration, and fine motor development—all without the mess of traditional crafts. It’s an easy win for parents, teachers, and caregivers looking for meaningful winter activities kids will actually want to play with.
Printable
Build a Snowman Sensory Bag (Easy Winter Activity for Kids)
Materials
- Clear zip-top bag (quart or gallon size)
- Black permanent marker (Sharpie)
- Clear hair gel or clear gel (Dollar Tree works great)
- Snowflake glitter or white/silver glitter
- 5 small buttons – I used various sizes
- 2 small sticks (collected from outside) – I found some from a Willow tree that weren't too jagged and didn't make me worry they would poke through the bag with extended play.
- Foam carrot nose (or orange foam triangle)
- Tape (optional but recommended) strong tape like Duck tap for sealing the bag
- Baking sheet or tray (for play surface)
Instructions
- Draw the Snowman-On the outside of a clear zip-top bag, use a permanent marker to draw a snowman’s body, head, and hat. Do not include details like eyes, arms, or buttons on the belly.
- Add Snowman Pieces-Place 5 buttons, 2 small sticks, and a foam carrot nose into the bag.
- Fill with Gel-Squeeze clear gel into the bag, filling it about halfway.
- Add the Snow-Sprinkle snowflake glitter on top of the gel to create a snowy effect.
- Remove Air & Seal-Gently press out as much air as possible before sealing the bag tightly.
- Extra Protection (Recommended)-Place the sealed bag inside a second zip-top bag to help prevent leaks.
- Secure for Kids-Tape across the top of the bag so little hands can’t open it.
- Play & Explore-Let kids move the pieces around to build the snowman and swirl the glitter to make it “snow” inside the bag.