Mummy Handheld Pies for Halloween
This post may contain affiliate links – please read my disclosure statement.
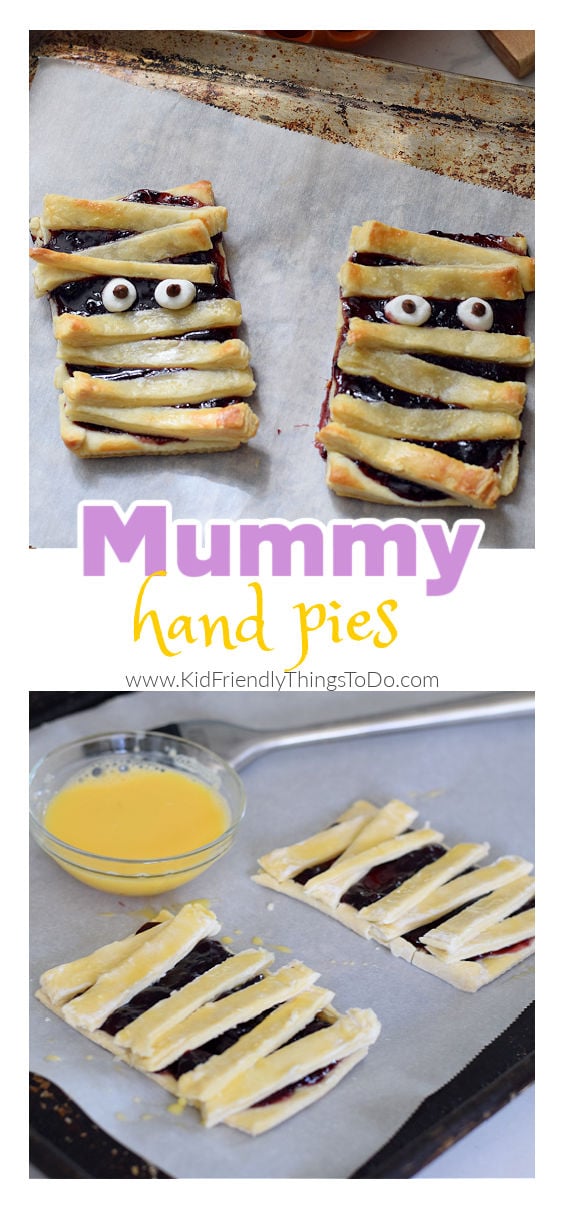
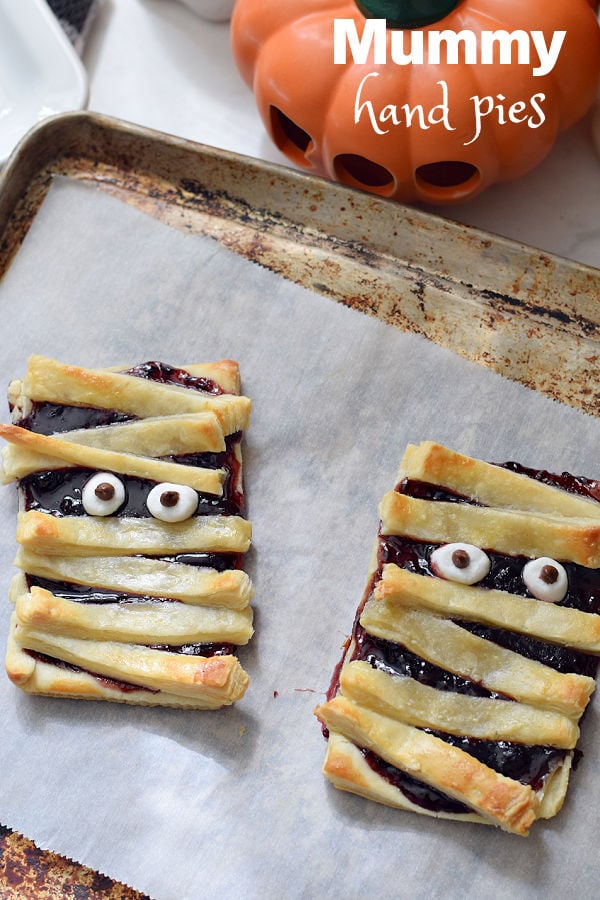
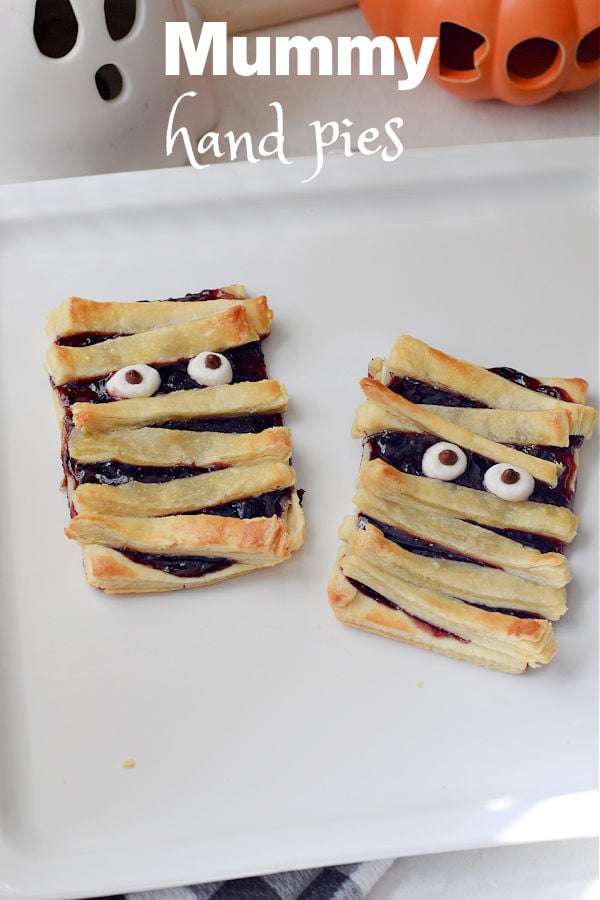
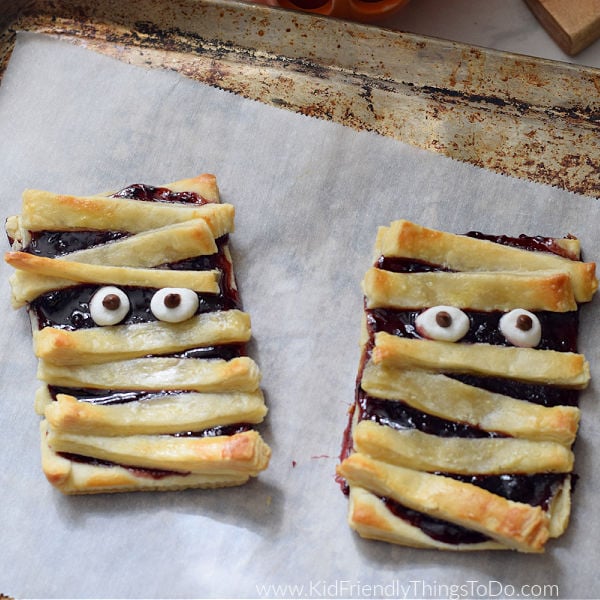
These Mummy Handheld Pies are so easy to make and a cute breakfast idea. With its puff pastry crust and fruit jam center, everyone will be happy you made these Halloween breakfast treats.
Mummy Handheld Pies
These little puff pastry pies remind me of a toaster strudel. Warm pastry crust with a fruit-filled center, they are absolutely delicious. The perfect complement to a nice glass of orange juice or a warm cup of coffee on a brisk fall day.
More Halloween Breakfast Ideas
Monster cups for Halloween drinks
What I love about these Halloween Treats:
- They are so easy to make
- I always love fruit-filled anything
- They are a nice warm breakfast idea for an October morning, before Halloween
- A fun idea for Halloween
- They are kid-friendly and the kids can even help make them
Ingredients
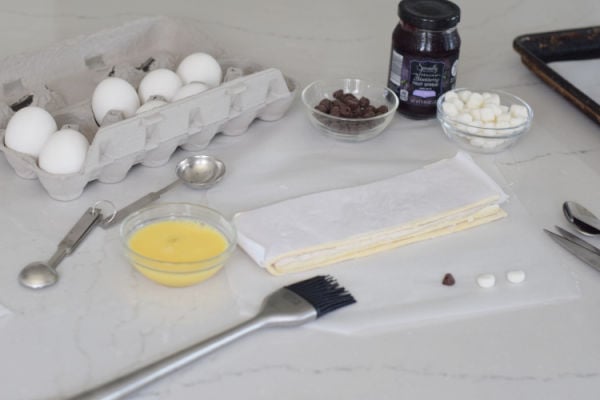
- puff pastry sheets – I found mine in the freezer aisle of my grocery store. It comes with 2 sheets that are folded up. You’ll unfold them and use the long strips of 3 to make your pies. You should get around 6 mummy pies
- jam – I happened to have blackberry jam, but you can substitute it with your favorite jam flavor
- large egg – this will be used to make an egg wash that you’ll brush onto the pastry before baking it
- water – another ingredient in your egg wash
- mini marshmallows – you’ll need one per mummy for the eyes
- mini chocolate chips – you might need to dip these into the sticky jam so they will glue to your marshmallow
How to Make these Halloween Hand Pies
- unfold the puff pastry sheets and use the folded lines as a guide to cut them into long strips of 6
- cut the strips into halves – these will be rectangles
- fold the edges up just a little to create a barrier so the jam does not run off while baking
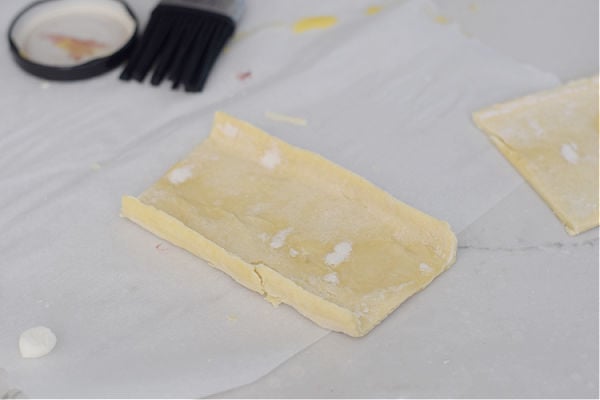
- spread a couple of Tbsp. of jam into the center of the pastry rectangle
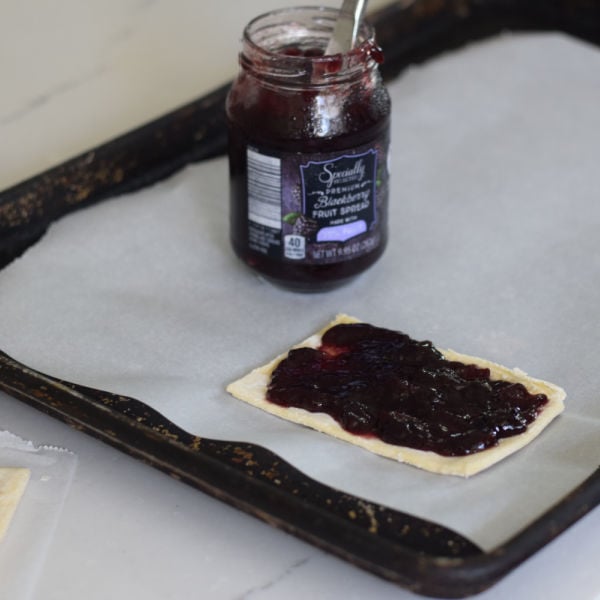
- use the other halves to cut into strips
- layer strips going across and at a diagonal – leaving space for eyes
- mix the egg and water and brush the pastry before baking
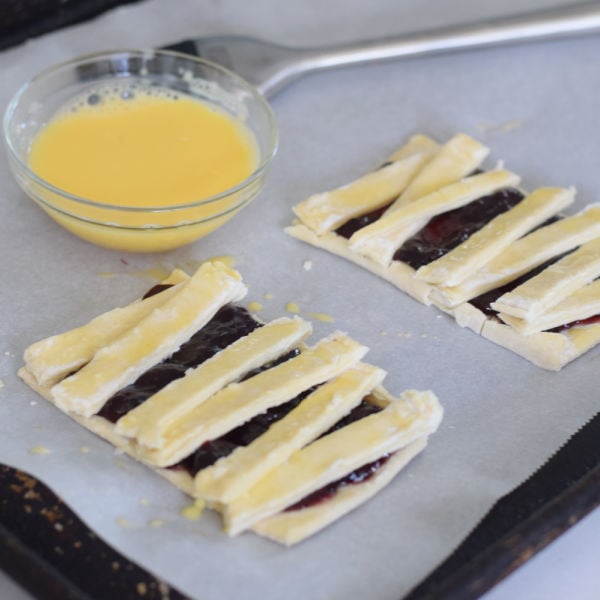
- bake at 350 degrees for 12-15 minutes
- cut a mini marshmallow in half for the eyes
- add mini chocolate chips to the center of the marshmallows for pupils
FAQs
Make Ahead and Storage:
How far in advance can I make these Handheld Pies?
You can make these Halloween pies a couple of days in advance, but they are best when fresh and right out of the oven
Storage: Store leftover Halloween Pastries covered in the refrigerator for 2-3 days
Reheating: Reheat puff pastries in the oven for about 5 minutes or until heated through. You can also microwave them to heat them up
Reheating Side Note: The marshmallow and chocolate chip eyes will probably melt during the reheating process
What Else Can I Fill Pastry Handheld Pies With?
- chocolate – melt chocolate chips and add to the center
- apple pie filling
- pumpkin pie filling – you’ll want to add other ingredients to the filling like evaporated milk and spices before making it into a handheld pie
- fruit jam
- ham and cheese
- sausage and cheese
- hamburger meat – seasoned to make an empanada
- pie fillings – various
Tips and Tricks:
- line your baking sheet with parchment paper to ensure even baking and catch any stray jam that might run off of the pastry while baking
- fold the sides of your mummy with a short edging to prevent the jam from running
- don’t overthink the mummy bandages. The more uneven they are, the better
- do brush an egg wash over your pastry to get that golden brown color
- do not add the eyes until your pastry is done baking
Top Amazon Picks
(affiliate links)
 Stainless Steel Baking Shee...Shop on Amazon
 Reynolds Kitchens Parchment...Shop on Amazon
Printable Recipe
Mummy Handheld Pie for Halloween
Ingredients
- 2 ready-made puff pastry sheets
- 6 oz. fruit spread jam or preserves
- 1 large egg
- 1 Tbsp. water
- 6 mini marshmallows
- 12 mini chocolate chips
Instructions
- line a baking sheet with parchment paper
- unfold the puff pastry sheets and use the folded lines as a guide to cut them into long strips of 6 rectangles
- cut the strips into halves – you should now have 12 equal rectangles
- with 6 of the pastry rectangles, fold the edges up just a little to create an edge so the jam does not run off while baking
- spread a couple of Tbsp. of jam into the center of the pastry rectangle
- use the other 6 pastry halves to cut into strips
- layer strips going across and at a diagonal – leaving space for eyes
- mix the egg and water and brush the pastry with the egg mixture before baking
- bake at 350 degrees for 12-15 minutes
- cut a mini marshmallow in half for the eyes
- add mini chocolate chips to the center of the marshmallows for pupils
Notes
nutrition facts are only an estimate
How far in advance can I make these Handheld Pies?
You can make these Halloween pies a couple of days in advance, but they are best when fresh and right out of the oven Storage: Store leftover Halloween Pastries covered in the refrigerator for 2-3 days Reheating: Reheat puff pastries in the oven for about 5 minutes or until heated through. You can also microwave them to heat them up Reheating Side Note: The marshmallow and chocolate chip eyes will probably melt during the reheating processWhat Else Can I Fill Pastry Handheld Pies With?
- chocolate – melt chocolate chips and add to the center
- apple pie filling
- pumpkin pie filling – you’ll want to add other ingredients to the filling like evaporated milk and spices before making it into a handheld pie
- fruit jam
- ham and cheese
- sausage and cheese
- hamburger meat – seasoned to make an empanada
- pie fillings – various
Tips and Tricks:
- line your baking sheet with parchment paper to ensure even baking and catch any stray jam that might run off of the pastry while baking
- fold the sides of your mummy with a short edging to prevent the jam from running
- don’t overthink the mummy bandages. The more uneven they are, the better
- do brush an egg wash over your pastry to get that golden brown color
- do not add the eyes until your pastry is done baking
Nutrition
