Turkey Ornament Handprint Craft
This post may contain affiliate links – please read my disclosure statement.
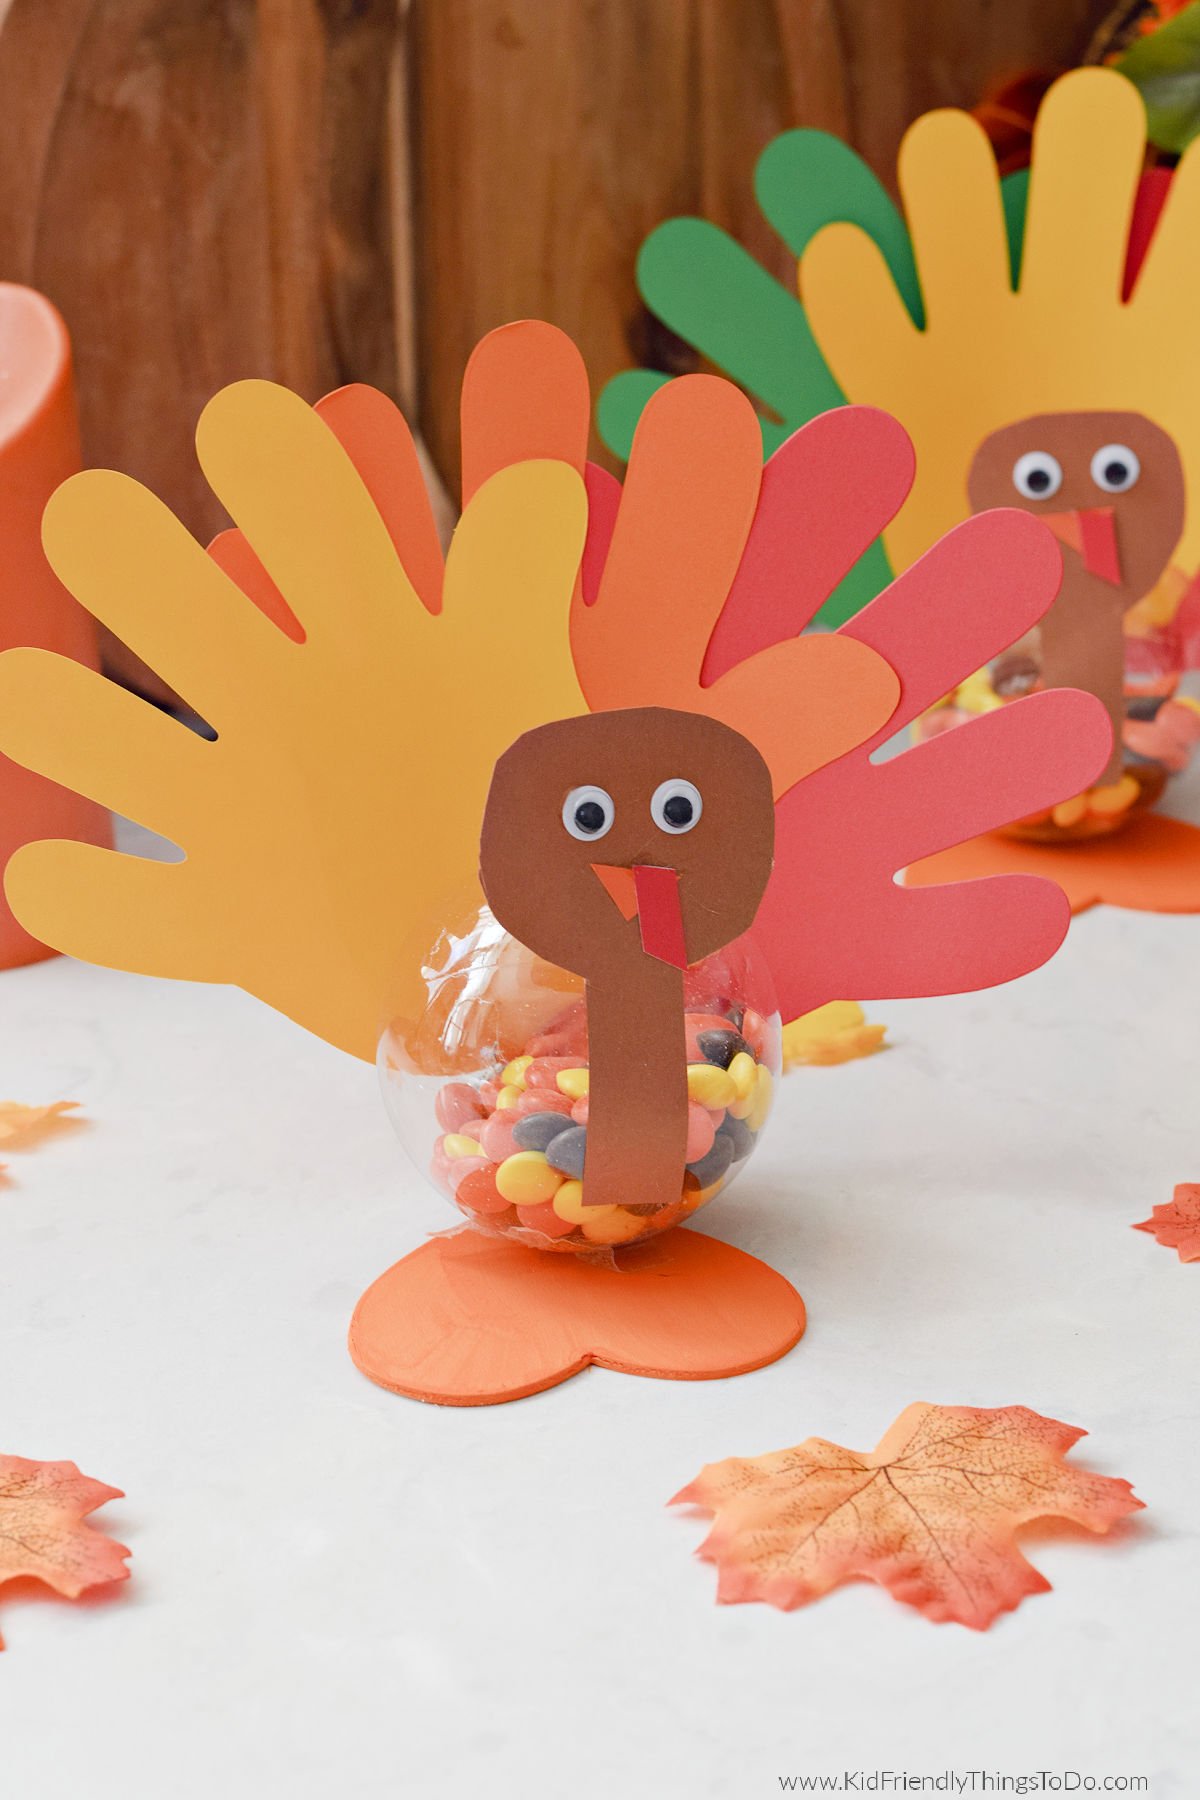
This adorable Turkey Ornament Handprint Craft is a fun Thanksgiving project that doubles as a table decoration and a sweet treat candy craft. Whether you make it as a sentimental keepsake using your child’s traced handprints or as a festive favor for guests, it’s sure to bring smiles all around the Thanksgiving table.
Creating crafts like these, such as Turkey Ornament Candy Holders, is one of the best ways to celebrate Thanksgiving creatively. They’re perfect for keeping kids busy, adding charm to your table, or giving guests a sweet little gift to take home. If you love easy holiday crafts, be sure to check out our Sugar Cone Cornucopias, Fruit Loop Turkey Donuts, and Turkey Cheesy Dip Snack Pack — all fun, festive, and perfect for your Thanksgiving celebration.
What You’ll Love About this Craft
Fun and Festive: Combines a cute turkey design with a sweet treat inside.
Personal Touch: Handprint feathers make it a meaningful keepsake craft.
Versatile: Use as a table setting, a small gift, or a Thanksgiving day activity for kids.
Supplies You’ll Need
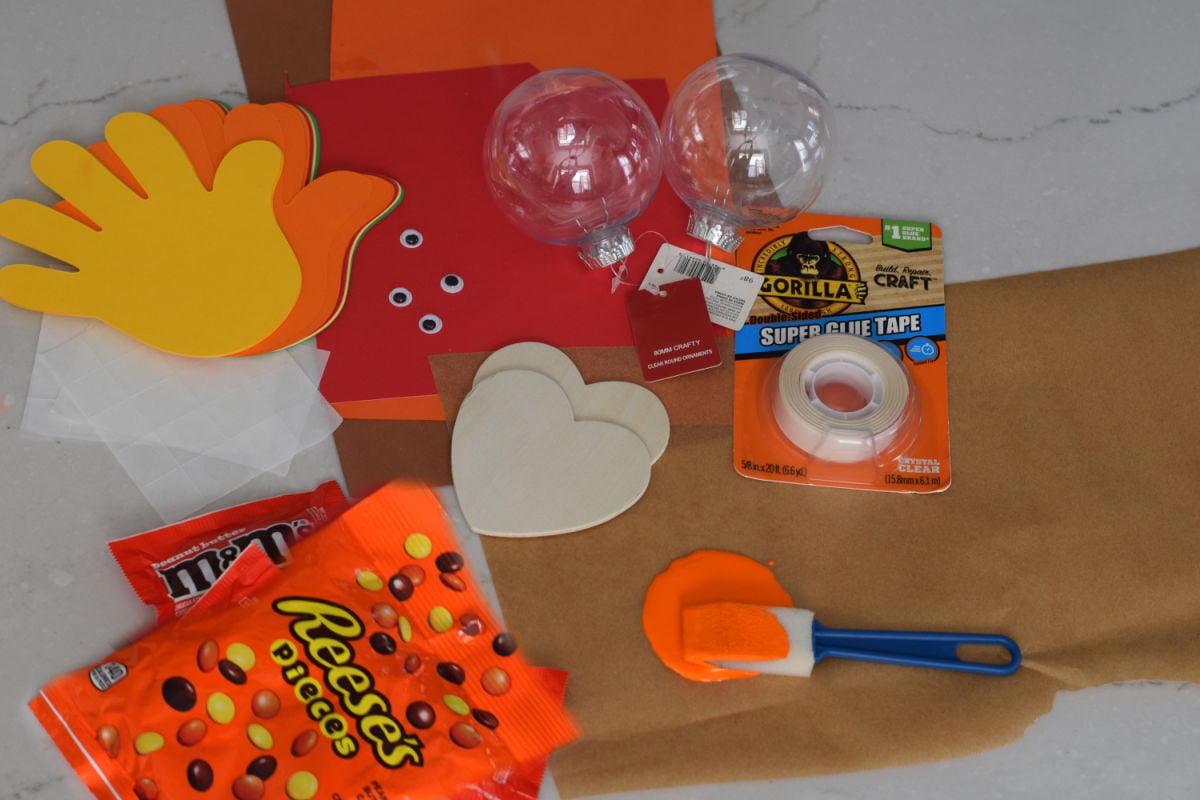
Clear plastic ornament (with removable top)
Fall-colored candies (milk chocolate M&Ms or Reese’s Pieces work perfectly!)
3″ wooden heart shape
Orange paint
Paintbrush – I like to use a sponge brush for crafts like this
Paper handprints (store-bought or traced and cut from colored paper)
Brown, orange, and red paper
Googly eyes
Glue (hot glue or a strong tacky craft glue like Beacon 3 in 1)
Double-Sided Tape – A strong craft double-sided tape, like Gorilla super glue craft tape
Paint marker (optional, for adding names)
How to Make a Turkey Ornament Handprint Craft
Make the Base:
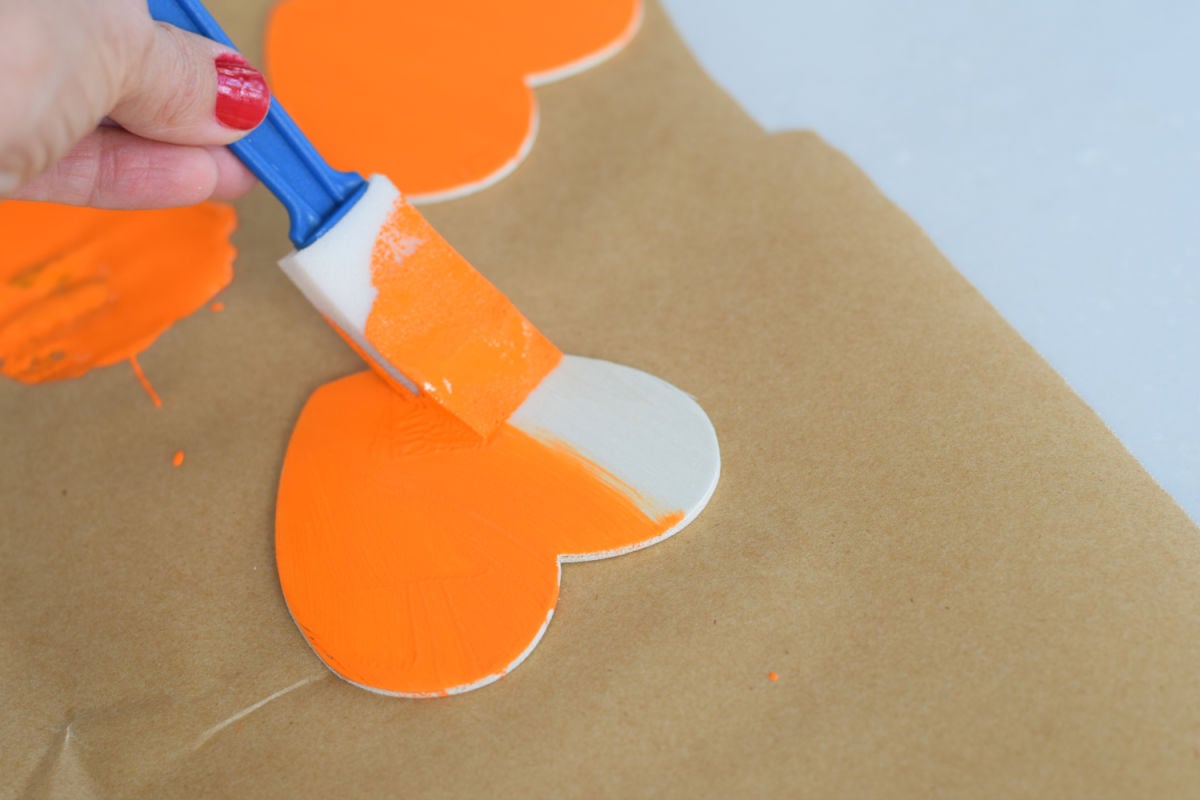
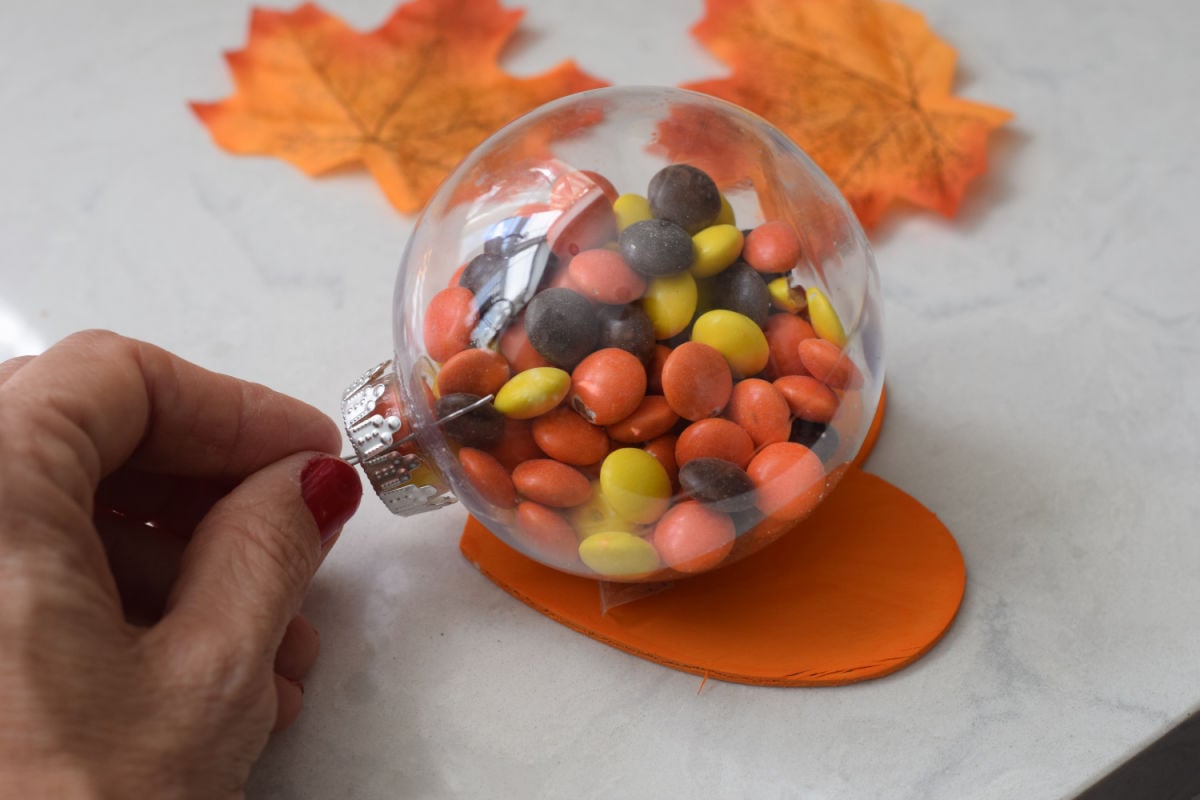
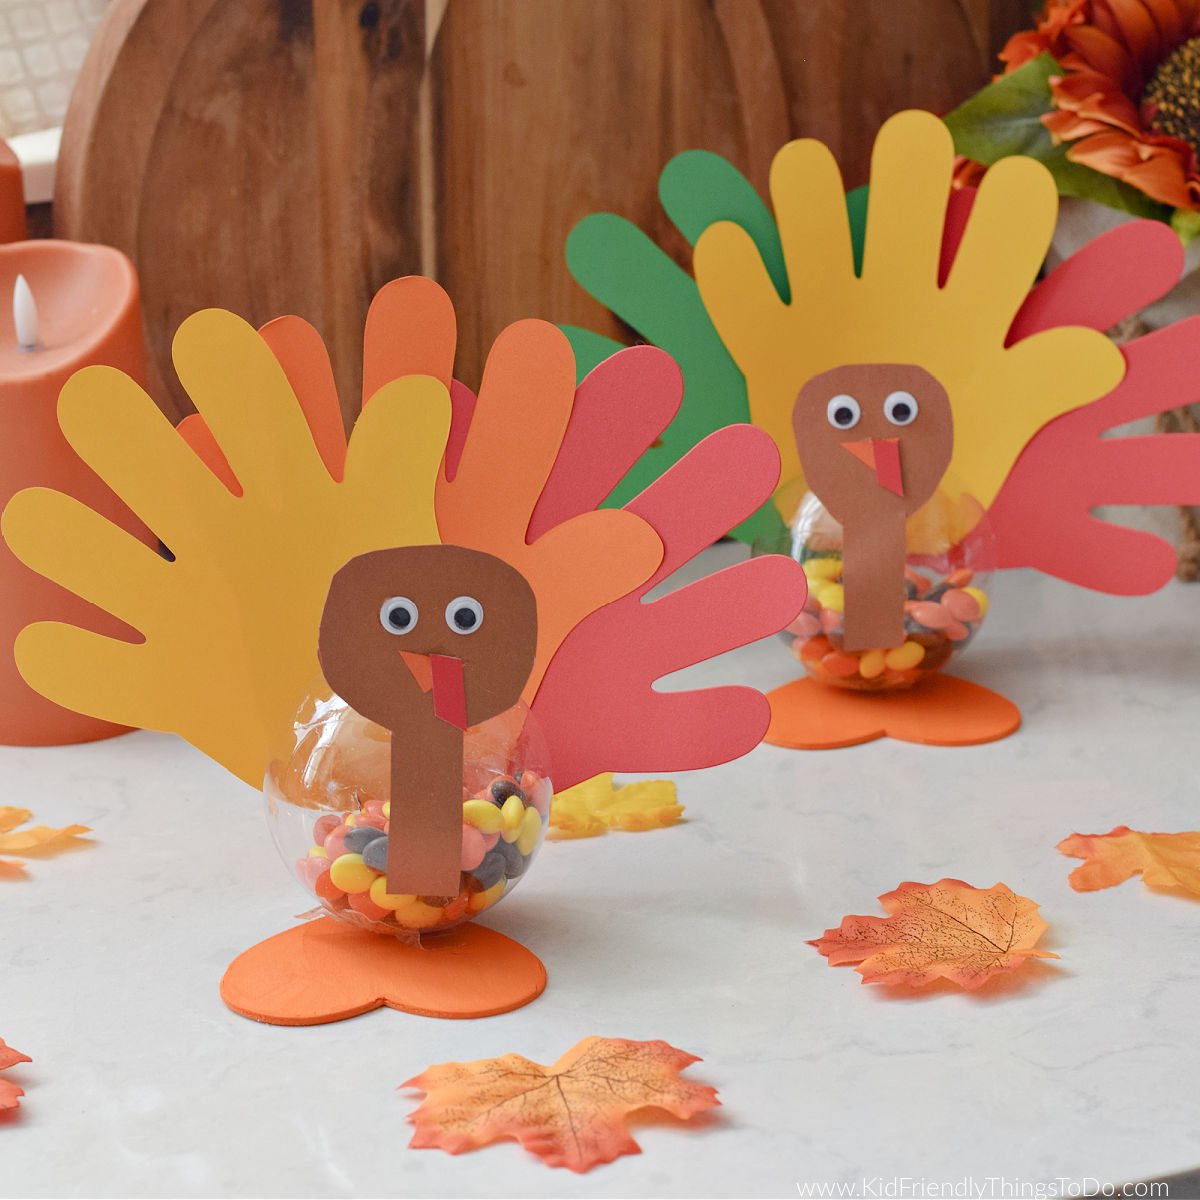
Paint your wooden heart orange and let it dry completely. The pointed end of the heart will be the turkey’s back, and the two rounded sections will act as its feet.
Prepare the Ornament:
Remove the top from your clear plastic ornament and set it aside. Partially fill the ornament with fall-colored candies — about 2.5 oz. or roughly ½ cup. A movie-sized box of candy is more than enough for one ornament. Replace the cap once filled.
Attach the Ornament:
Glue the filled ornament to the wooden heart. I used Gorilla Super Glue Tape (a double-sided tape), positioning it so that the ornament’s opening faces downward and sits near the pointed end of the heart. Hold in place until the glue sets.
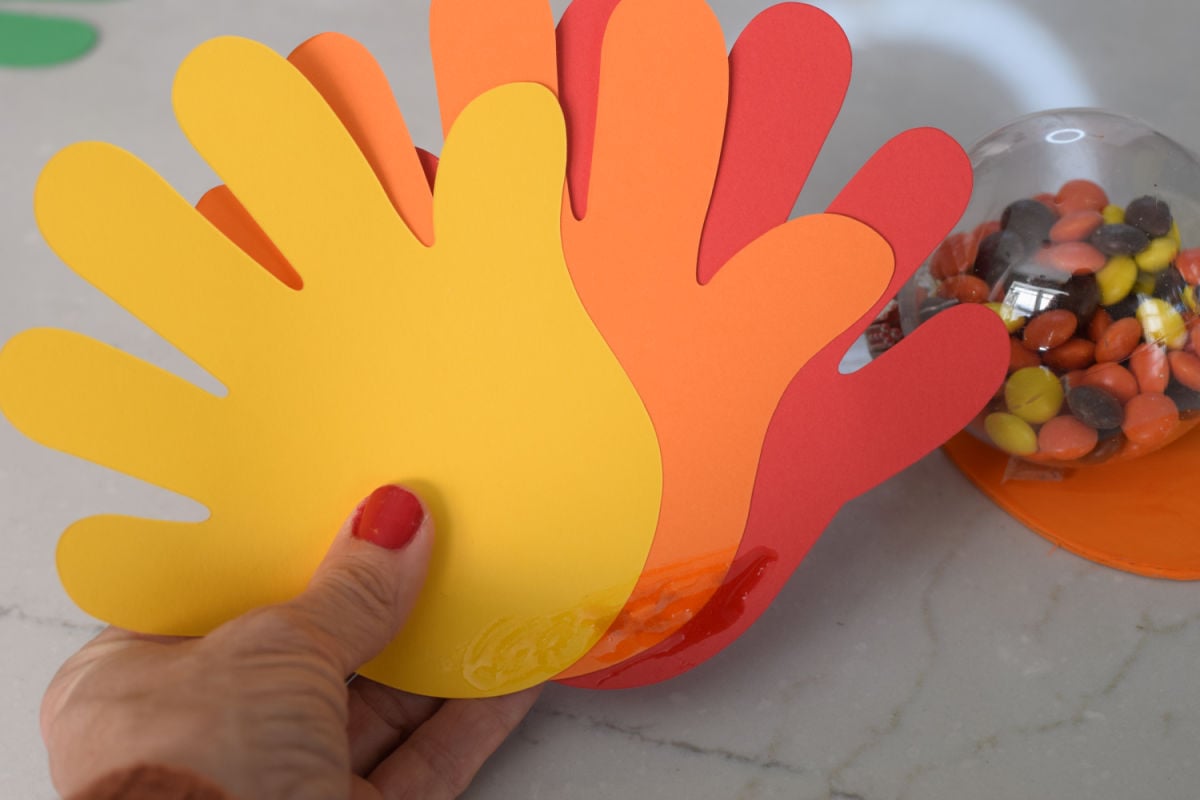
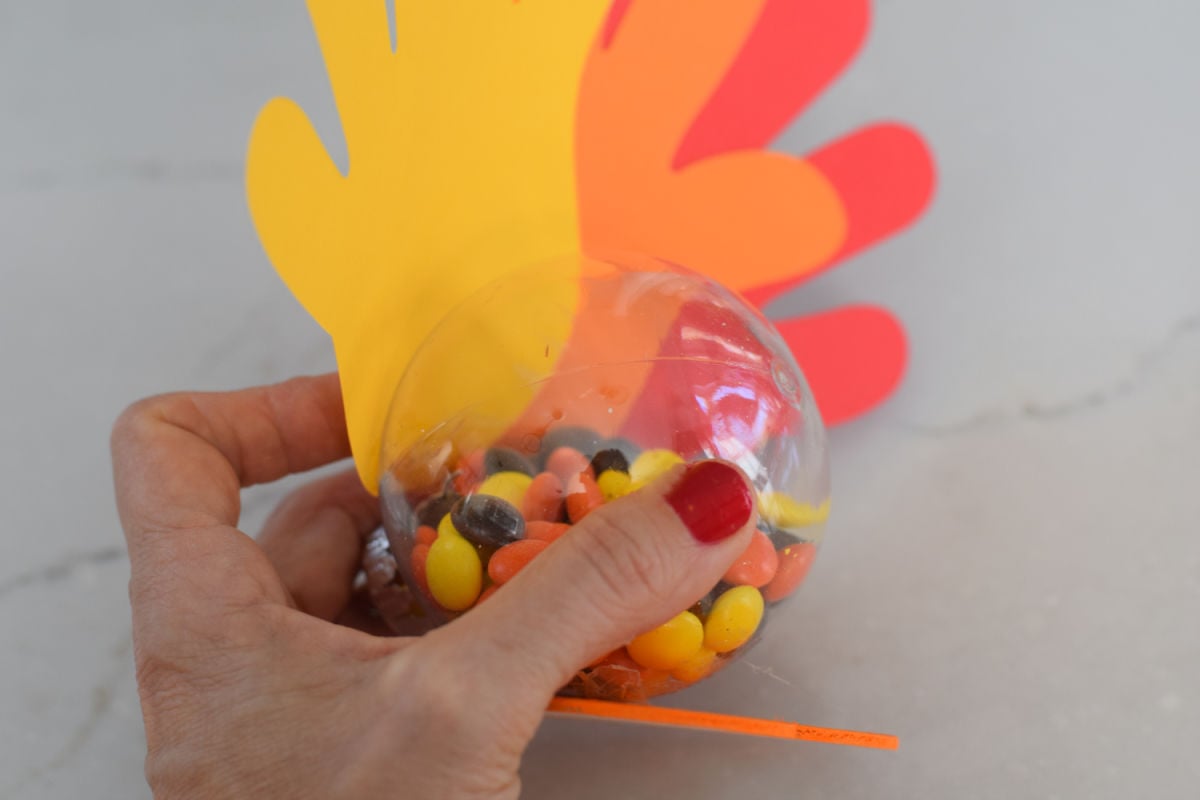
Add the Feathers:
Fan out three colorful paper handprints and glue them behind the ornament to resemble the turkey’s feathers. Curve them slightly around the ornament for a rounded, feathered look. (You can use pre-cut paper hands or trace and cut your child’s hands for a personal touch.)
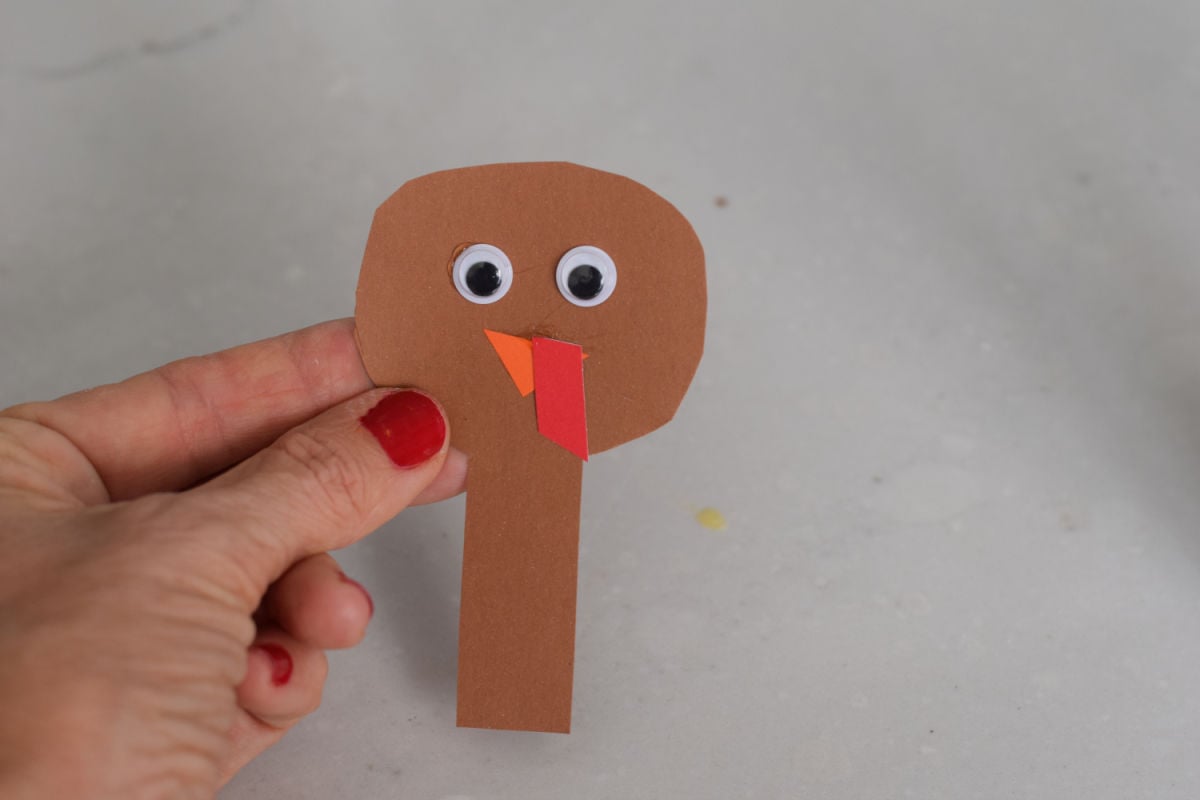
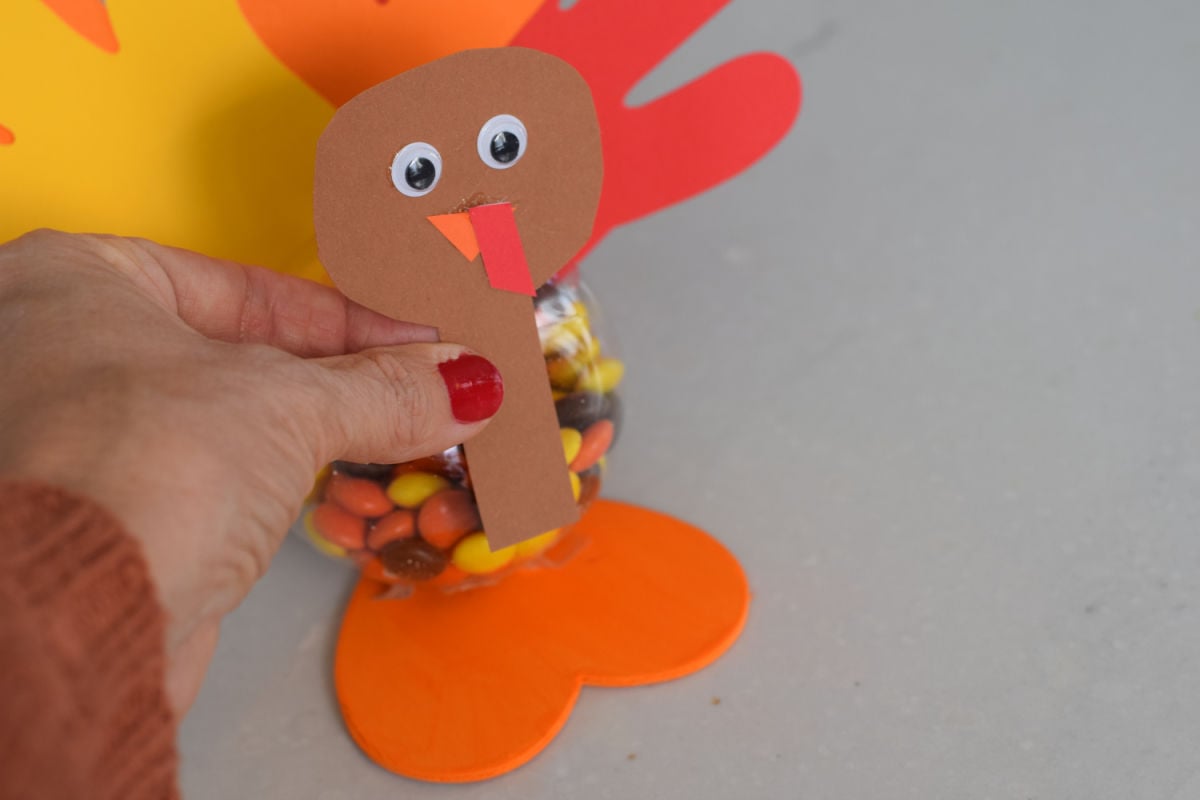
Create the Head:
Cut a small circle and neck from brown paper for the head. Add an orange paper beak, a red wattle, and googly eyes. Glue this onto the front of the ornament to the front of the candy-filled body.
Add Details:
Use a paint marker to write names or a cute Thanksgiving message on the wooden “feet” if you’d like to turn these into place settings or favors.
Expert Tips
Remove the Tops Carefully:
Gently pull or twist off the silver cap. Keep it in a safe place so it doesn’t get bent or lost.
Avoid Cracks:
- Handle the plastic gently; it can crack if bent or pressed too hard.
- When gluing to a base (like your wooden heart), avoid squeezing the ornament. Hold it in place lightly until the glue sets.
Filling Without Mess:
- Use a small funnel or a piece of rolled paper to help pour candy inside without spilling.
- If using small candies like M&Ms or Reese’s Pieces, fill slowly to avoid static causing them to stick to the sides.
Variations
Try mini ornaments for bite-sized favors or larger ornaments for centerpiece decorations.
Use different candy colors for a custom look (pastel for spring, red and green for Christmas!).
Add ribbon or tags with guest names for an extra-special touch.
FAQs
Can I use glass ornaments instead of plastic?
It’s best to stick with plastic for safety, especially if kids are helping or handling them.
How far in advance can I make these?
You can make and fill them up to a week before Thanksgiving! Just store in a cool, dry place to keep the candy fresh.
More Thanksgiving Crafts You’ll Love


Turkey Ornament Candy Craft
Materials
- 1 Clear plastic ornament (with removable top)
- 1 box Fall-colored candies (milk chocolate M&Ms or Reese’s Pieces work perfectly!) about 2.5 oz.
- 1 3" wooden heart shape
- 1 Orange paint
- 1 Paintbrush – I like to use a sponge brush for crafts like this
- 3 Paper handprints (store-bought or traced and cut from colored paper)
- Brown, orange, and red paper
- 2 Googly eyes
- Glue like a tacky craft glue such as Beacon 3 in 1)
- Double-Sided Tape – A strong craft double-sided tape, like Gorilla super glue craft tape
- Paint marker (optional, for adding names)
Instructions
- Make the Base: Paint your wooden heart orange and let it dry completely. The pointed end of the heart will be the turkey’s back, and the two rounded sections will act as its feet.
- Prepare the Ornament: Remove the top from your clear plastic ornament and set it aside. Partially fill the ornament with fall-colored candies — about 2.5 oz. or roughly ½ cup. A movie-sized box of candy is more than enough for one ornament. Replace the cap once filled.
- Attach the Ornament: Glue the filled ornament to the wooden heart. I used Gorilla Super Glue Tape (a double-sided tape), positioning it so that the ornament’s opening faces downward and sits near the pointed end of the heart. Hold in place until the glue sets.
- Add the Feathers: Fan out three colorful paper handprints and glue them behind the ornament to resemble the turkey’s feathers. Curve them slightly around the ornament for a rounded, feathered look. (You can use pre-cut paper hands or trace and cut your child’s hands for a personal touch.)
- Create the Head: Cut a small circle and neck from brown paper for the head. Add an orange paper beak, a red wattle, and googly eyes. Glue this onto the front of the ornament to the front of the candy-filled body.
- Add Details: Use a paint marker to write names or a cute Thanksgiving message on the wooden “feet” if you’d like to turn these into place settings or favors.