Winter Paper Plate Craft: Ice Skating Craft for Kids
This post may contain affiliate links – please read my disclosure statement.
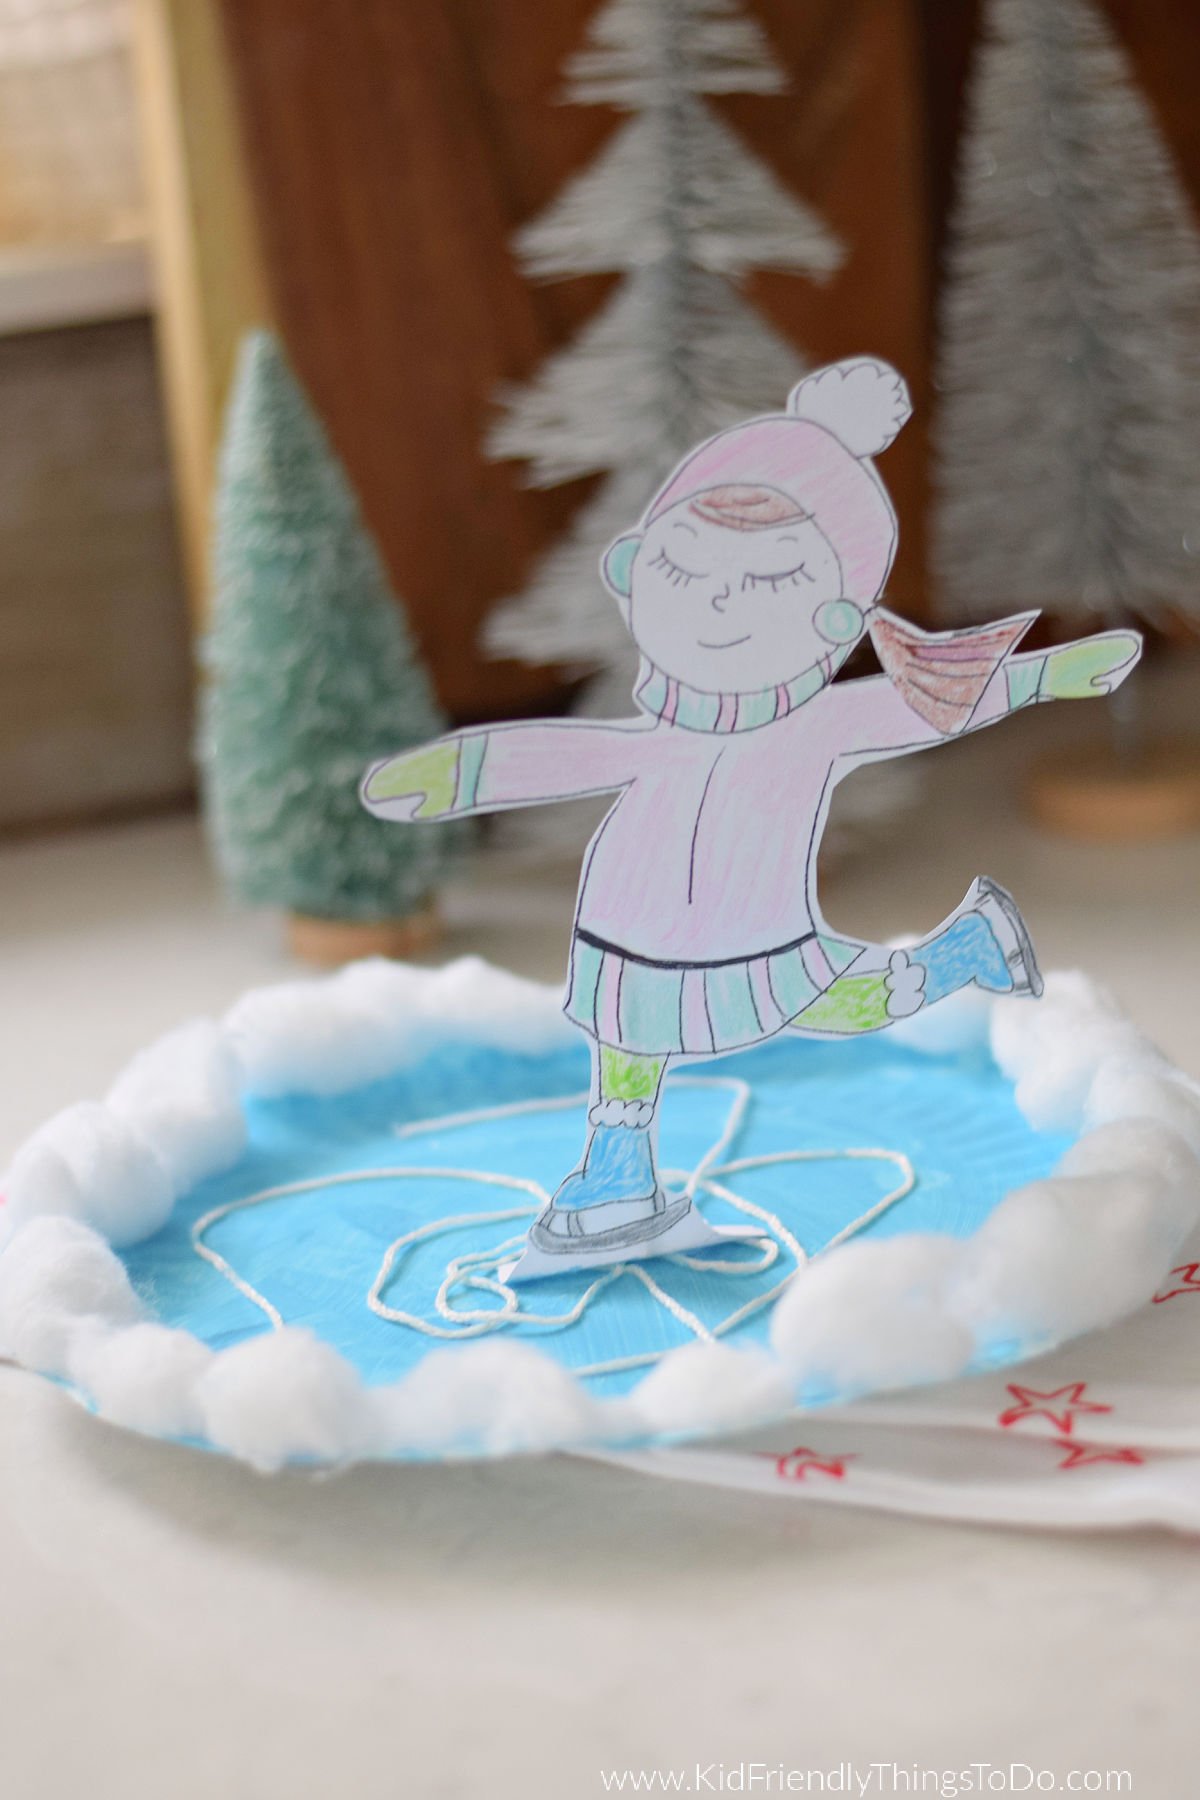
Ice skating craft ideas are perfect for winter, and this Ice Skating Paper Plate Craft is a cozy, sparkly project kids will love. Kids will love creating skate marks across a frozen pond and finishing it off with a standing ice skater—complete with fluffy snow around the edges. It’s a perfect winter art activity for classrooms, playdates, or snowy afternoons at home.
Best of all, this craft uses basic supplies and includes two free skater printables (a boy and a girl) to make prep easy for grown-ups.
I love winter crafts for kids, especially during those long, gloomy days when everyone is stuck indoors. There’s no better way to add a little color and creativity to the day than crafting together like paper doily snowman, toilet paper tube snowman, and this homemade winter birdfeeder.
Why We Love This Winter Craft
- Encourages creativity and fine motor skills
- Combines painting, texture, and simple assembly
- Works great for a wide range of ages
- Minimal prep with big visual payoff
- Makes an adorable winter display
Supplies Needed
- Paper plate
- Light blue paint – I ended up combining a light blue with white to get the shade that I wanted.
- Paintbrush or sponge brush
- White yarn, I found some white yarn with a little sparkle to it that is perfect for this craft.
- Cotton balls
- Glue school glue works ok, but it can also be a bit frustrating to wait on. I found that a tacky glue for crafting dries faster and holds a little better. Alternatively, you could use tape.
- Free ice skater printables (boy and girl)
- Cardstock (for printing)
- Crayons or markers
- Scissors
- Flat-end toothpick
How to Make the Ice Skating Craft
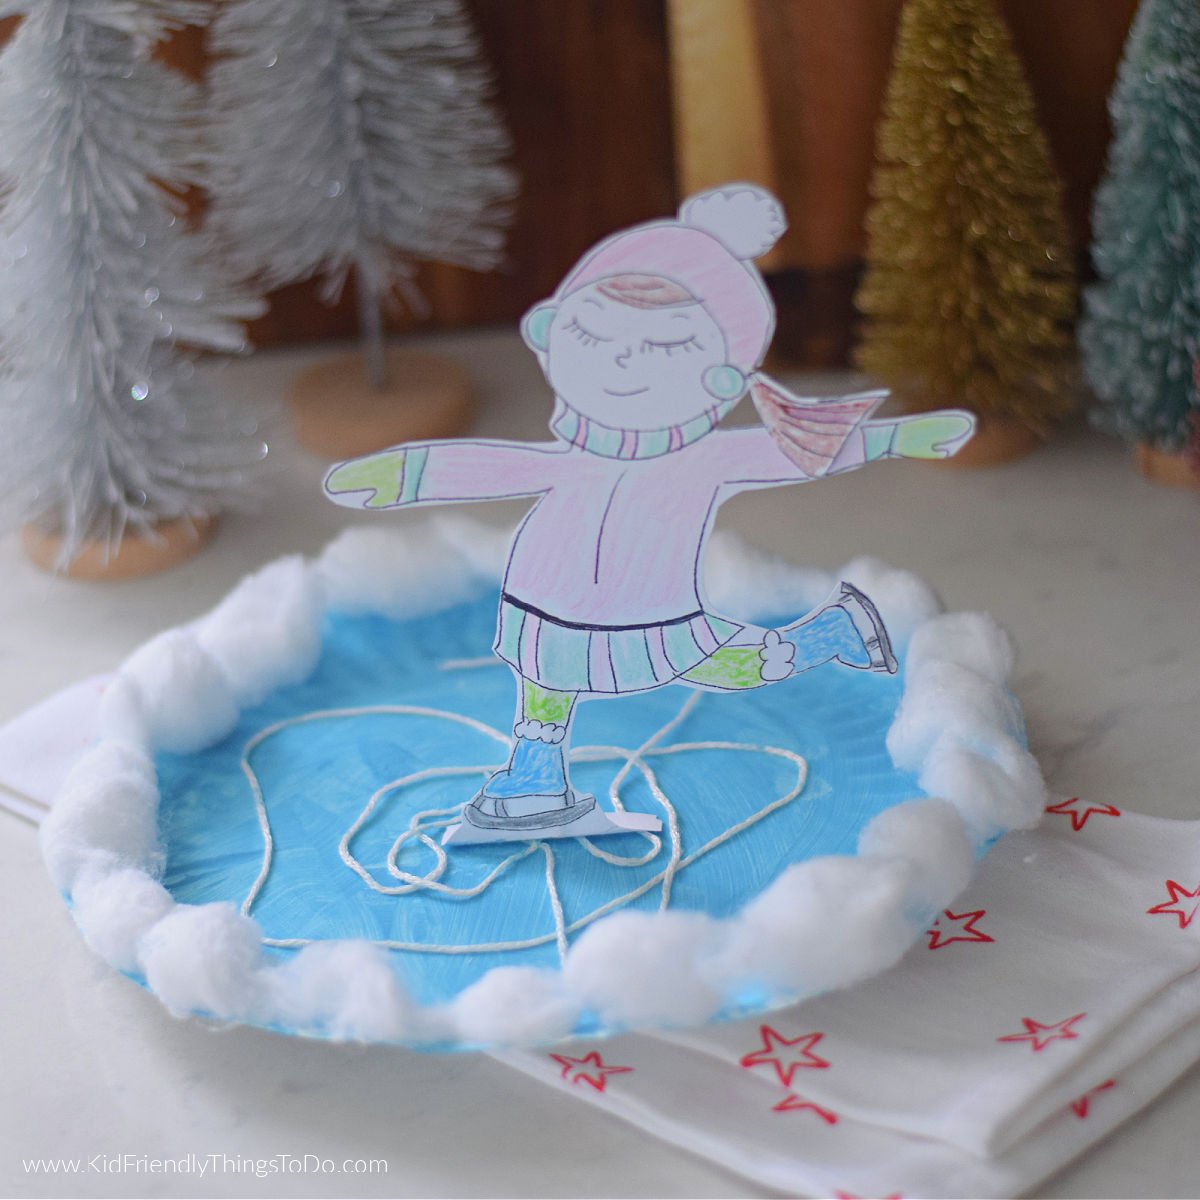
Create the Frozen Pond
Begin by painting the paper plate light blue. I combined light blue and white to get an even lighter blue for this craft.
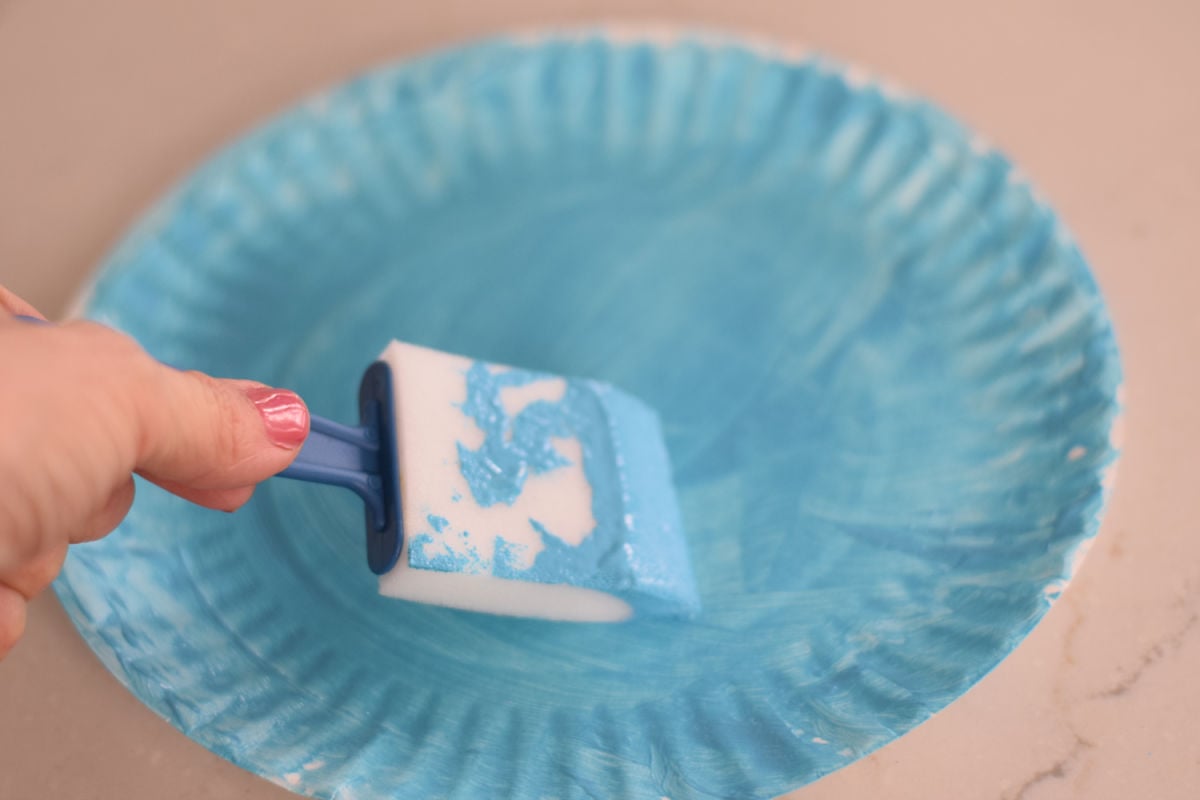
While the paint is still wet, press the white sparkly yarn into the paint, moving it back and forth and all around the plate. This creates the look of real skate marks on ice and adds fun texture. Set the plate aside to dry completely.

Add the Snowy Edge
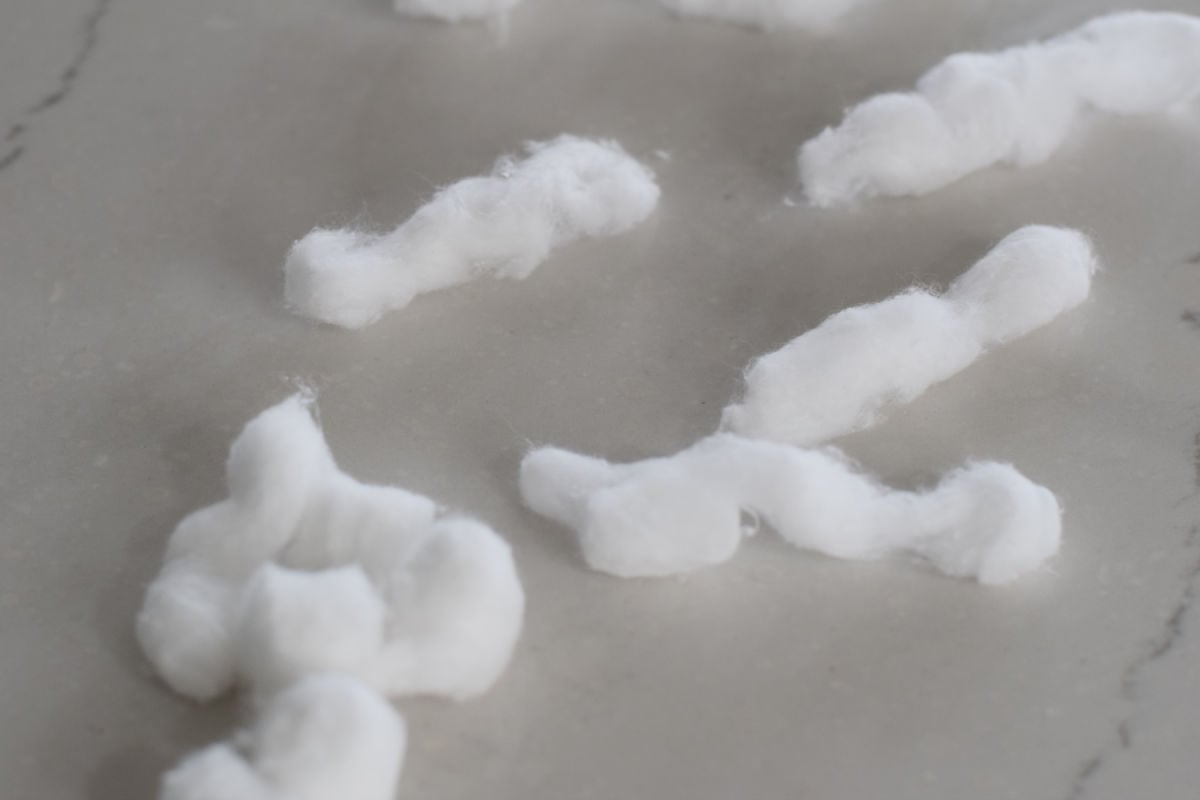
Gently pull the cotton balls apart to make them longer and fluffier. Glue them around the outer edge of the paper plate to resemble soft piles of snow surrounding the frozen pond. Allow the glue to dry.
Prepare the Ice Skater
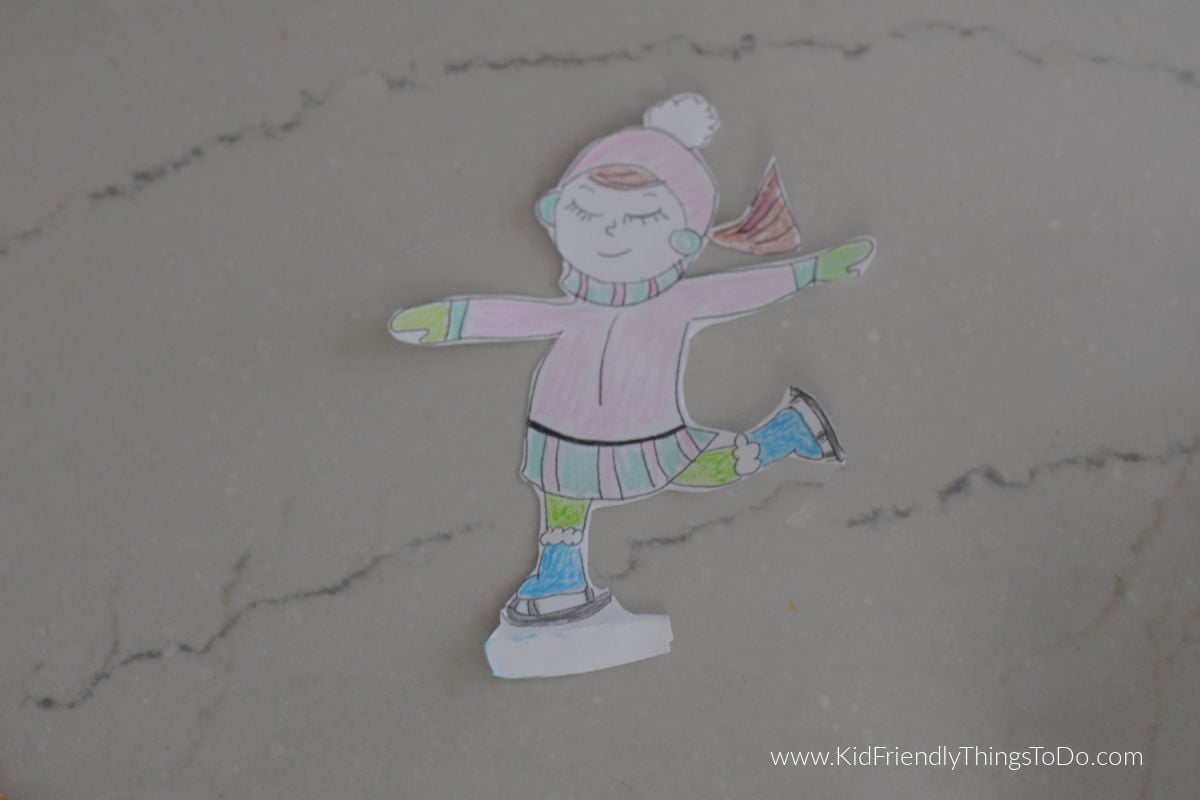
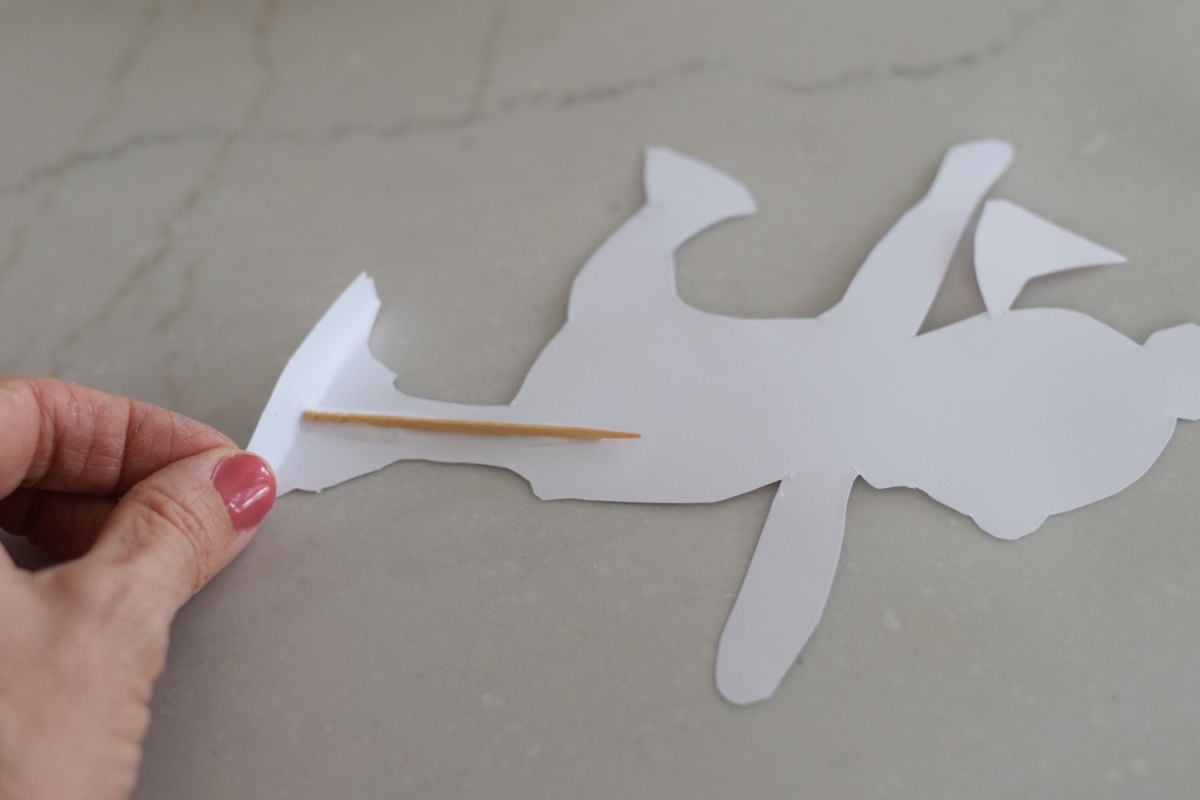
Print the free ice skater printable (boy or girl) onto cardstock. Color the skater and carefully cut it out. Be sure to cut the extra dotted-line section under one skate, as this will be used for gluing. Bend the dotted section underneath the skate to create a small tab.
Add Stability
To help the skater stand upright, glue a flat-end toothpick to the back/bottom of the skater. Let this dry completely before moving on.
Assemble the Craft
Once everything is dry, glue the skater onto the paper plate pond using the bent skate tab and the toothpick support. Press gently and allow the glue to set fully.
Tips for Success
- Cardstock works best for the skaters, so they don’t bend or flop over
- Let each step dry fully before moving on for the best results
- Younger kids may need help with cutting and gluing the skater
Variations
Interactive Skating Craft
Interactive Spinning Skater
Fun for movement-based craft and play.
Cut a small circle in the plate where the skater goes, attach the skater with a brad fastener, and let them spin their skater around the pond.
Interactive Moving Skater
Attach a small paper clip to the skater’s tab.
Place a magnet under the paper plate pond.
Kids can “skate” their skater around the frozen pond by moving the magnet underneath, making the craft interactive and playful.
This is perfect for classroom or home use and adds an extra STEM-like element with magnetic movement.
Popsicle Stick Skater
Instead of just a toothpick for stability, glue the skater onto a popsicle stick so it can “stand” in the snow and be played with like a small figure.
Cut a slit in the plate for the skater to move back and forth.
Snowy Winter Scene
- Add mini cotton ball snowmen or trees around the plate edge.
- Children can use blue and white watercolor wash for a frosty pond instead of acrylic paint.
Seasonal Theme Skaters
- Make holiday or seasonal versions:
- Christmas: Add tiny paper gifts or tree cutouts.
- Valentine’s: Add heart-shaped snow patches or pink/red accents.
- Winter sports: Make the skater hold a paper hockey stick or figure skating props.
Perfect For
- Winter-themed units
- Snow and ice lessons
- Classroom bulletin boards – If you modify them just a little.
- Home crafting days
- January and February art projects
This ice skating paper plate craft is such a sweet way to celebrate winter creativity. Every finished piece looks a little different, and the skate marks make it feel extra special. Don’t forget to grab the free skater printables and enjoy crafting your own frozen pond scene!
More Winter Crafts You’ll Love
Happy crafting!
Printable Craft

Winter Paper Plate Craft: Ice Skating Craft for Kids
Materials
- Paper plate
- Light blue paint
- Paintbrush or sponge brush
- White yarn
- Cotton balls
- Glue Tacky craft glue that is fast-drying works best.
- Free ice skater printable boy or girl
- Cardstock (for printing)
- Crayons or markers
- Scissors
- Flat-end toothpick
Instructions
Create the Frozen Pond
Begin by painting the paper plate light blue. While the paint is still wet, press the white sparkly yarn into the paint, moving it back and forth and all around the plate. This creates the look of real skate marks on ice and adds fun texture. Set the plate aside to dry completely.Add the Snowy Edge
Gently pull the cotton balls apart to make them longer and fluffier. Glue them around the outer edge of the paper plate to resemble soft piles of snow surrounding the frozen pond. Allow the glue to dry.Prepare the Ice Skater
Print the free ice skater printable (boy or girl) onto cardstock. Color the skater and carefully cut it out. Be sure to cut the extra dotted-line section under one skate, as this will be used for gluing. Bend the dotted section underneath the skate to create a small tab.Add Stability
To help the skater stand upright, glue a flat-end toothpick to the back bottom of the skater. Let this dry completely before moving on.Assemble the Craft
Once everything is dry, glue the skater onto the paper plate pond using the bent skate tab and the toothpick support. Press gently and allow the glue to set fully.

Simple for our 4–year-old granddaughter and seasonal.
Aww. I love that! Thank you so much for coming back to tell me and thank you for the rating.