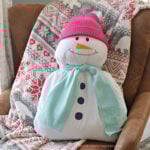
DIY No-Sew Snowman Pillow Buddy Craft
This post may contain affiliate links – please read my disclosure statement.
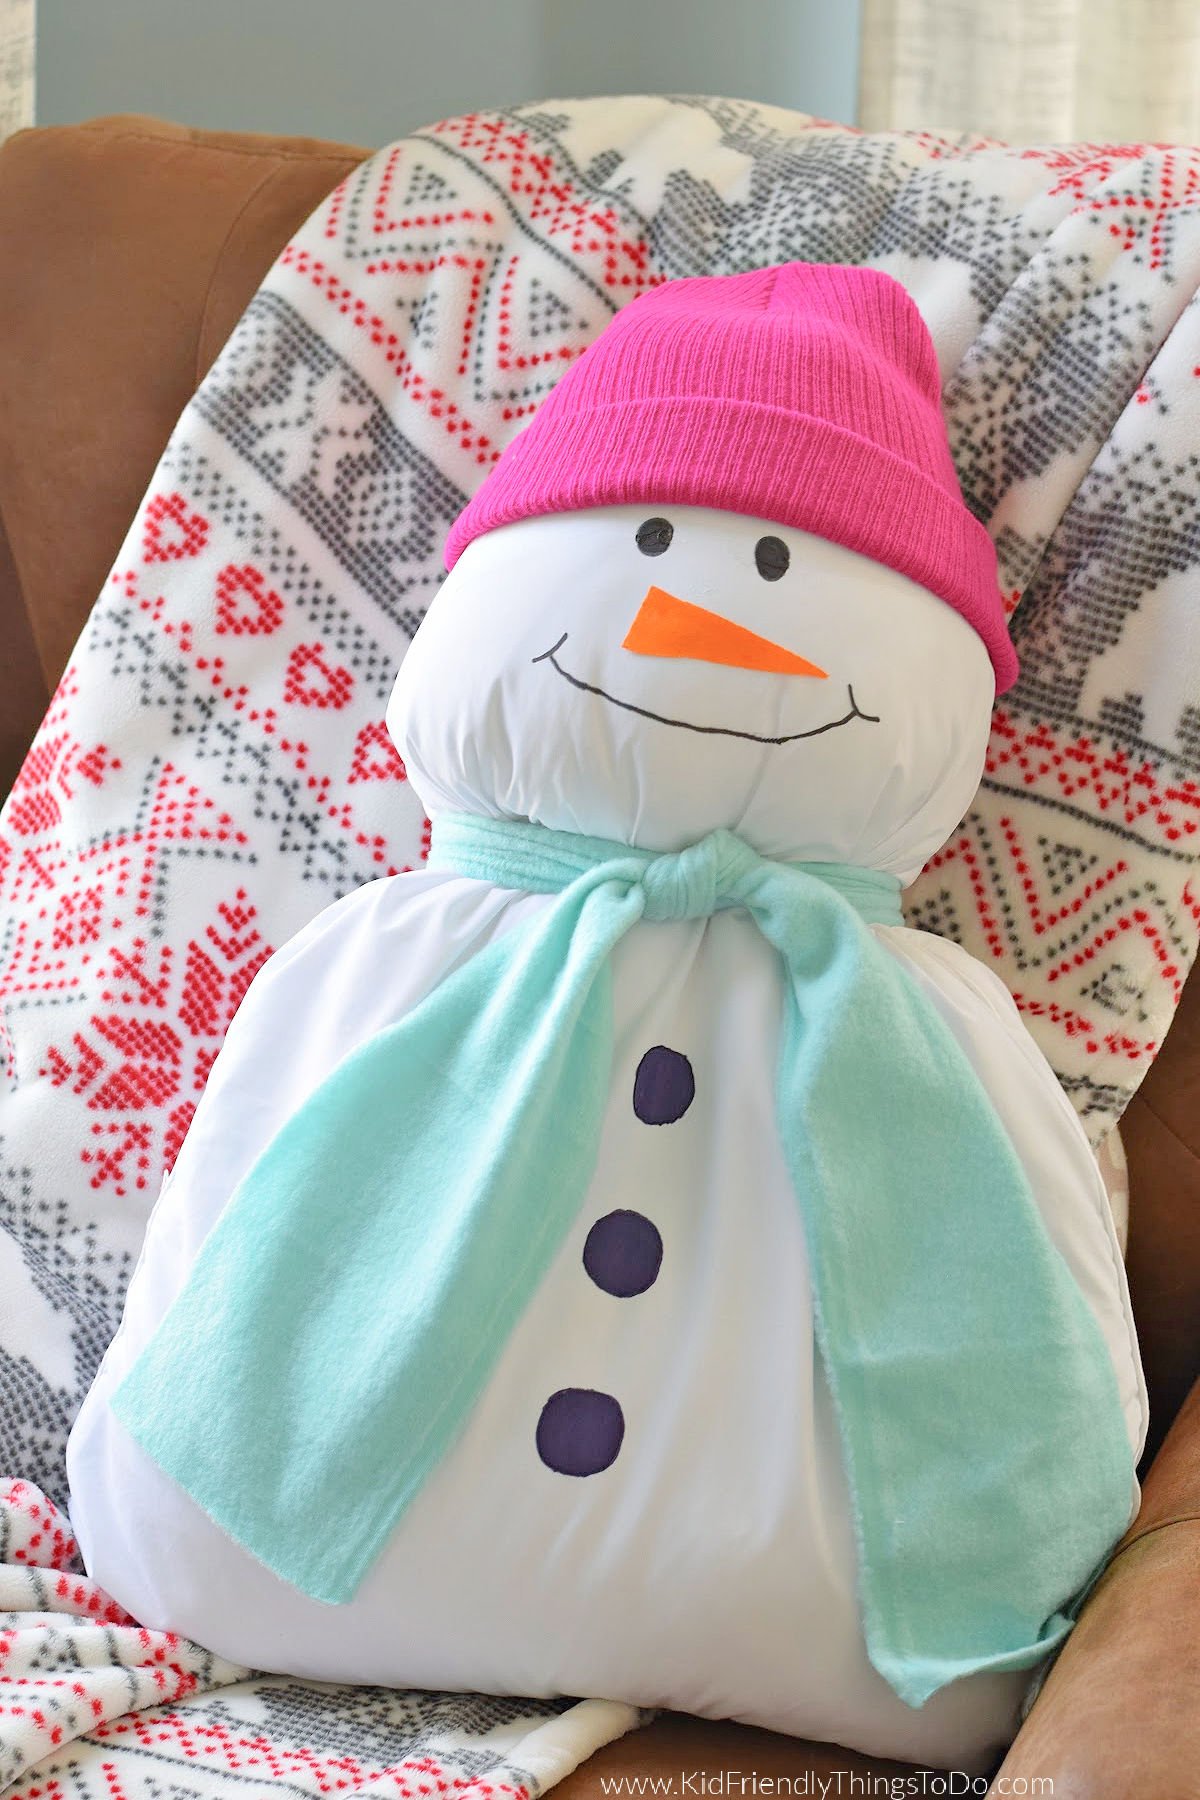
DIY no-sew snowman pillow buddy craft ideas don’t get much easier-or cuter-than this cozy winter project. Using a simple polyester pillow and a few basic supplies, you can transform an everyday pillow into an adorable snowman friend with no sewing required. It’s soft, huggable, and perfect for winter decorating, classroom fun, or a creative afternoon at home.
This project is beginner-friendly and comes together quickly with fabric, glue, and a little imagination—making it a great option for kids (with supervision), teachers, and anyone who loves easy winter crafts.
Cozy Winter Crafting with Kids
Winter is the perfect time to slow down, stay cozy indoors, and create something fun with kids. Simple winter crafts like this snowman pillow buddy, toilet paper tube snowmen, and easy snowflake art projects give kids a chance to be creative while working with textures, colors, and seasonal themes – including this adorable catching snowflake craft, or making a snowflake from a coffee filter.
Why You’ll Love This Snowman Pillow Craft
- No sewing required — perfect for beginners
- Soft and cuddly winter decor kids love
- Budget-friendly using simple supplies
- Great for winter classroom crafts or home projects
- Each snowman turns out to be unique and full of personality
What You’ll Need
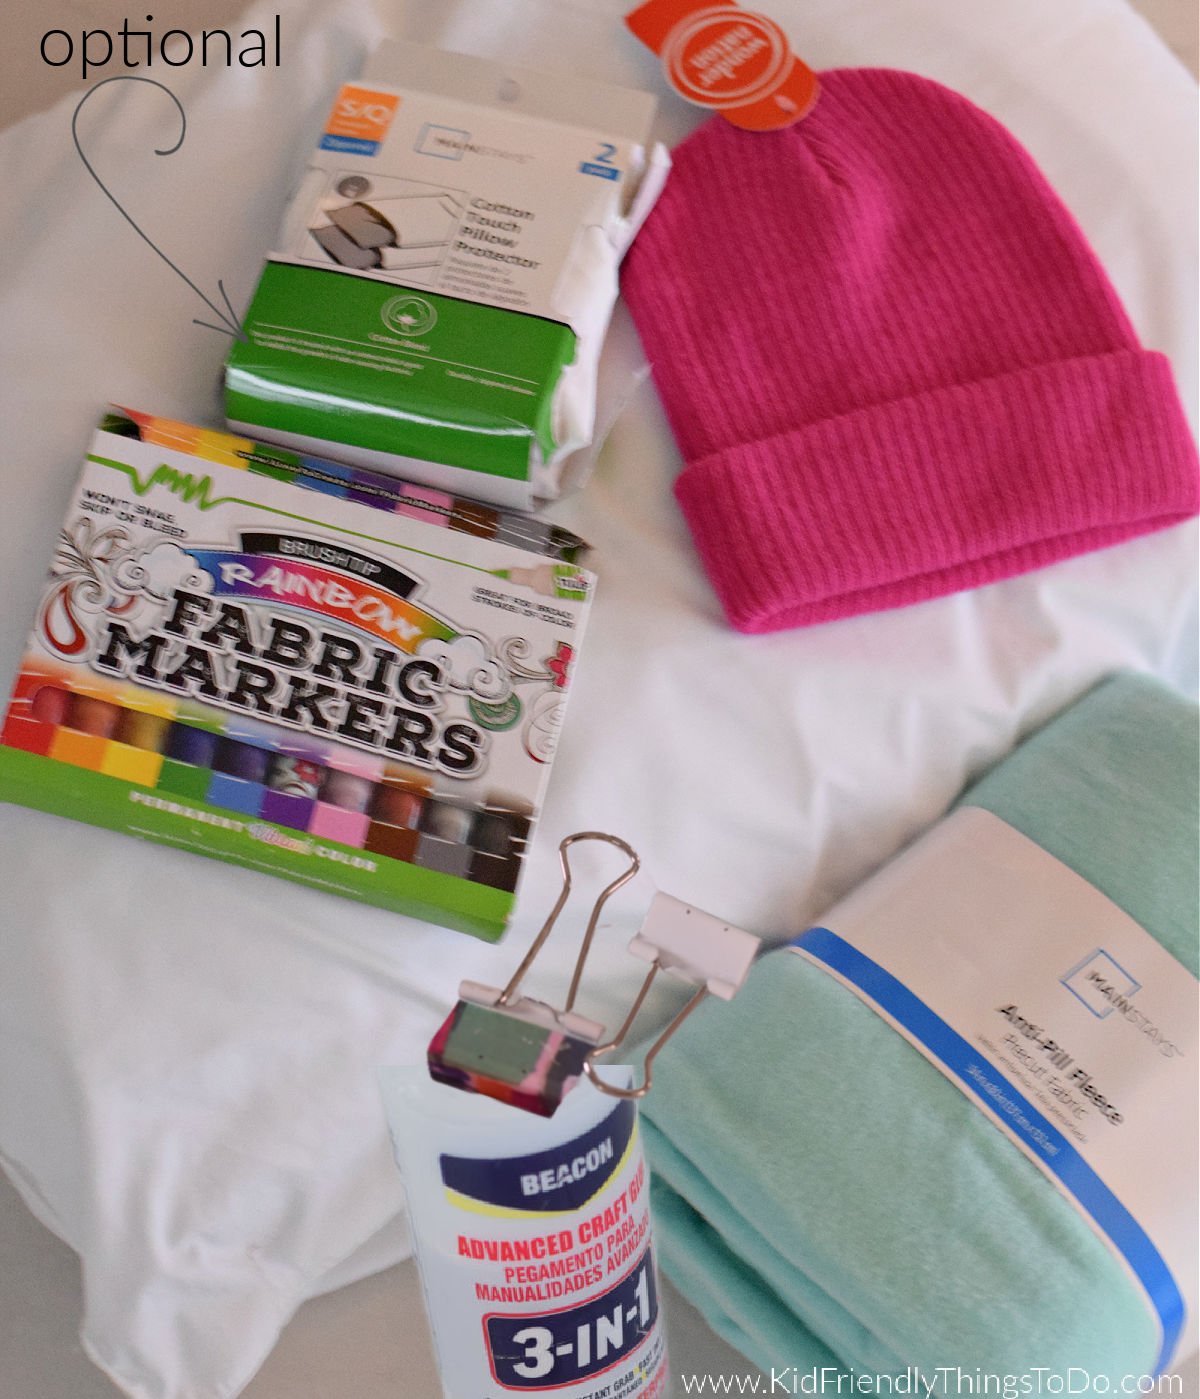
- Polyester pillow (standard or small works great)
- Fleece fabric – cut into a long strip
- Winter hat (kid-sized beanie or knit hat)
- Fabric for the nose (orange cotton, felt, or fleece)
- Fabric markers (black and optional colors)
- Strong craft glue – I use Beacon 3-in-1
- Binder clips (strong ones work best)
- Scissors
How to Make Your Snowman Pillow Buddy
Create the Head
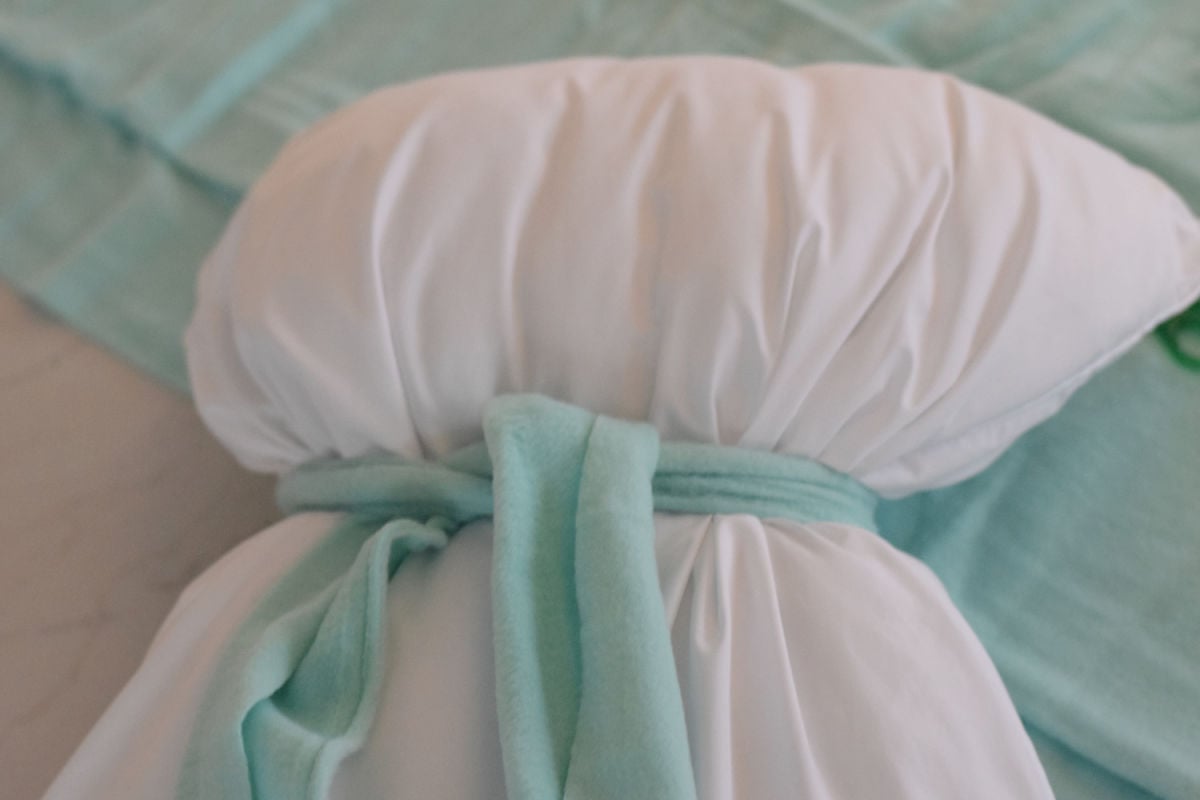
Start by wrapping and tying the fleece scarf around the pillow about one-third of the way down. Pull it snug—this forms the snowman’s “neck” and gives you a clear head and body shape.
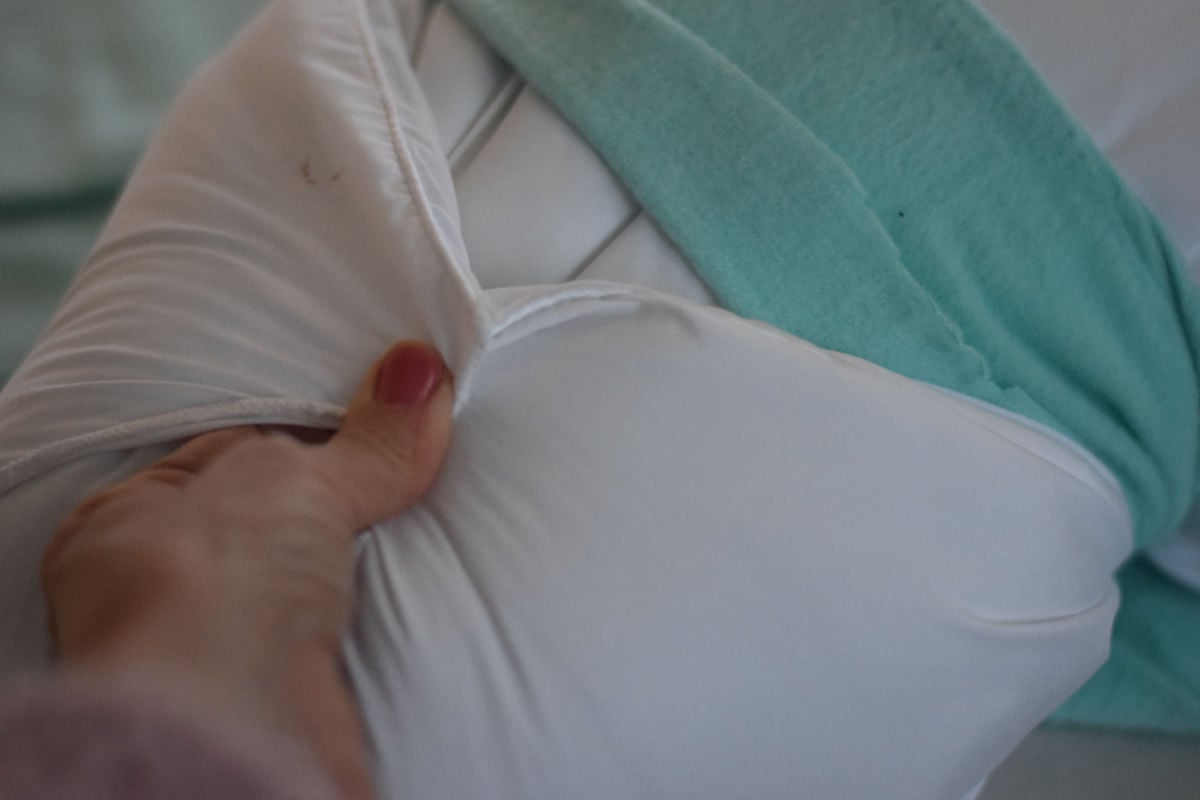
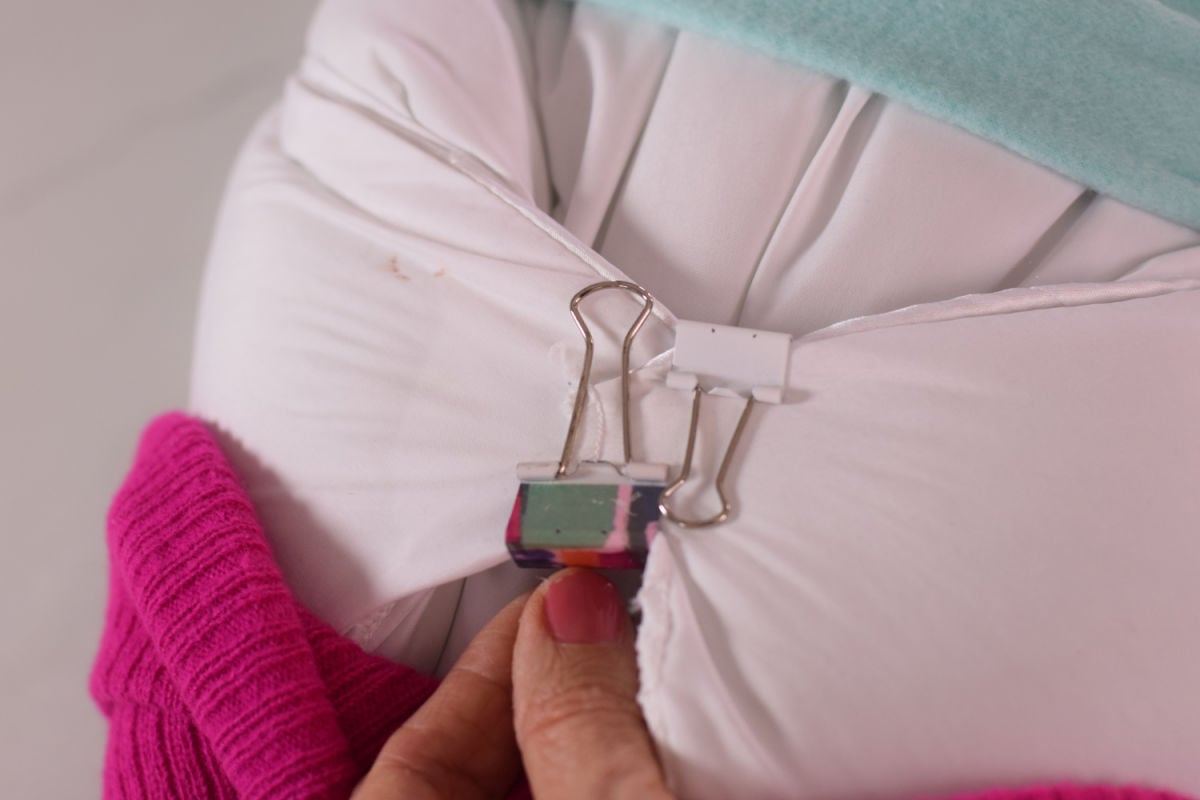
Shape the Snowman Top
At the top of the pillow, gently pull the two top corners toward each other. Add a generous amount of strong craft glue where the corners meet, then clip them together with binder clips.
Pro tip: Leave the clips on until the glue is fully dry to keep everything secure.
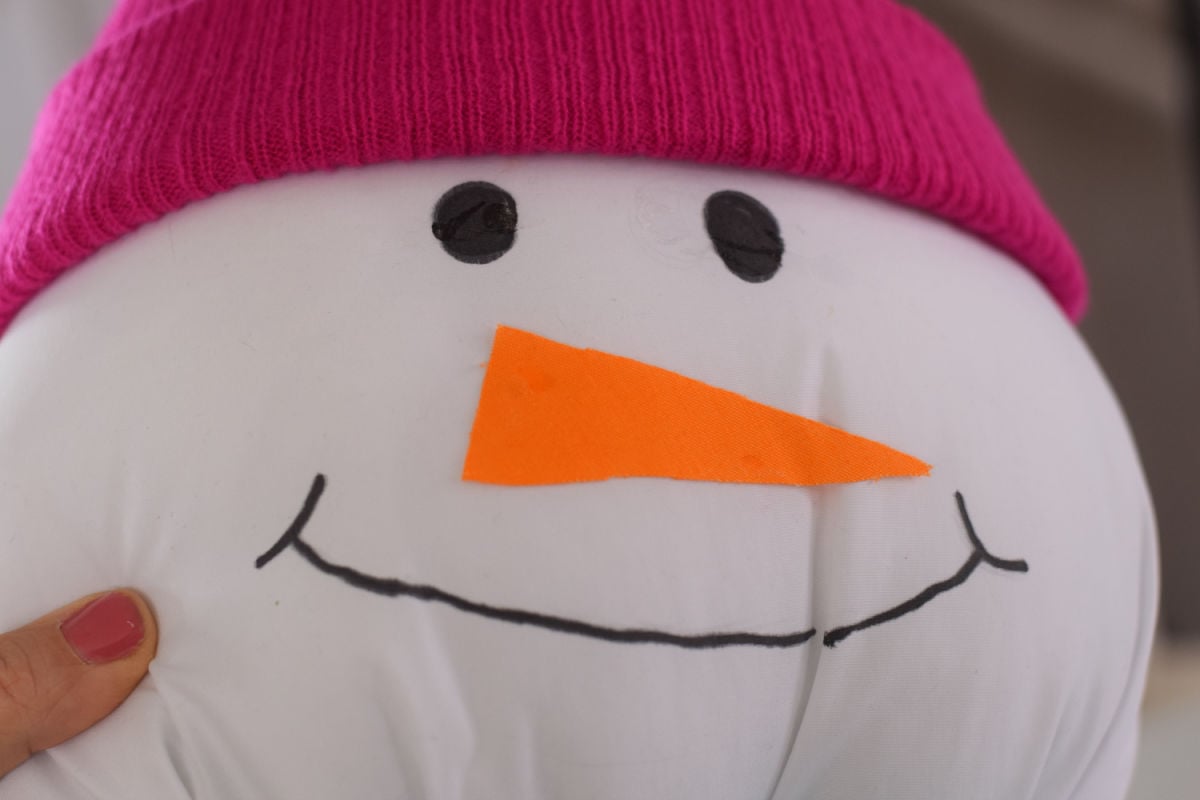
Add the Hat
While the glue dries, continue on with your craft. Slide the winter hat onto the pillow, covering the clipped area. This hides the construction and instantly brings the snowman to life.
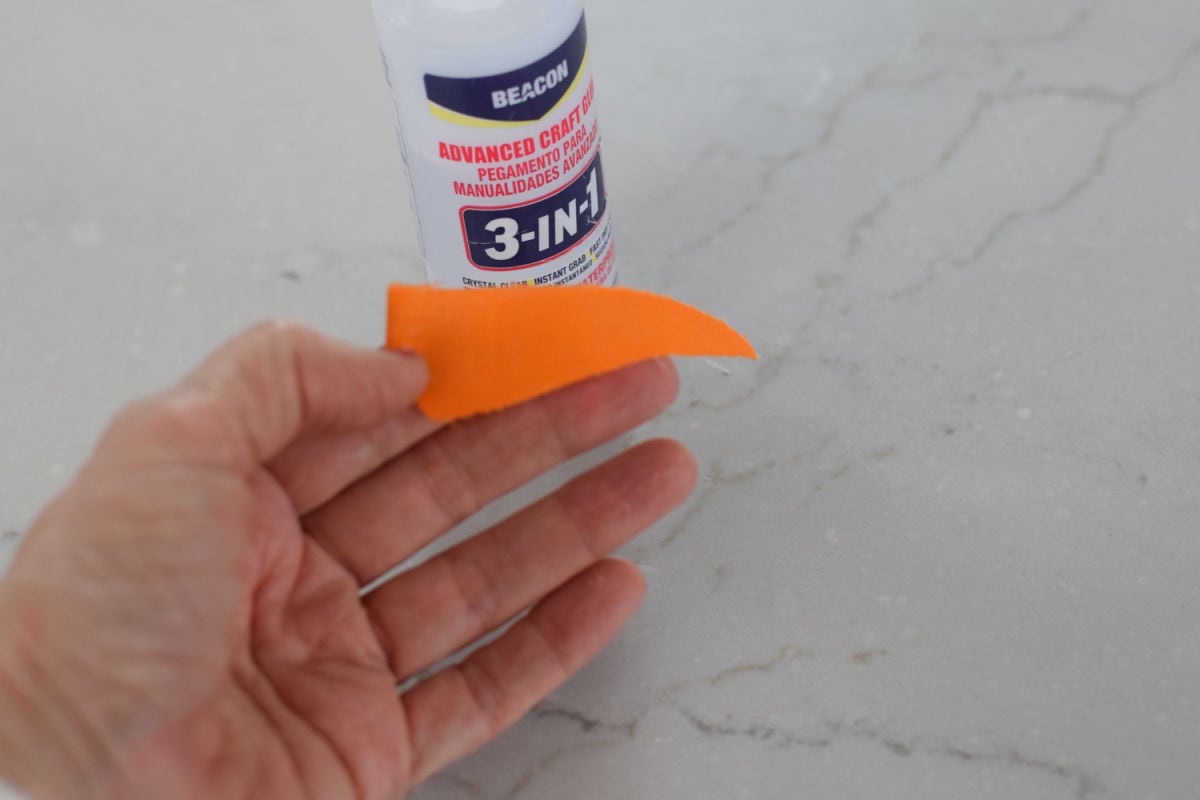
Make the Nose
Cut a small triangle or cone shape from orange fabric. Glue it onto the center of the face area and let it dry completely.
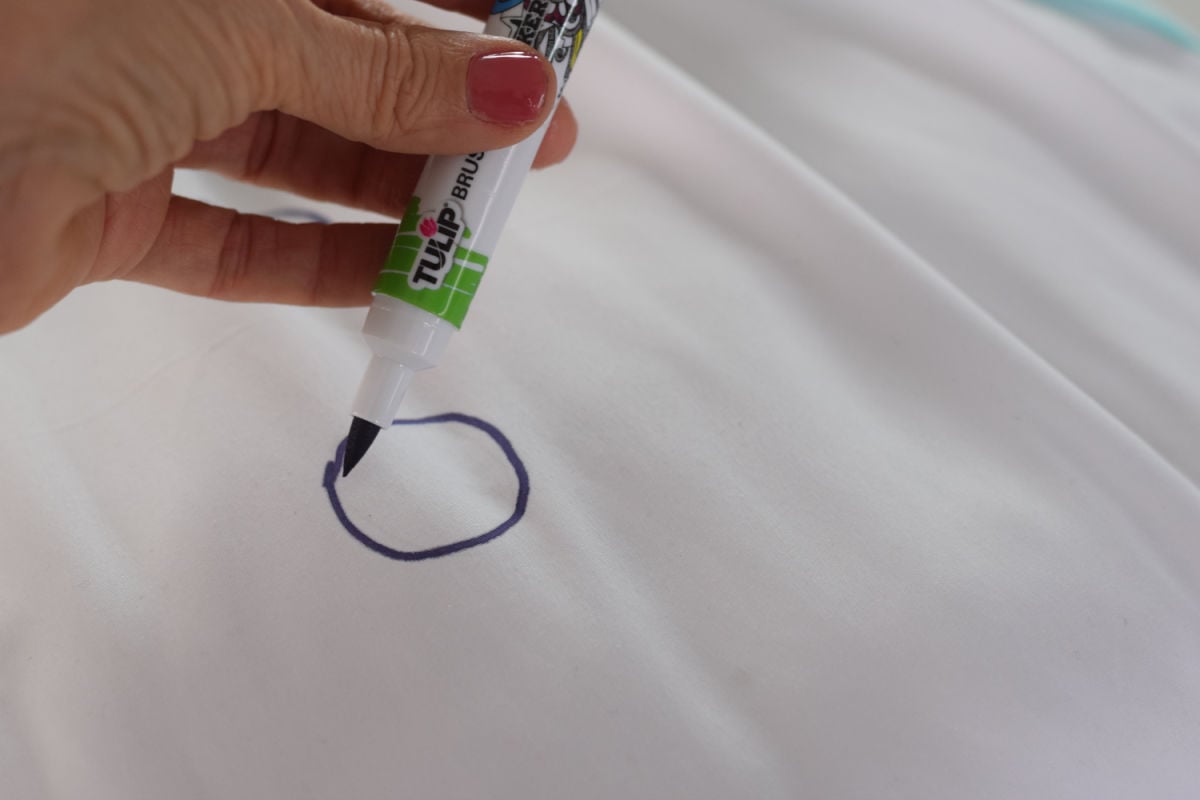
Draw the Details
Use fabric markers to draw the snowman’s face—eyes, smile, and buttons down the body. You can keep it classic or add your own personality with eyelashes, rosy cheeks, or fun expressions.
Enjoy your new Snowman Buddy

Snowman Pillow Buddy Variations
- Use patterned or holiday fleece for the scarf
- Add earmuffs instead of a winter hat
- Create different facial expressions with fabric markers
- Personalize with names or classroom labels
- Make a mini version using a small pillow
FAQs
What kind of glue works best for this craft?
A strong craft glue designed for fabric works best. I like to use Fabri-Tac or Beacon 3-in-1.
How long does the glue need to dry?
Dry time varies by brand, but letting the binder clips stay in place for at least 30 minutes.
Is this a good classroom winter craft?
Yes! With prep and adult supervision, this no-sew snowman craft works well for older kids and small groups.
Can I wash the snowman pillow?
This pillow is best used as decor or a cuddle buddy and should be spot-cleaned only.
More Crafts You’ll Love

Estimated Time for Craft
Prep Time: 10 minutes (cut fabric pieces, set out supplies)
Active Craft Time: 20 minutes per snowman
Dry Time: Allow glue to fully cure before handling
Printable
DIY No-Sew Snowman Pillow Buddy Craft
Materials
- 1 Polyester pillow (standard or small works great)
- Fleece fabric – cut into a long strip
- 1 Winter hat (kid-sized beanie or knit hat)
- Fabric for the nose (orange cotton, felt, or fleece)
- Fabric markers (black and optional colors)
- Strong craft glue – I use Beacon 3-in-1 Fabric glue would also be a good option
- Binder clips (strong ones work best)
- Scissors
Instructions
- Create the HeadStart by wrapping and tying the fleece scarf around the pillow about one-third of the way down. Pull it snug—this forms the snowman’s “neck” and gives you a clear head and body shape.
- Shape the Snowman Top-At the top of the pillow, gently pull the two top corners toward each other. Add a generous amount of strong craft glue where the corners meet, then clip them together with binder clips.Pro tip: Leave the clips on until the glue is fully dry to keep everything secure.
- Add the Hat- While the glue dries, continue crafting. Slide the winter hat onto the pillow, covering the clipped area. This hides the construction and instantly brings the snowman to life.
- Make the Nose-Cut a small triangle or cone shape from orange fabric. Glue it onto the center of the face area and let it dry completely.
- Draw the Details-Use fabric markers to draw the snowman’s face—eyes, smile, and buttons down the body. You can keep it classic or add your own personality with eyelashes, rosy cheeks, or fun expressions.