Thing 1 and Thing 2 Handprint Craft (Dr. Seuss Week Activity)
This post may contain affiliate links – please read my disclosure statement.
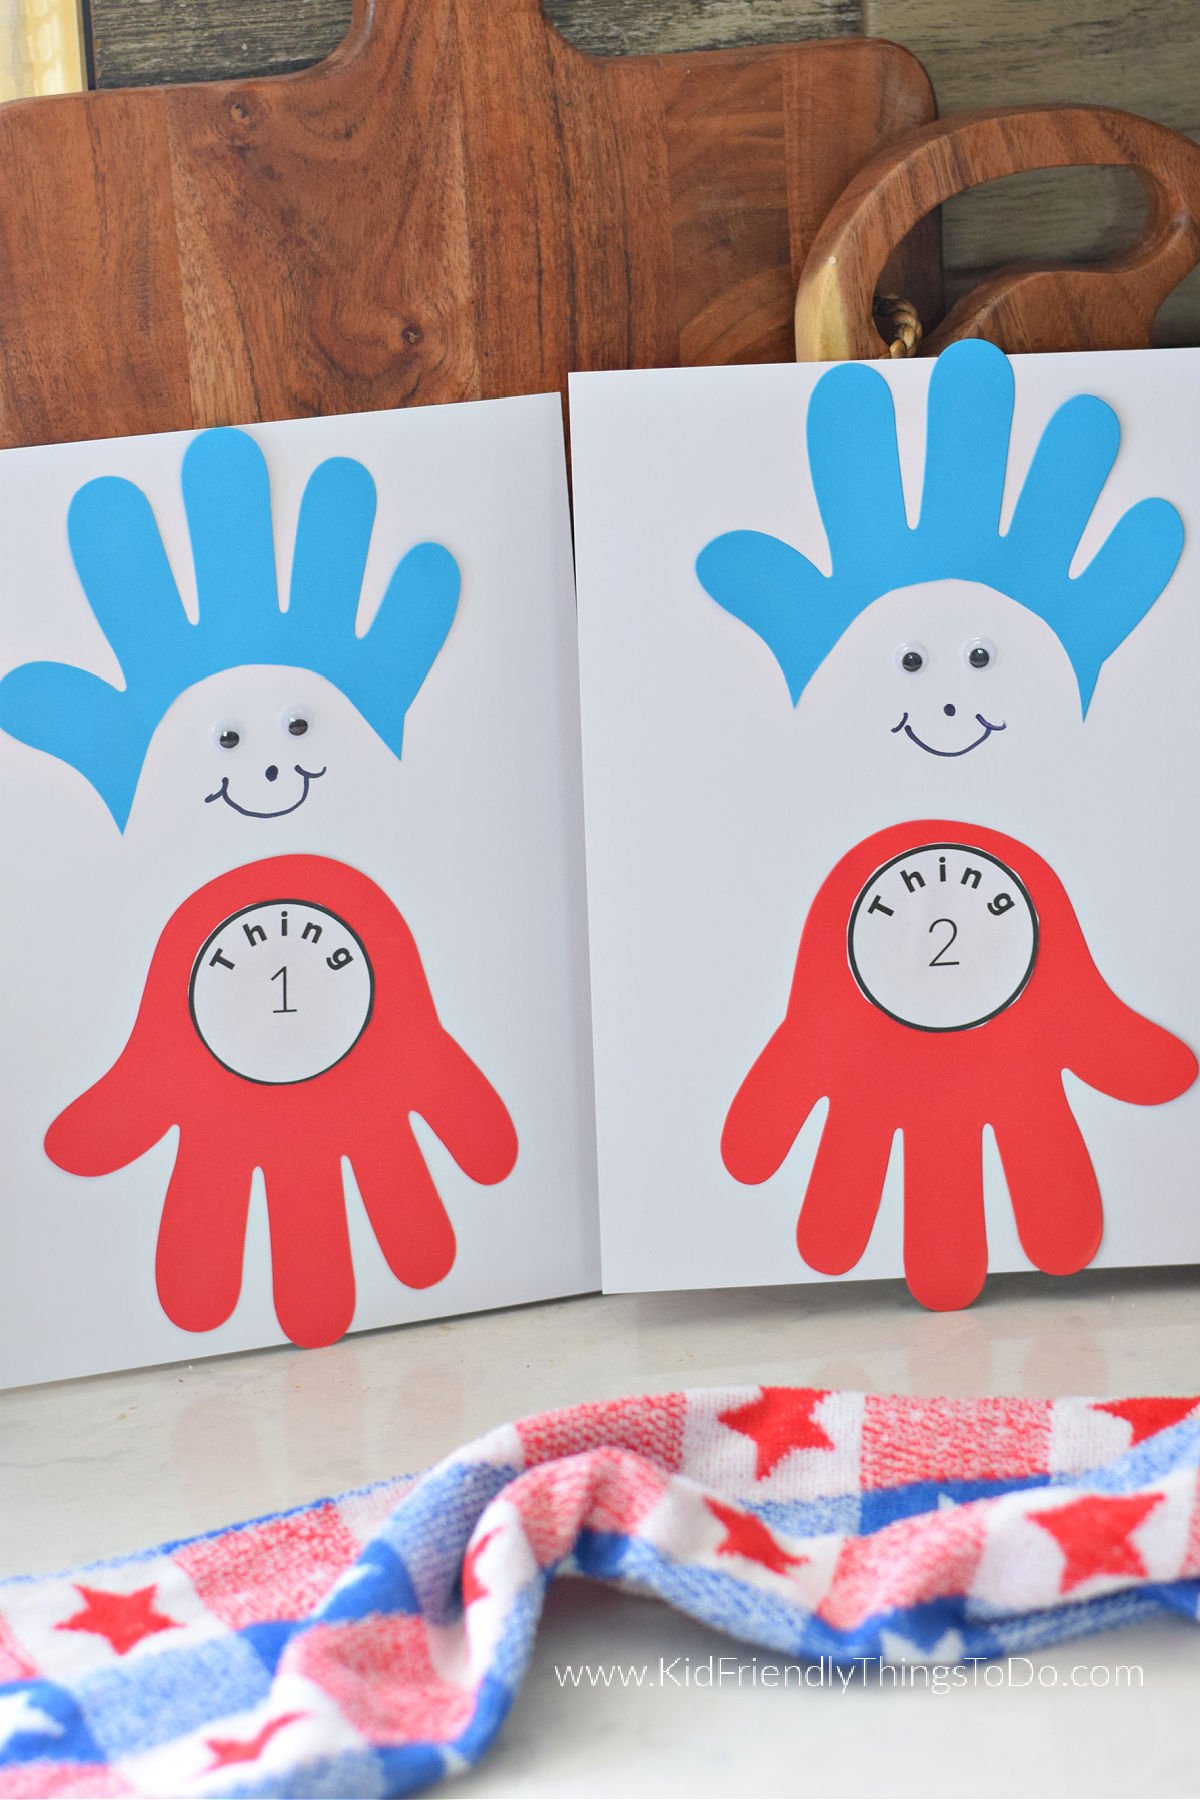
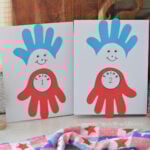
This Thing 1 and Thing 2 handprint craft is a fun, creative, and sentimental activity perfect for Dr. Seuss Week and Read Across America celebrations. Using simple handprints, kids can create their own version of Thing 1 and Thing 2 while practicing fine motor skills and creativity.
Made on white cardstock, this handprint craft can be completed using paint or a cut-and-paste method, making it easy to adapt for classrooms, homeschool settings, or at-home crafting. A printable set of Thing 1 and Thing 2 belly circles completes the look and helps bring these beloved characters to life.
Dr. Seuss crafts are a favorite during literacy celebrations. This activity pairs well with other popular projects like Truffula Tree Crayons, Toilet Paper Tube Cat in the Hat Craft, and this Bookmark Craft, making it a great addition to themed lessons or bulletin board displays.
Why You’ll Love This Thing 1 and Thing 2 Craft
- A meaningful handprint keepsake parents love to save
- Perfect for Dr. Seuss Week and Read Across America
- Works for multiple age groups
- Easy to customize with paint or paper
- Great for classroom displays and hallway decor
Supplies Needed
- White cardstock
- Red paint and blue paint or red and blue construction paper
- Printable Thing 1 and Thing 2 belly circles
- Googly eyes
- Black marker
- Glue
- Scissors
- Paper towels or wipes (if painting)
How to Make the Thing 1 and Thing 2 Handprint Craft
This craft can be done two different ways, depending on age level and classroom setup.
Painted Handprint Method
- Step one: Start with a sheet of white cardstock placed on a flat, protected surface.
- Step two: Paint the child’s fingers blue and press it near the top of the page to create Thing 1 or Thing 2’s hair.
- Step three: Wipe hands clean and allow the paint to dry slightly.
- Step four: Paint the hand red and press it lower on the page to form the body.
- Step five: Let the paint dry completely.
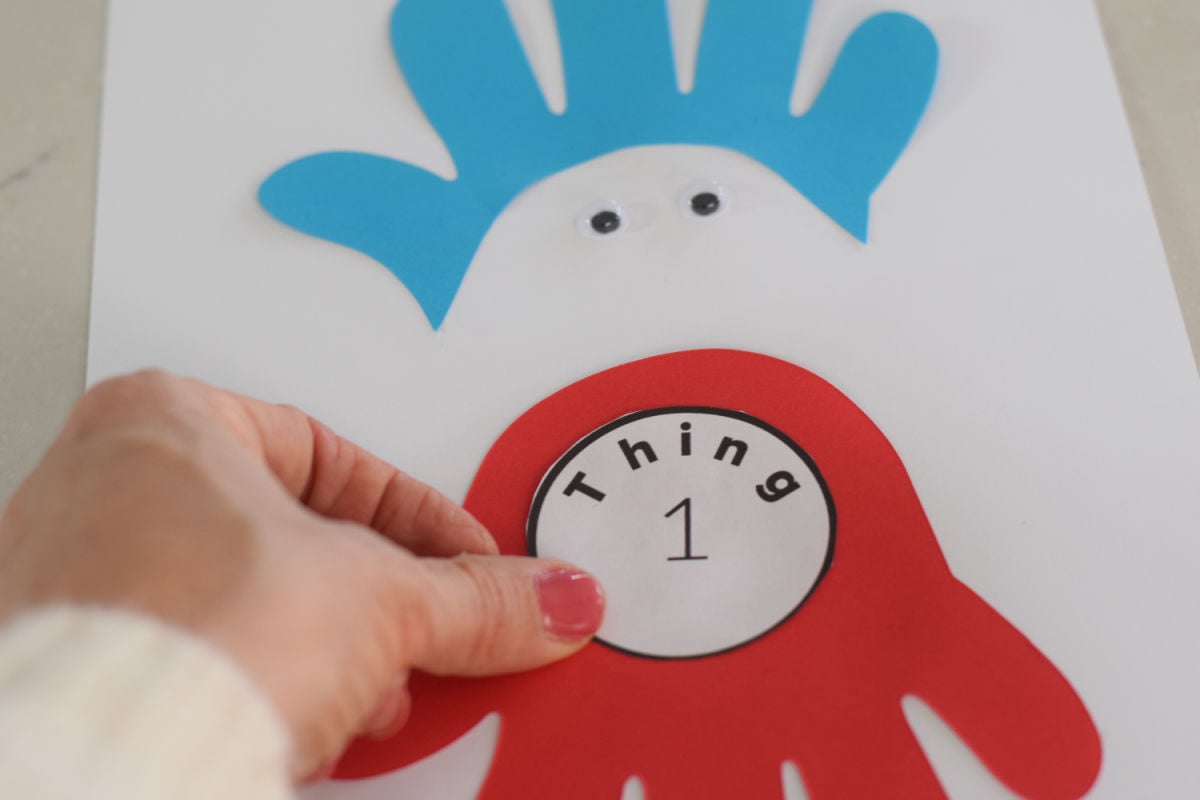
- Step six: Glue the printable Thing 1 or Thing 2 belly circle onto the red handprint.
- Step seven: Add googly eyes.
- Step eight: Use a black marker to draw a simple face.
Cut-and-Paste Handprint Method
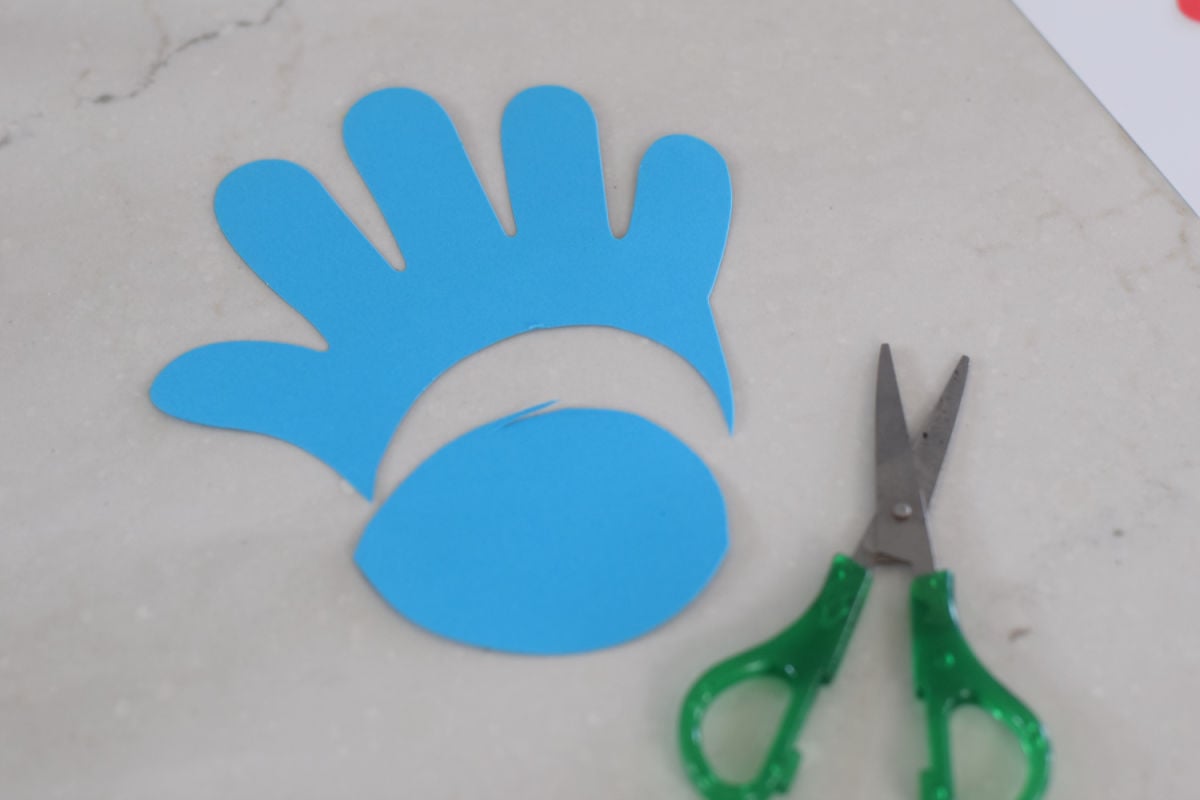
- Step one: Trace the child’s hand onto blue paper and cut it out for the hair. Remove the palm section so the curved fingers leave space for the face.
- Step two: Trace the hand onto red paper and cut it out for the body.
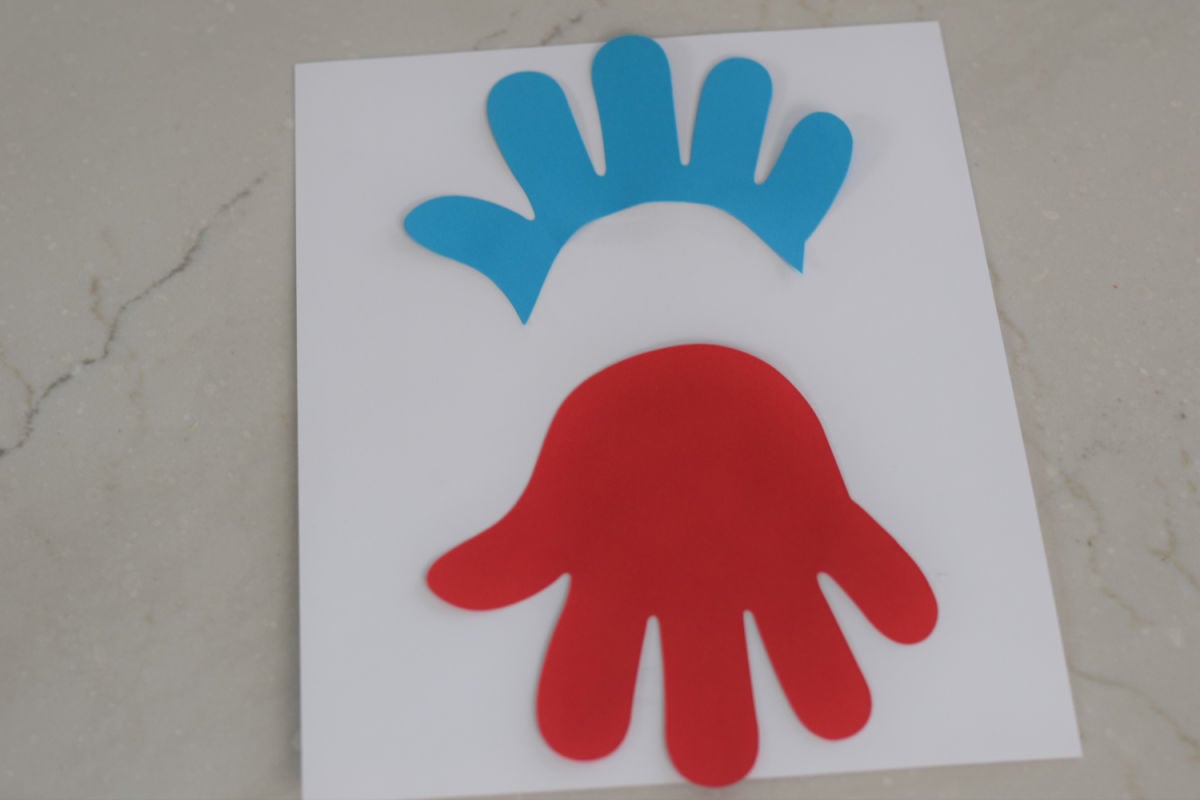
- Step three: Glue the blue handprint near the top of the white cardstock.
- Step four: Glue the red handprint below it to create the body.
- Step five: Attach the printable Thing 1 or Thing 2 belly circle with glue.
- Step six: Add googly eyes.
- Step seven: Draw the face using a black marker.
Expert Tips
- Use cardstock instead of regular paper for sturdier keepsakes
- Paint hands lightly to avoid smudging details
- Let the paint dry fully before adding glue
- Pre-cut handprint shapes for younger children
- Write the child’s name and year on the back for a lasting memory
Variations
- Create Thing 1 and Thing 2 twins by making two matching crafts
- Use foam paper for added texture
- Laminate finished crafts for durability
- Display on a bulletin board with Dr. Seuss quotes
- Pair with a reading of The Cat in the Hat
FAQs
What age is this craft best for?
This craft works well for preschool through early elementary students.
Is paint required?
No. The cut-and-paste method works just as well and is less messy.
Can this be used in classrooms?
Yes! It’s perfect for group activities, bulletin boards, and hallway displays.
Storage & Display Ideas
- Store finished crafts flat in a folder
- Send home in large zip-top bags
- Display on classroom walls or doors during Dr. Seuss Week
This Thing 1 and Thing 2 handprint craft is a creative way to celebrate reading, imagination, and childhood memories. It’s an easy, meaningful activity that kids enjoy making and families cherish long after Dr. Seuss Week is over.
More Handprint Crafts You’ll Love

Grab Your Printable
Thing 1 and Thing 2 Handprint Craft (Dr. Seuss Week Activity)
Materials
- White cardstockRed paint and blue paint or red and blue construction paperPrintable Thing 1 and Thing 2 belly circlesGoogly eyesBlack markerGlueScissorsPaper towels or wipes (if painting)
Instructions
Painted Handprint Method
- Step one: Start with a sheet of white cardstock placed on a flat, protected surface.Step two: Paint the child’s fingers blue and press it near the top of the page to create Thing 1 or Thing 2’s hair.Step three: Wipe hands clean and allow the paint to dry slightly.Step four: Paint the hand red and press it lower on the page to form the body.Step five: Let the paint dry completely.Step six: Glue the printable Thing 1 or Thing 2 belly circle onto the red handprint.Step seven: Add googly eyes.Step eight: Use a black marker to draw a simple face.
Cut-and-Paste Handprint Method
- Step one: Trace the child’s hand onto blue paper and cut it out for the hair. You'll cut the palm completely out, leaving the fingertips. Remember to make a curved "head" shape when cutting the palm section.Step two: Trace the hand onto red paper and cut it out for the body.Step three: Glue the blue handprint near the top of the white cardstock.Step four: Glue the red handprint below it to create the body.Step five: Attach the printable Thing 1 or Thing 2 belly circle with glue.Step six: Add googly eyes.Step seven: Draw the face using a black marker.