How To Tie Dye Sheets
This post may contain affiliate links – please read my disclosure statement.
This summer, have fun tie-dying your bedding. Transform plain white sheets into a colorful, vibrant, and fun bed set – a great way to decorate a child’s or teenager’s bedroom, or a fun summer project with the kids.
When it’s finally summertime, I am ready for some color and fun. Enough of the drab winter days. I say bring on sun and fun like making puffy sidewalk chalk, rock painting, and this cute paper plate sun craft.
Every summer, I travel back to my home state of Indiana, and in those two short weeks, I try to spend as much quality time as possible with my nieces and nephews. One of our favorite traditions over the years has become Aunt Meme’s Tie-Dye Projects. Each summer, I dream up something new and fun to tie-dye, and the kids dive right in!
They’re not so little anymore – ranging in age from 20 down to newborn – but they’ll always be my little nieces and nephews. It’s a tradition I hope they’ll never forget and look forward to: Aunt Meme, summertime, and a colorful project that brings us all together for some messy, memorable fun.
Last summer, with some of them heading off to college, I thought tie-dye sheets would be the perfect project – something fun yet practical. There’s something special about pulling back your blanket at night and seeing those vibrant, personalized sheets. Whether they’re at home or away at school, I hope they think of us every time they go to bed. These sheets are more than just colorful – they’re a reminder of how much we love them and how close we all still are, no matter the miles.
Here’s What You’ll Need to Make Tie-Dye Sheets of Your Own
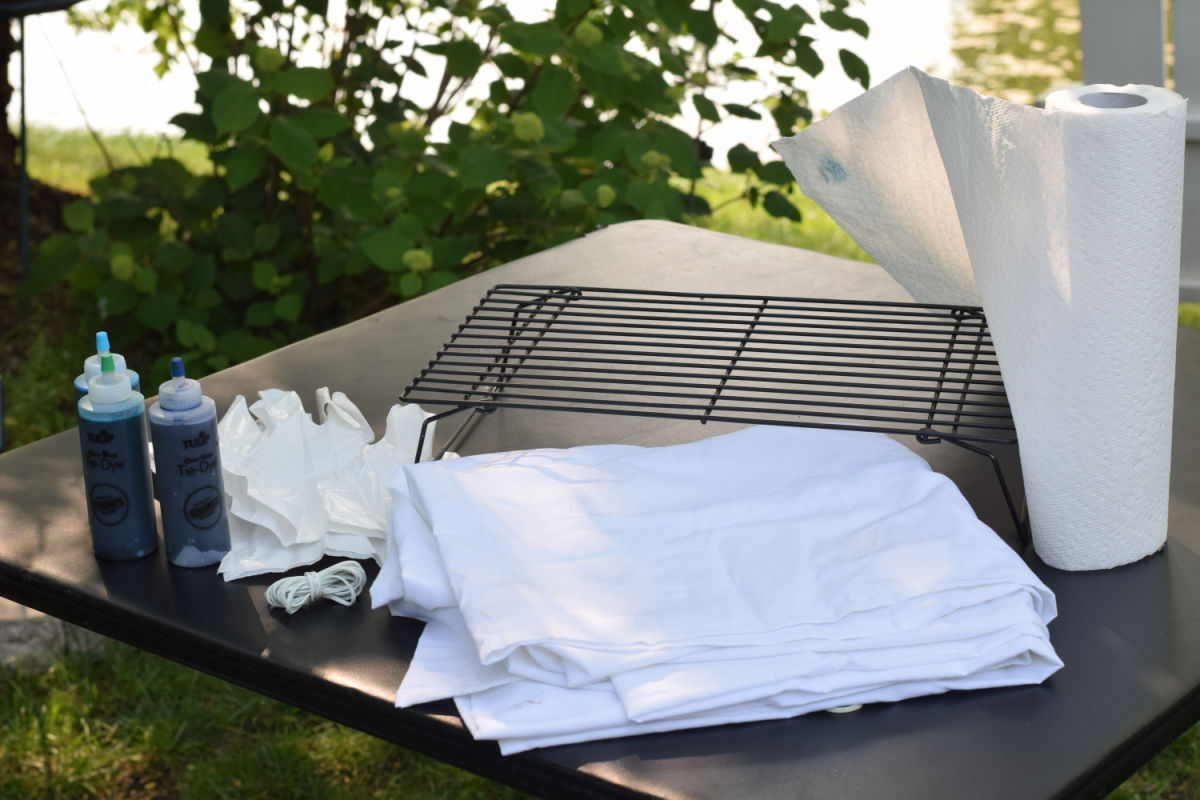
- Cotton sheets – I found mine at Walmart
- A tie-dye kit or fabric dye
- Rubber bands – usually included in the kit
- Gloves – typically in the kit
- Table covering
- Drying rack or something to keep sheets from sitting in a pool of dye
- Bags
- Water-filled bucket
- Water hose or sink
How to Make Tie Dye Sheets
Step-by-step instructions
Step 1:
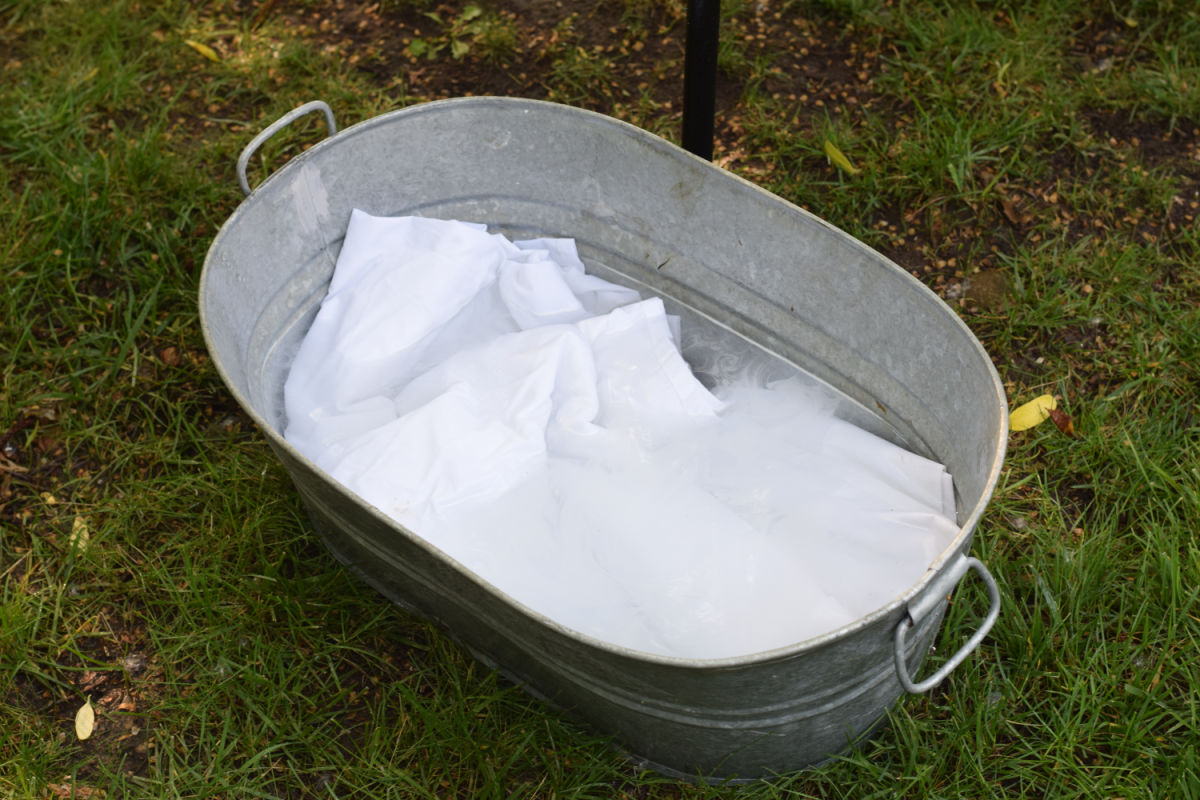
Soak the sheets. Squeeze excess water out of them and set them on the work surface
Step 2: Set Up Your Workspace
Cover your table or workspace with a disposable plastic tablecloth or tarp. Put on gloves and ensure your dye bottles are filled and ready for use.
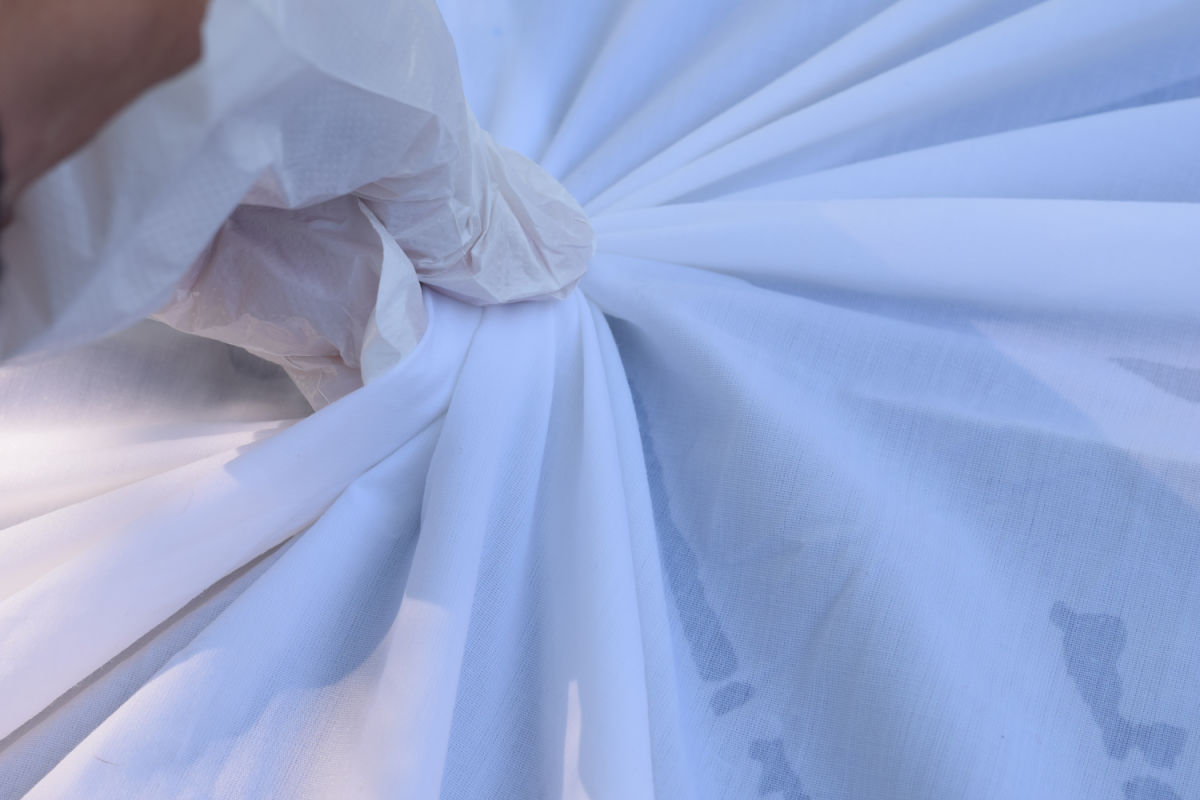
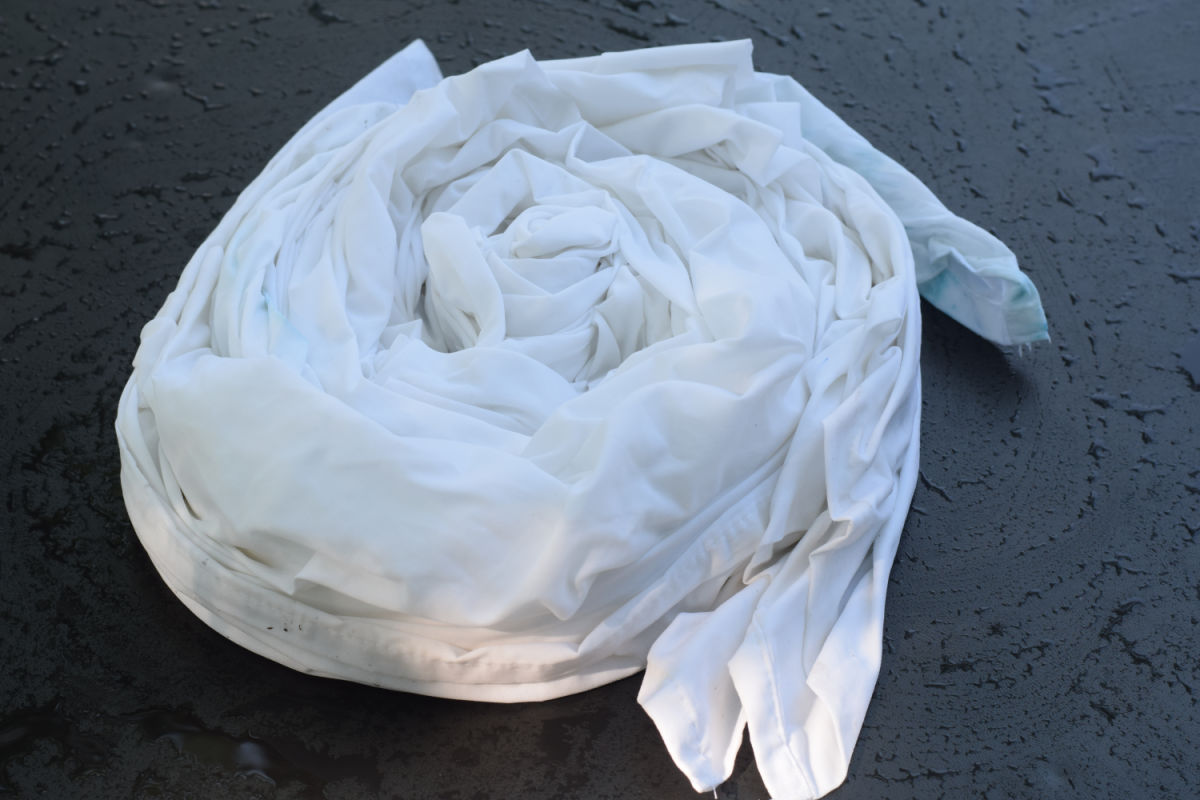
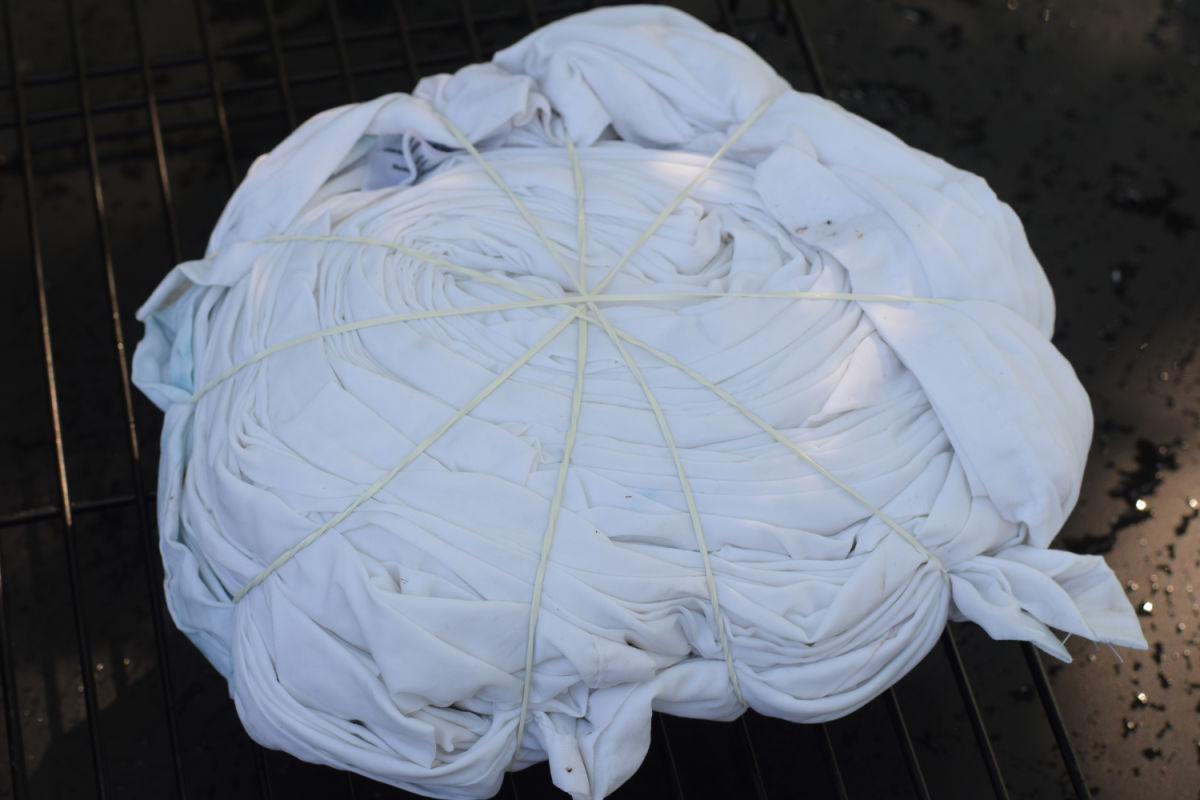
Step 3: Fold and Bind
There are lots of fun tie-dye folding techniques. Try one of these:
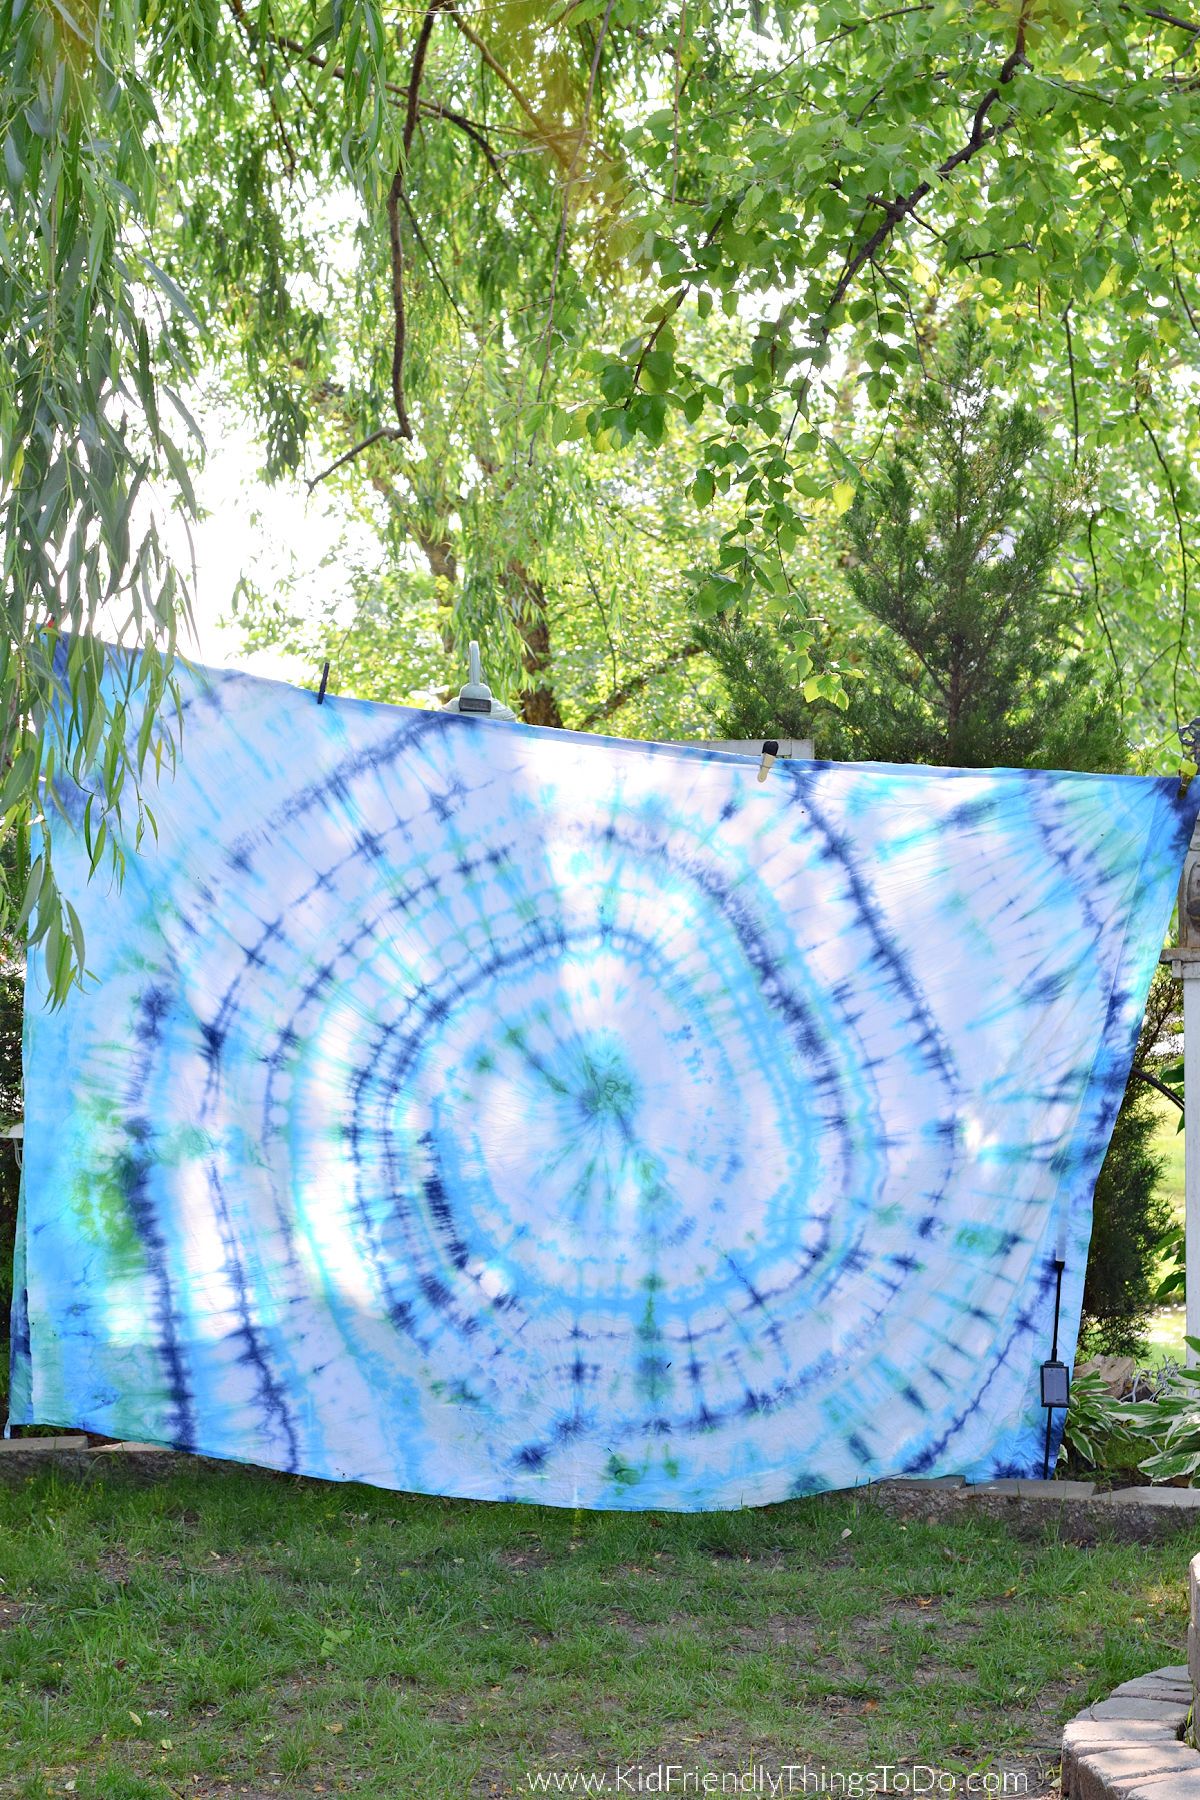
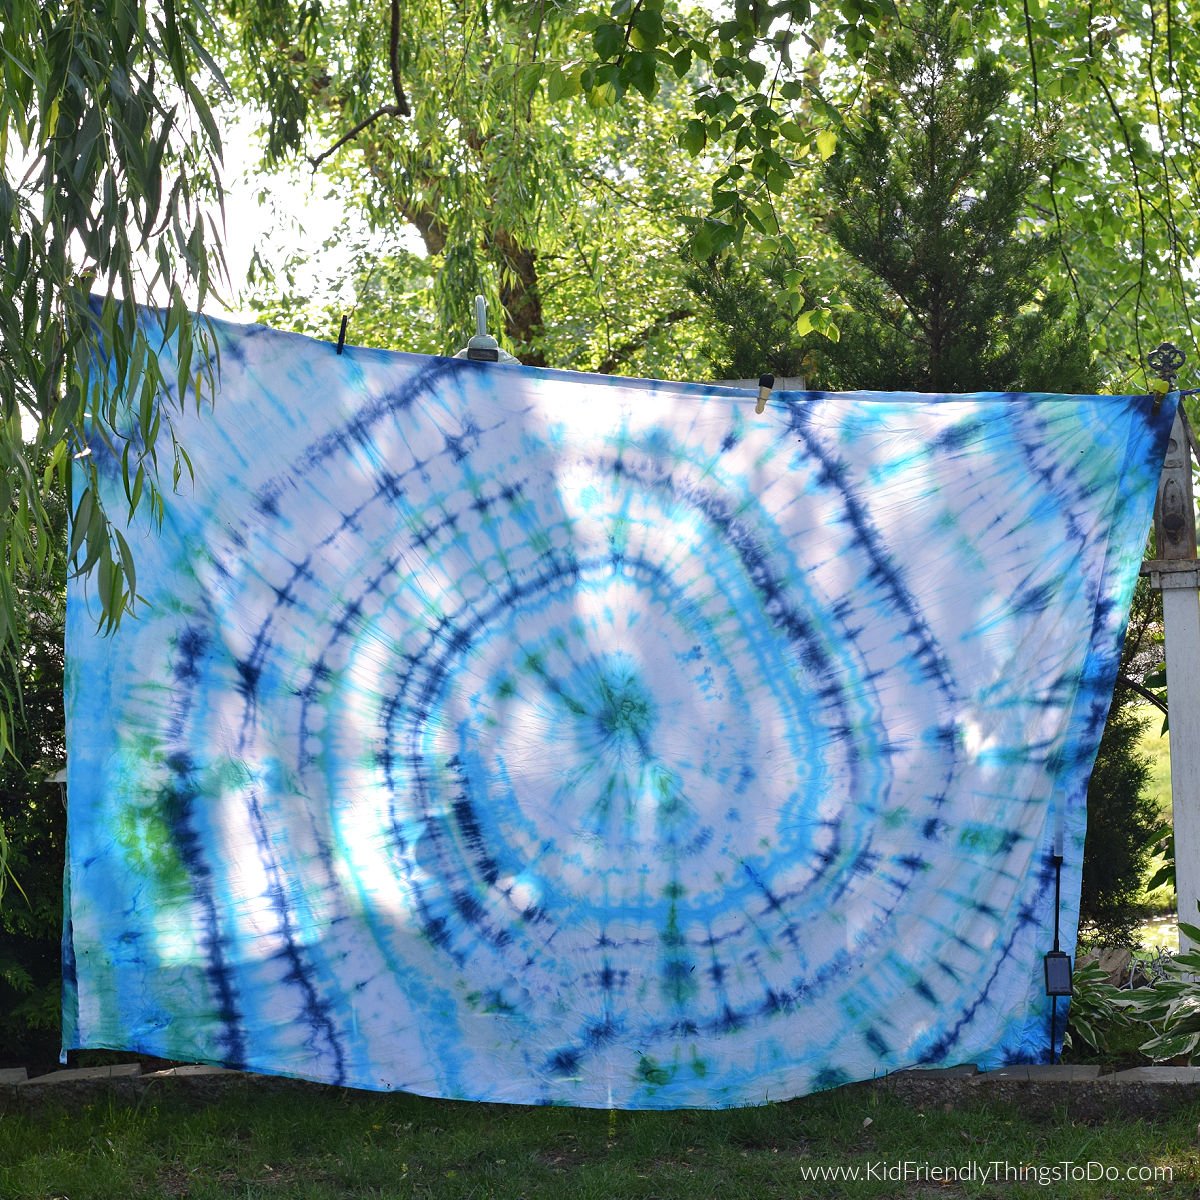
- Spiral: Pinch the center and twist the sheet into a flat spiral. Secure with rubber bands like a pizza, dividing it into wedges.
- Accordion Fold: Fold the sheet back and forth like a fan, then section it off with rubber bands.
- Bullseye: Pinch one spot and pull it upward, then tie sections down the length of the “cone.”
Don’t stress about it being perfect. Half the fun is seeing what crazy pattern you created.
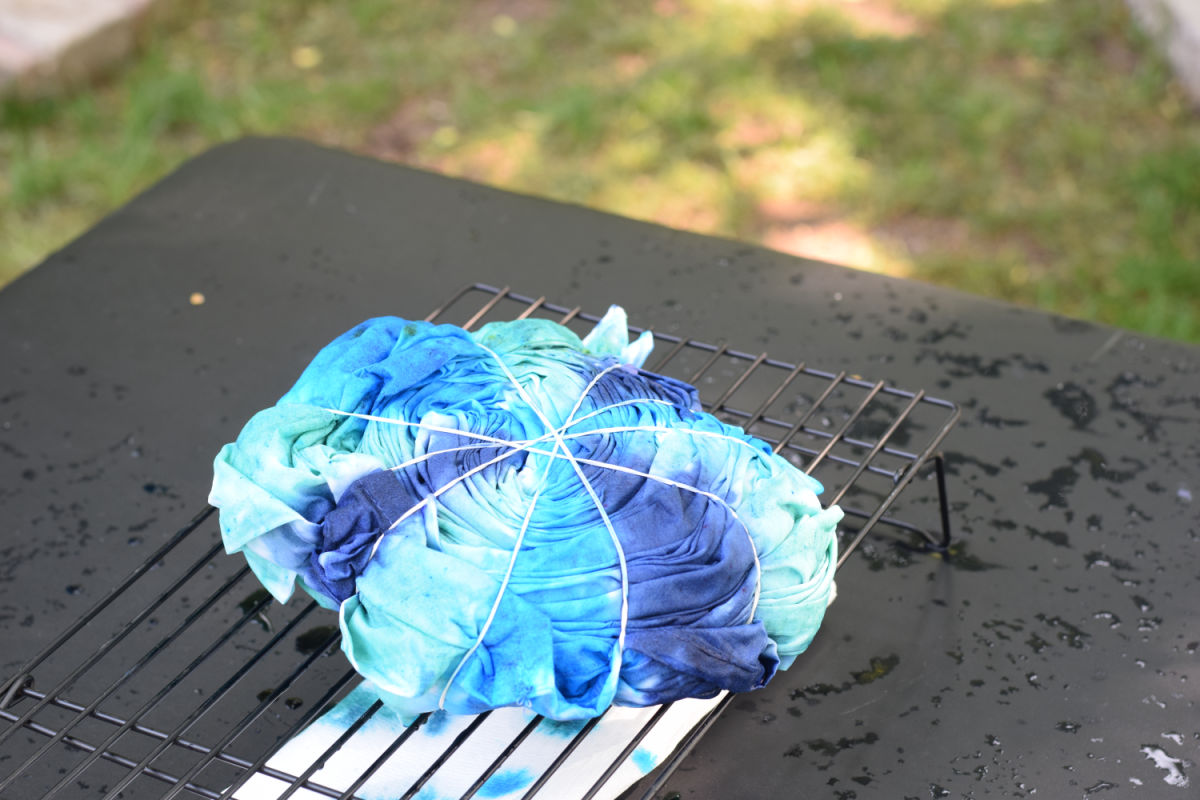
Step 4: Apply the Dye
Place the sheets onto a drying rack or something to elevate it from sitting in a pool of dye.
Apply dye to different sections of the bound fabric. Be creative with your color placement, but remember to leave some white space for contrast. Then, flip the sheet and repeat the process on the back.
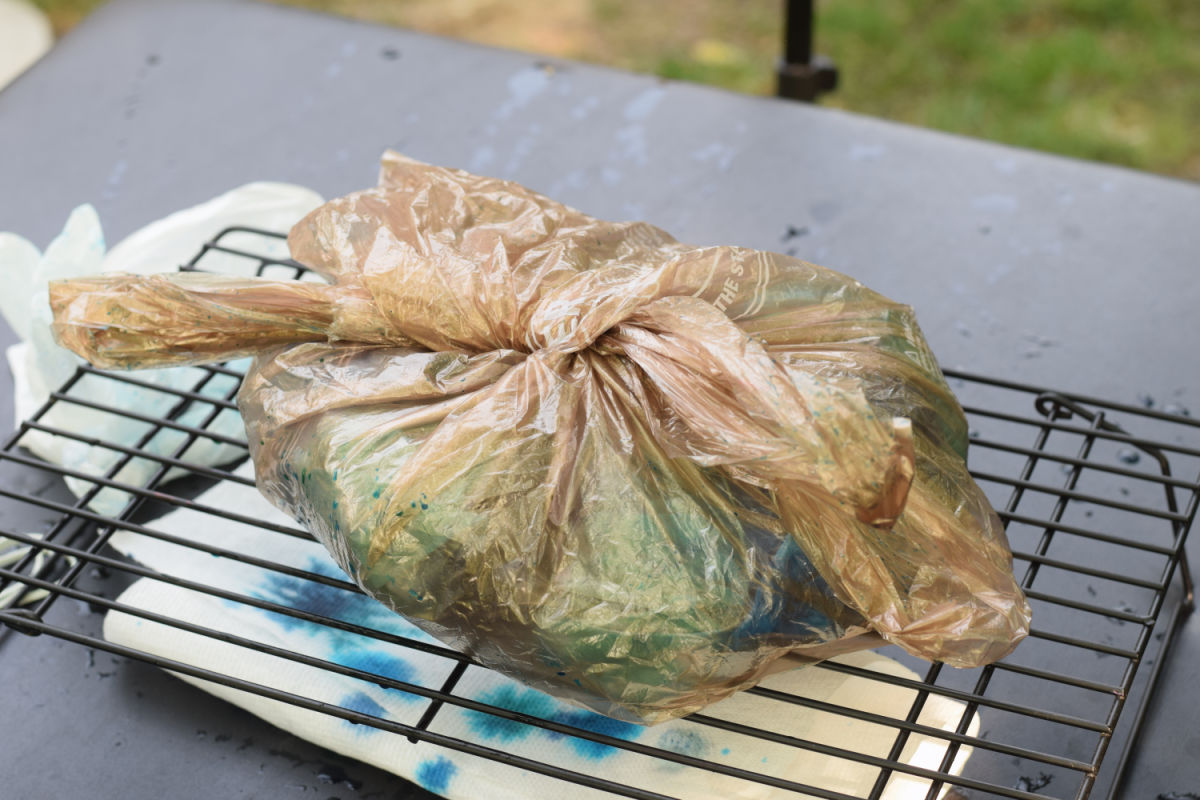
Step 5: Let It Set
Once you’ve finished dyeing, place it in a sealed plastic bag. Let it sit for 6–8 hours (or overnight) to allow the dye to fully absorb.
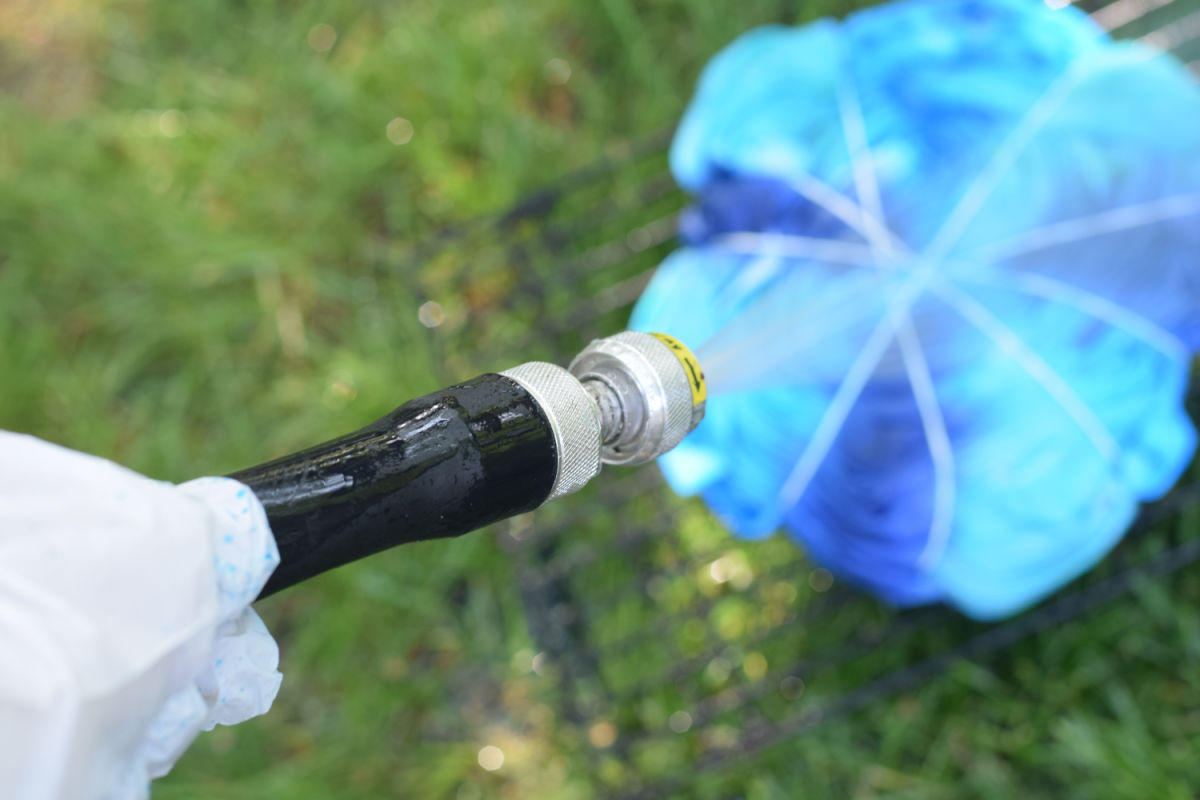
Step 6: Rinse and Wash
Put your gloves back on and rins the sheet until the water runs mostly clear. Open your masterpiece and enjoy your creation.
Wash sheets separately in hot water with a bit of detergent. Dry as usual—either in a dryer or on a clothesline.
Tip: Make pillowcases to match your sheets for a full bedding set
Pro Tip:
Wash and dry sheets separately for a few washes so bleeding doesn’t occur in your wash.
For softer tones, dilute the color
~Melissa- KidFriendlyThingsToDo.Com