Crayon Truffula Trees
This post may contain affiliate links – please read my disclosure statement.
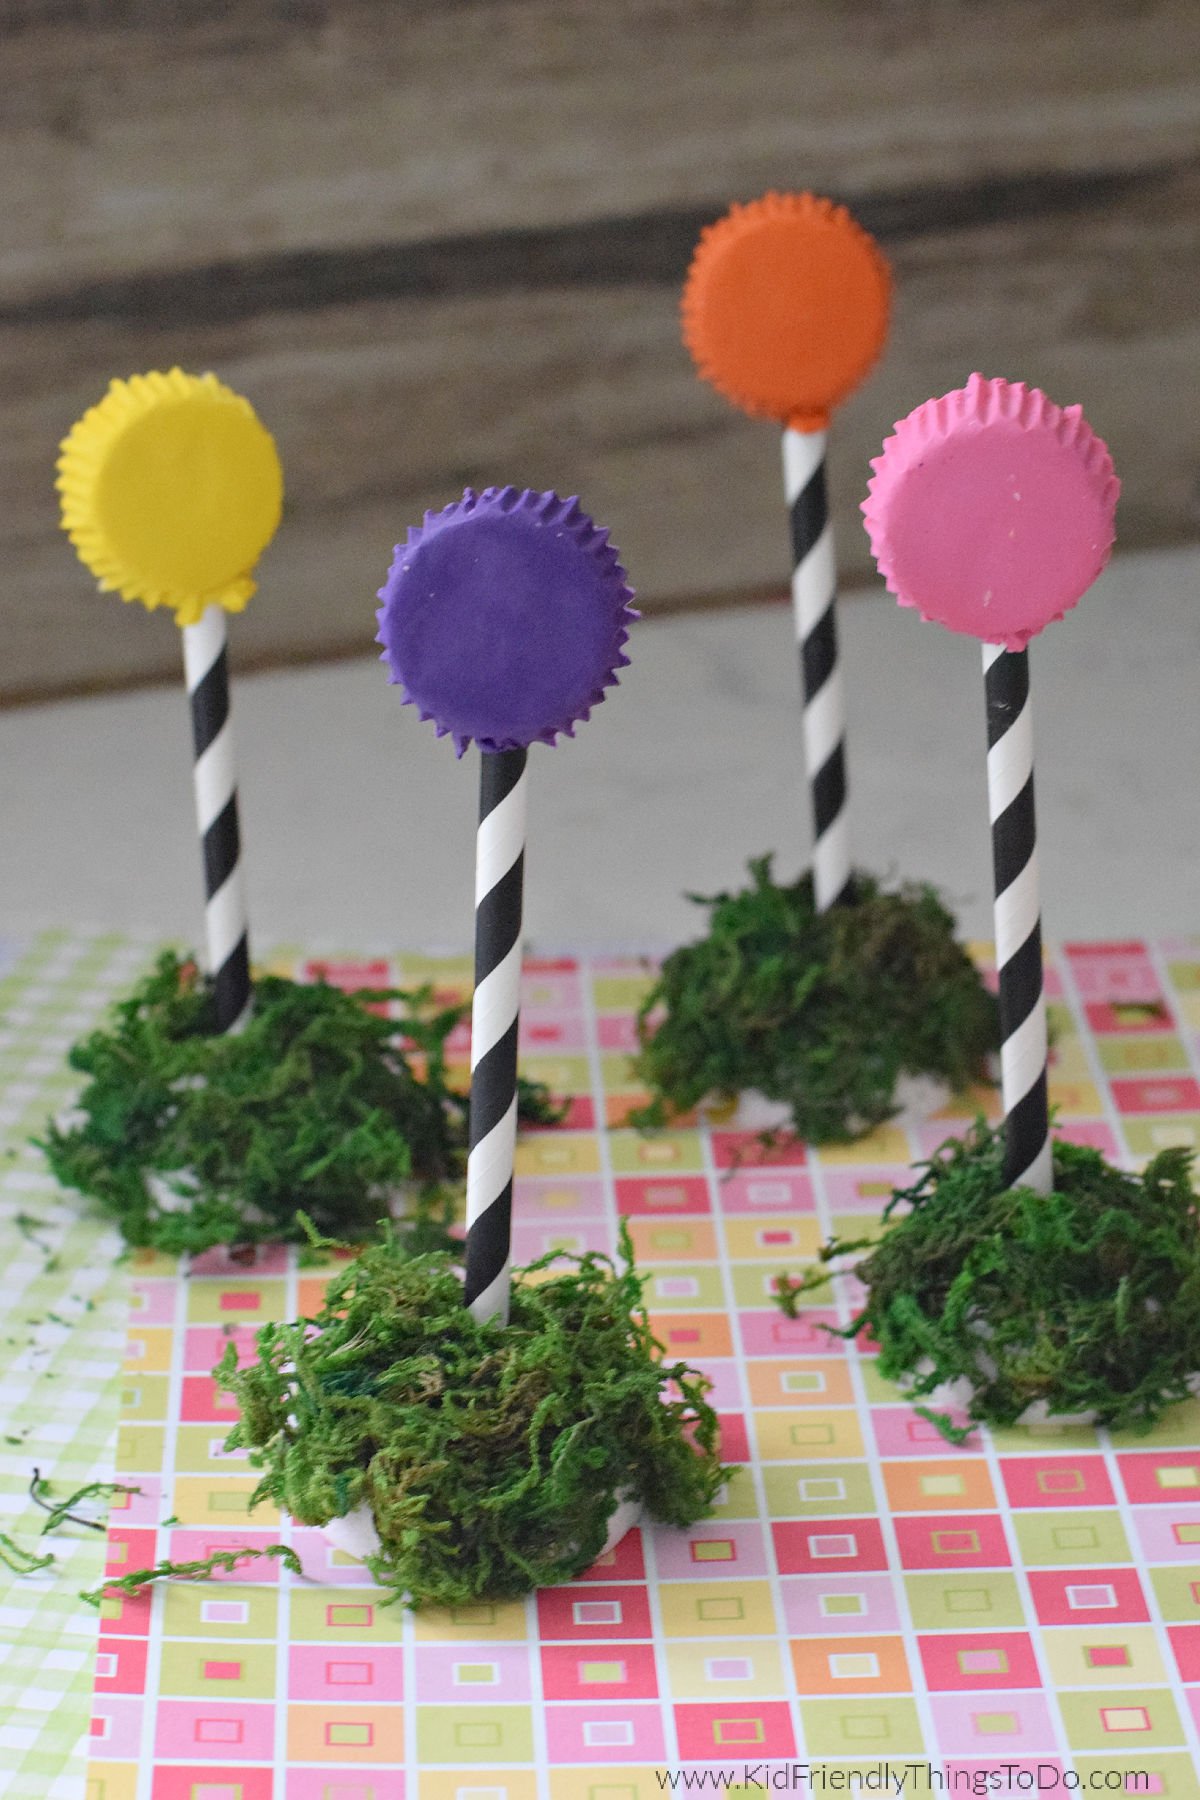
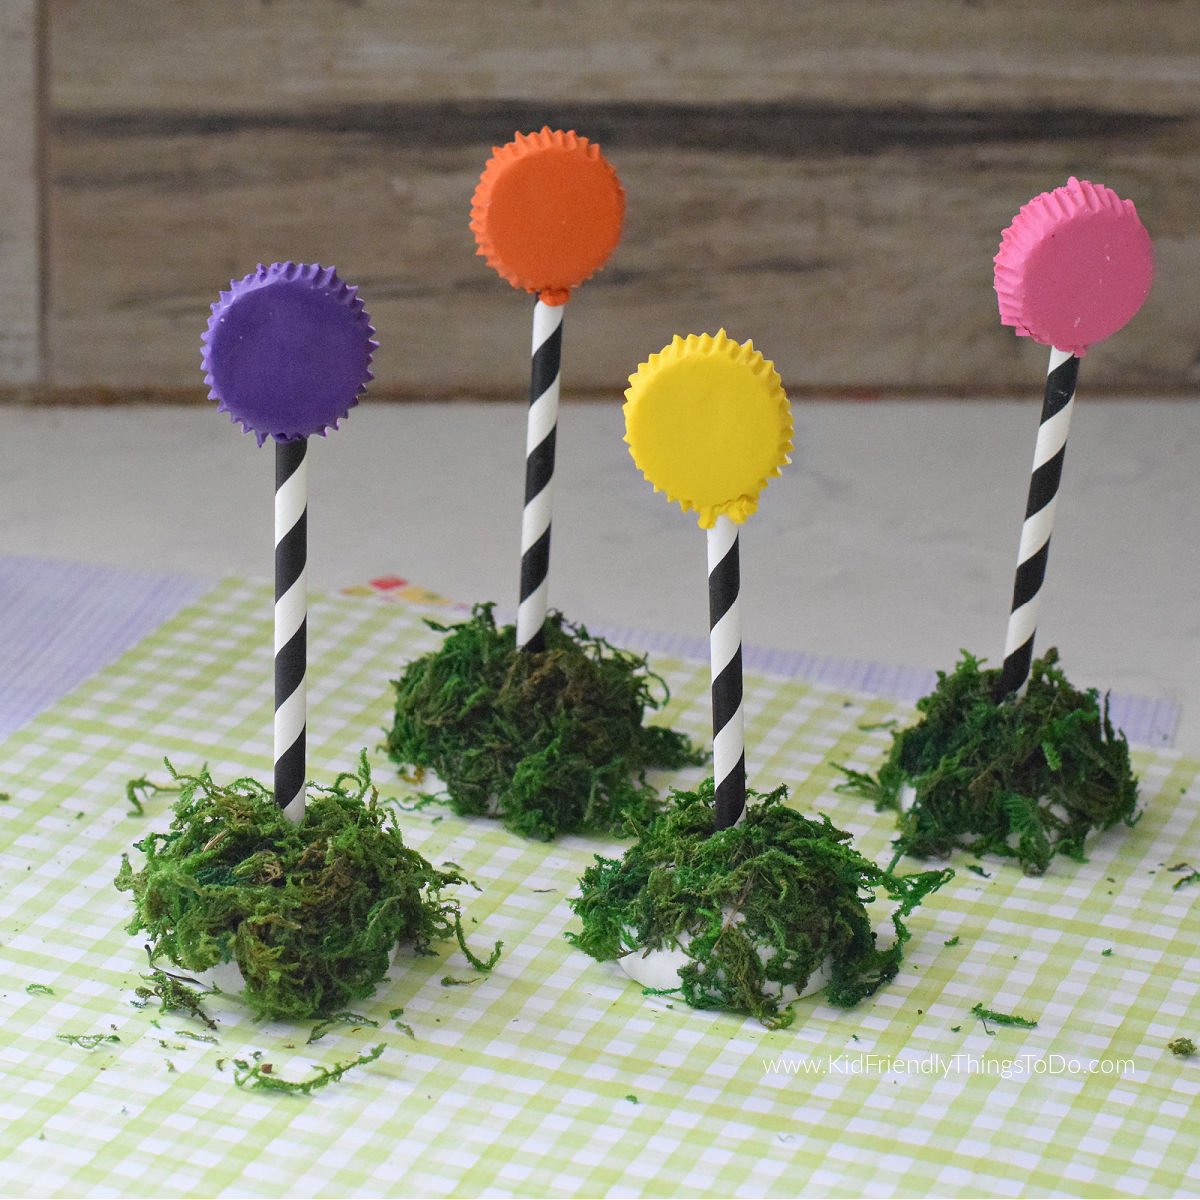
Make Lorax truffula tree-shaped crayons from recycled crayons as a Lorax craft or a fun Dr. Seuss party favor. It is a great Dr. Seuss craft and activity for the kids.
This post may contain affiliate links. As an Amazon Associate, I earn a small commission from qualifying purchases. See my disclosure policy to read more. Adult supervision is required for each step of activities, recipes, crafts, and games with children. Small parts are a choking hazard.
Truffula Tree DIY
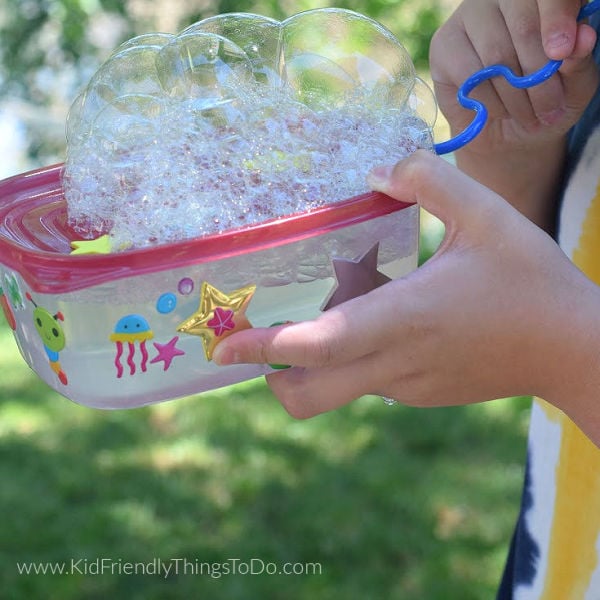
Making crafts like that also double as an activity with the kids is so much fun to do and provides ongoing entertainment. Like making window clings out of puffy paint that they can arrange on the windows, a popsicle stick airplane that they can pretend to fly, or decorating a Bubble Making Machine and enjoying bubbles on a hot summer day. We are big Dr. Seuss fans. We were so excited when the Lorax came out in 2012. This truffula tree DIY is the perfect Lorax craft and party activity for the kids.
What You’ll Love about this Truffula Tree Craft
- These Lorax Truffula Trees are not only a craft but also an activity.
- They are easy to make with very few supplies
- Kids love them
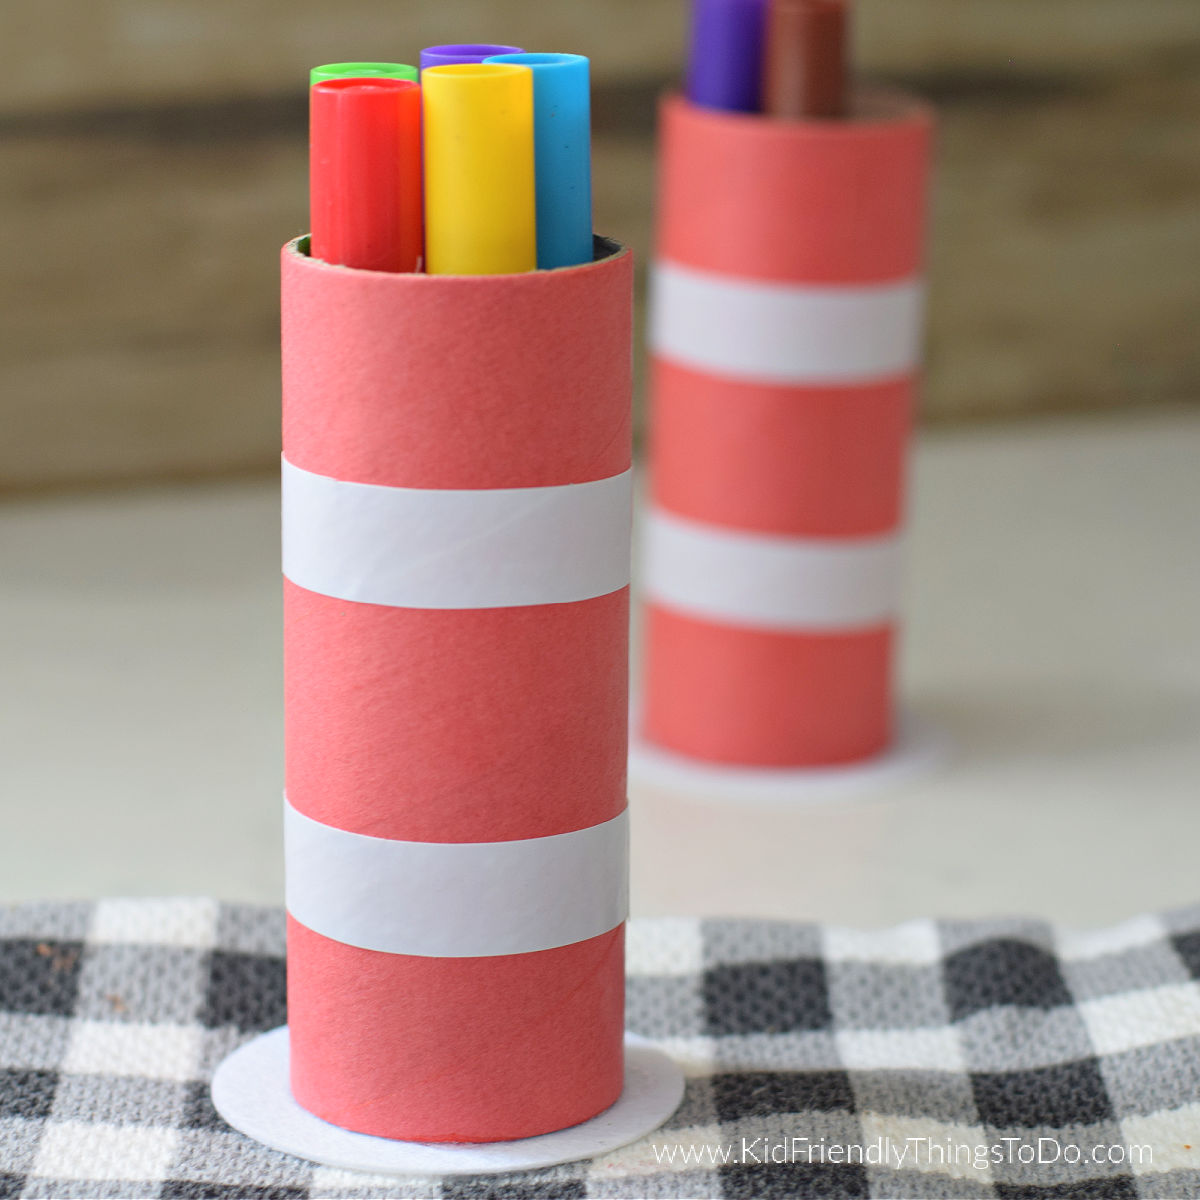
Supplies You’ll Need for this Dr. Seuss Acivity
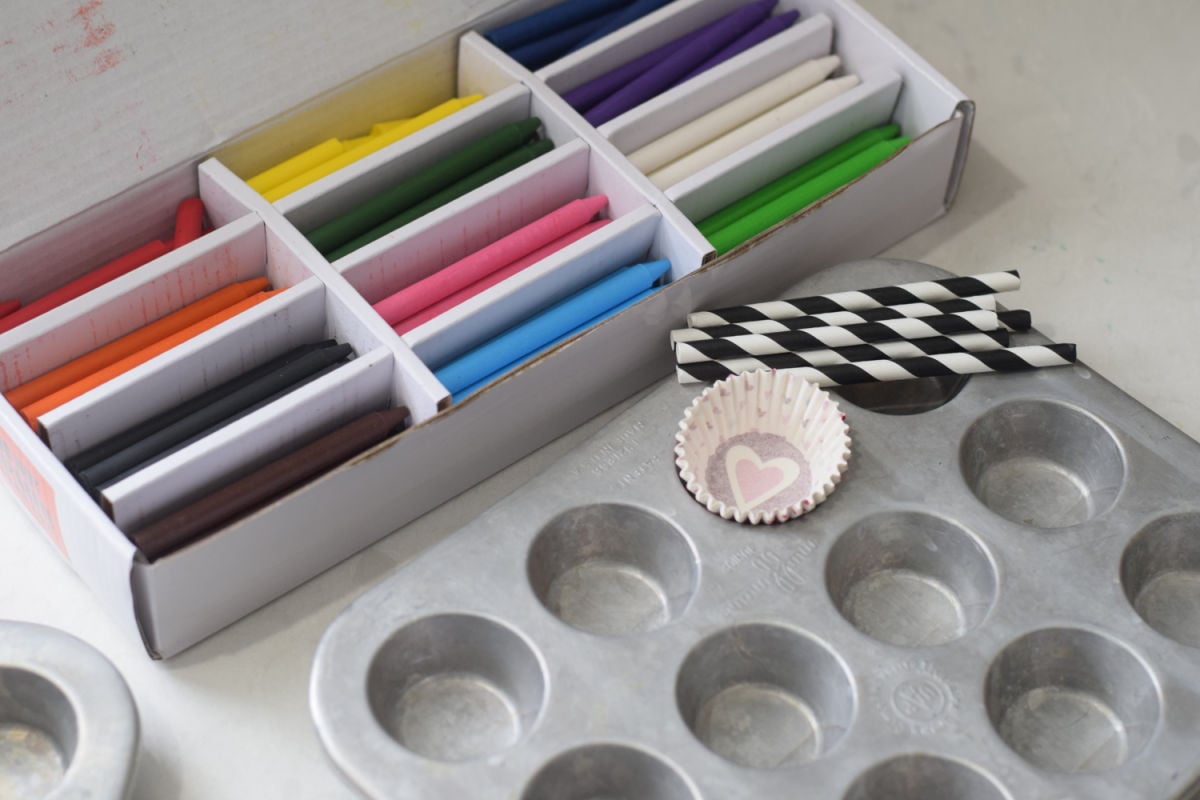
- Unwrapped crayons – I used some of the colors that you would see in the movie or in the book The Lorax
- Minu muffin wrappers – If you want bigger trees, then use a normal-sized cupcake wrapper
- Mini muffin tins – for larger crayons, use a normal-sized muffin tin.
- Paper straws – I like to use striped straws that resemble the birch tree-like bark in the Lorax book.
Extra Equipment:
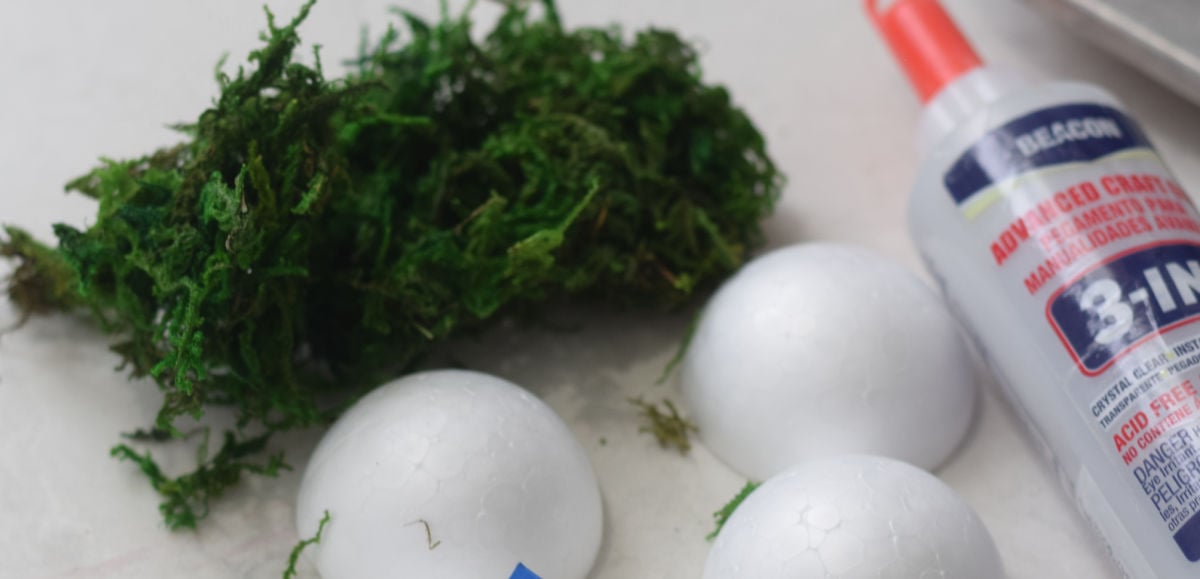
If you want to make the hills to set the crayons in, then you’ll need a couple more things.
- Foam Half-Round shapes – I bought small 2-inch wide foam dome shapes because I made mini-sized crayons. Get larger for full-size muffin tin crayons.
- Glue – I like to use tacky glue that dries quickly.
- Green Moss – to cover the foam hill
- Toothpicks – You’ll need this to act as a base for the straw.
Instructions For The Crayons:
- Heat your oven to 250 degrees.
- Place cupcake wrappers inside the cupcake tin. Double them up because the wax does tend to leak through the paper.
- If you want to keep your trees all one color, put all your pink shades in one wrapper, blue shades in another, and so on.
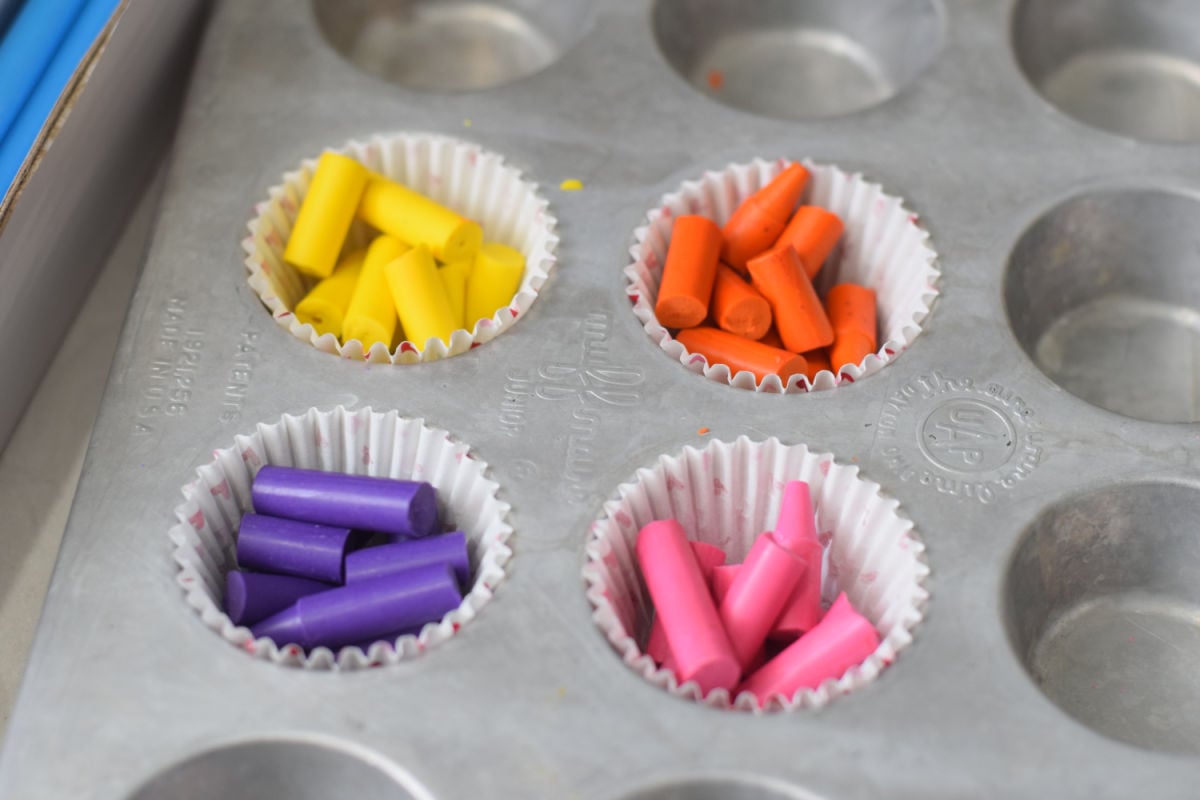
- Place the cupcake tin into the oven for about 20 minutes. The crayons should be melted by then.
- Carefully pull the melted crayons out and set them somewhere to cool off.
- When crayons are starting to solidify but are still somewhat liquid, it’s time to place your paper straw base into the wax. You will probably see some solid pieces floating around in the crayon. They will be a lighter shade
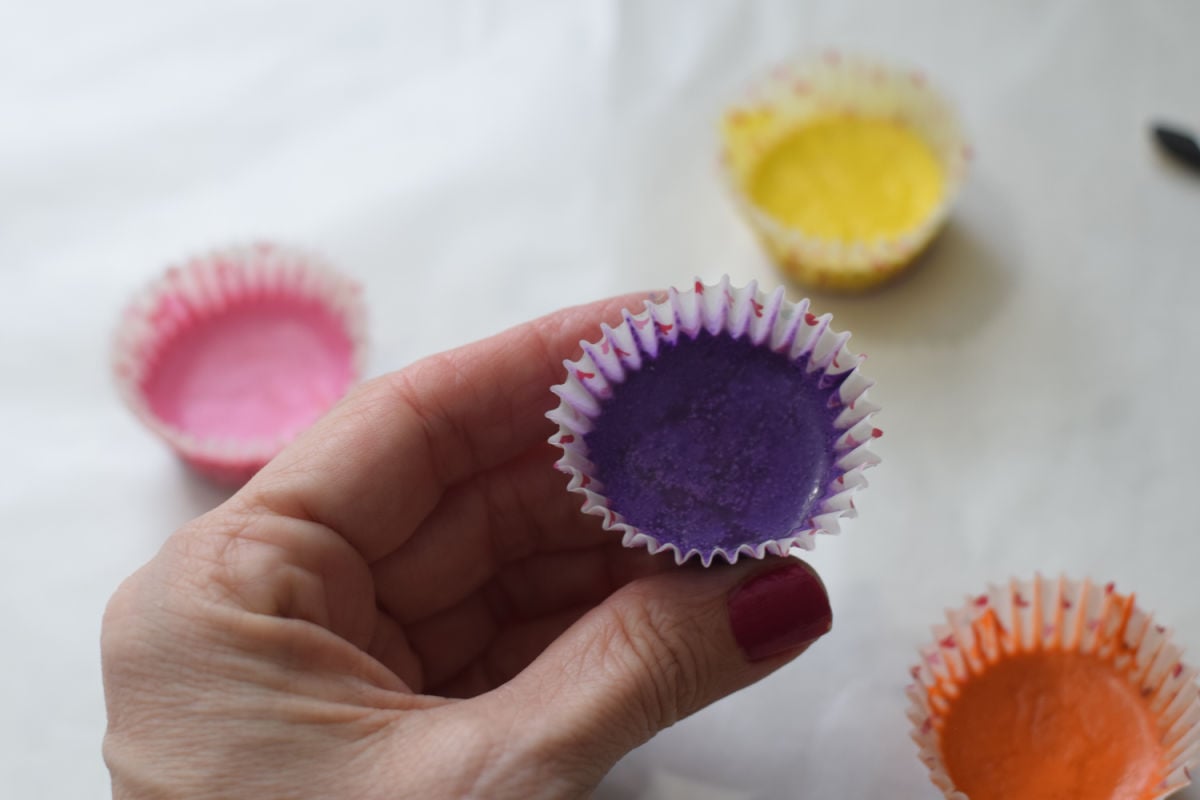
- Tear off and pull down a little piece of the cupcake wrapper to place the paper straw. If the crayon starts to spill out, then it is not dry enough. Carefully place the wrapper back up and wait a little longer
- Push the edge of the paper straw down into the melted crayon so it is formed around the straw.
- Now, let the crayon completely harden before taking the rest of the cupcake wrapper.
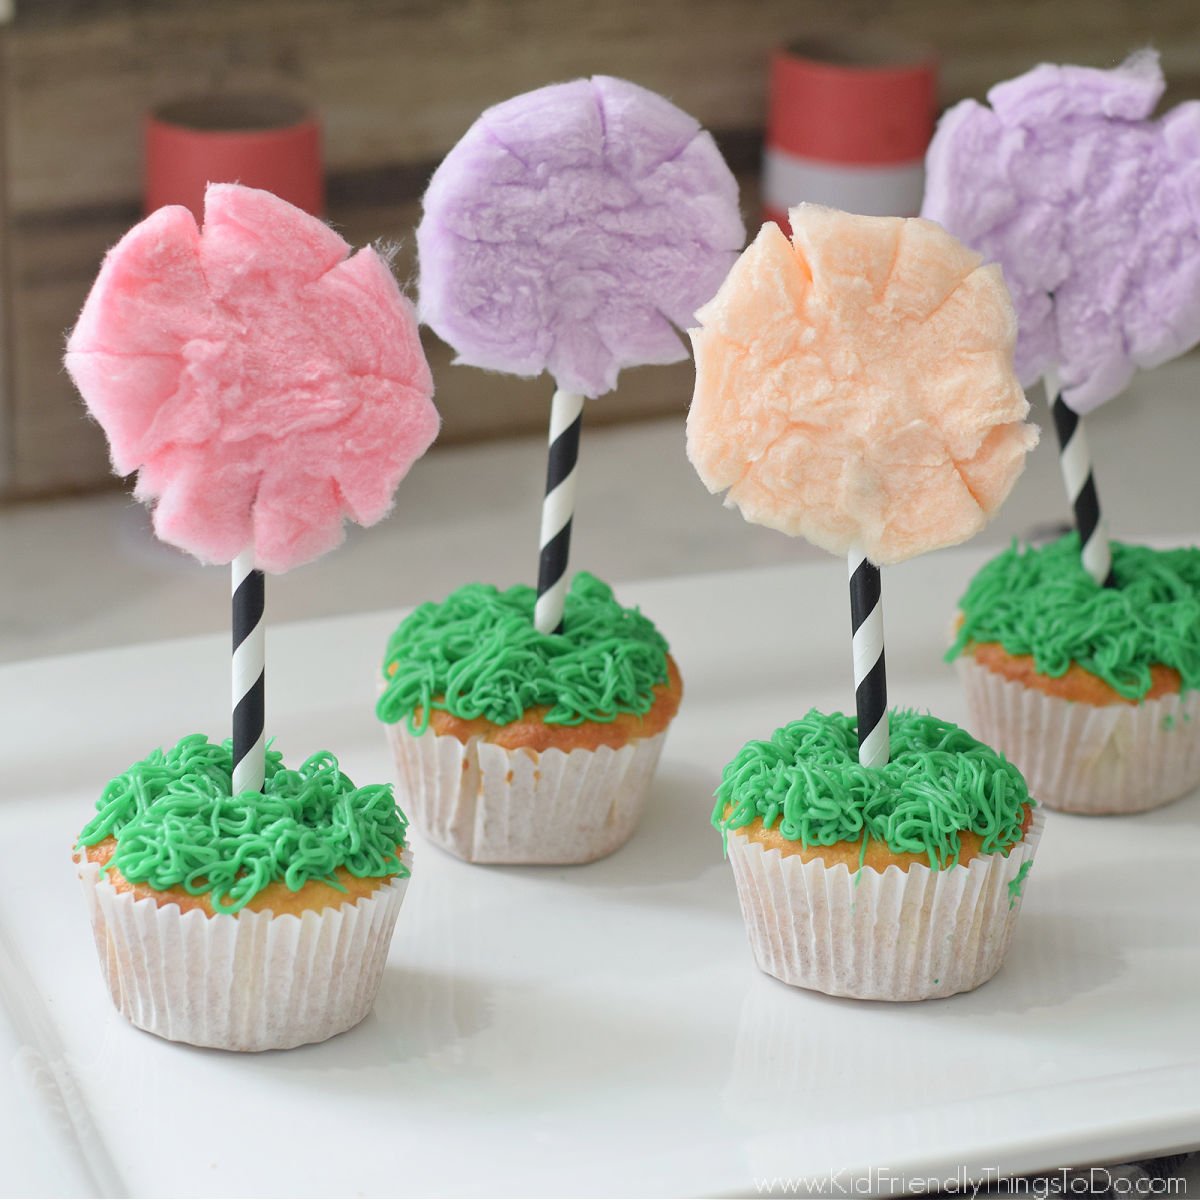
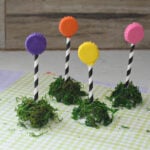
Making the Grass Hill
- Glue the moss around the hill
- Place a toothpick into the center to slide the crayon over
Expert Tips
As the crayon dries, you can push a little of the partially solidified wax over the paper straw to strengthen the bond even more.
More Dr. Seuss Ideas
How to Make Truffula Trees
Crayon Truffula Trees
Materials
Crayons
- 1 box Unwrapped crayons typically truffula tree colors are orange, yellow, pink, and purple
- Minu muffin wrappers
- Mini muffin tins for 12 mini muffins
- Paper straws
Grass Hill
- Foam Half-Round shapes I bought small 2-inch wide foam dome shapes
- Glue I like to use tacky glue that dries quickly.
- Green Moss to cover the foam hill
- Toothpicks You'll need this to act as a base for the straw.
Instructions
- Heat your oven to 250 degrees.
- Place cupcake wrappers inside the cupcake tin.
- Double them up because the wax does tend to leak through the paper
- If you want to keep your trees all one color, put all your pink shades in one wrapper, blue shades in another, and so on.
- Place the cupcake tin into the oven for about 20 minutes.
- The crayons should be melted by then.
- Carefully pull the melted crayons out and set them somewhere to cool off.
- When crayons are starting to solidify but are still somewhat liquid, it's time to place your paper straw base into the wax.
- You will probably see some solid pieces floating around in the crayon. They will be a lighter shade
- Tear off and pull down a little piece of the cupcake wrapper to place the paper straw.
- If the crayon starts to spill out, then it is not dry enough. Carefully place the wrapper back up and wait a little longer .
- Push the edge of the paper straw down into the melted crayon so it is formed around the straw.
- Now, let the crayon completely harden before taking the rest of the cupcake wrapper
Grass Hill
- Glue the moss around the foam hill
- Place a toothpick into the center to slide the crayon over
~Melissa – KidFriendlyThingsToDo.com