Snow Globe Bulletin Board Craft with a Printable Template
This post may contain affiliate links – please read my disclosure statement.
When I shared an adorable classroom snow globe bulletin board idea on Facebook, I couldn’t believe how many teachers wanted to make it! So many people were asking for a snow globe template that I decided to make one to share with everyone.
I wanted to make this craft especially easy for busy teachers who might be making an entire classroom’s worth of snow globes. Instead of tracing plates and drawing individual snow globe bases, I designed a printable with the snowy background, trees, snowman, and base already prepared. That takes a lot of the prep work out of making these sweet little keepsakes!
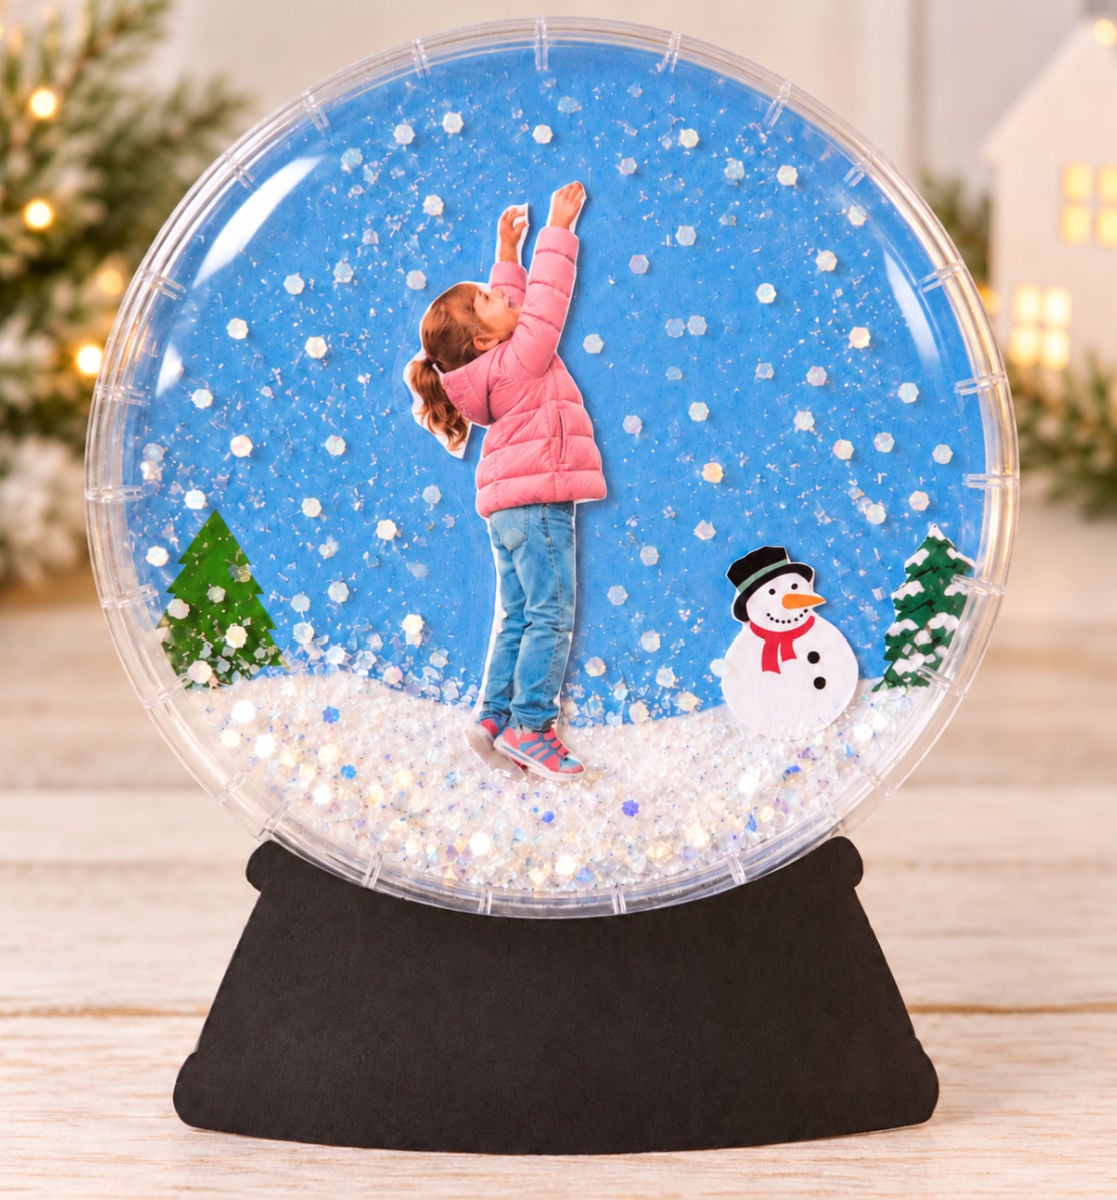
I even printed the template and used a paper plate with the center cut out to check the proportions. Adding a child’s photo to the snowy scene really brings this craft to life. I love the idea of children posing in their winter coats, reaching out to catch snowflakes or playing in the snow. These would be adorable on a classroom door, a winter bulletin board, or displayed at home.
Why You’ll Love This Snow Globe Craft
- Printable template: No need to trace circles or draw snow globe bases by hand.
- Perfect for classrooms: Prepare a whole class set for a winter bulletin board or classroom door.
- Personalized keepsake: Each snow globe features a child’s photo.
- Fun decorating options: Children can add snowflakes, glitter, and extra winter decorations.
- Christmas or winter: The snowy design works for December, January, and beyond.
- Great for families: Make one at home as a special keepsake or gift for grandparents.
Supplies for This Snow Globe Craft
- Snow globe template printable
- White cardstock
- Clear plastic dessert plate
- Printed photograph of your child
- Scissors
- Strong tacky glue, such as Beacon 3-in-1
- Loose glitter or artificial snow
- Glue stick or craft glue for attaching the photograph and decorations
- White crayon or colored pencils (optional)
- White paint pen or marker for writing on the base (optional)
Snow Globe Template Printable
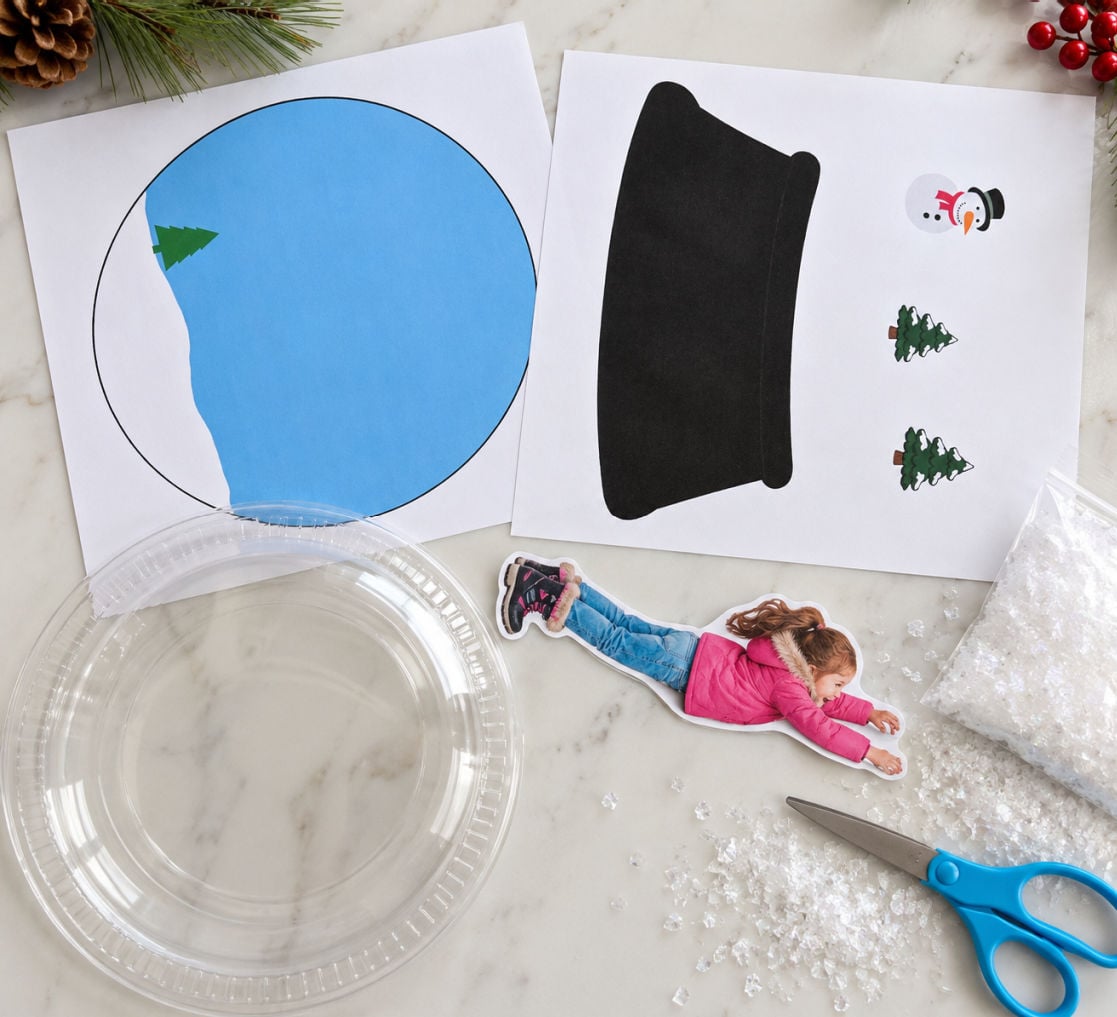
The printable packet includes a full-color blue snow globe background with a snowy ground and evergreen tree already in place.
The second page has a black snow globe base, a snowman, and snowy evergreen trees that can be cut out and added to the scene.
You can use the background exactly as it is or let children customize their snow globes with the additional decorations.
[SNOW GLOBE PRINTABLE DOWNLOAD]
Safety note: Always supervise children when using scissors, glue, and small craft materials. Adults should handle hot glue if that option is used.
How to Make This Snow Globe Picture Craft
Step 1: Print and cut out the template.
Print the snow globe template onto white cardstock. Cut around the blue circle and the black snow globe base.
If you want to use the optional snowy trees or snowman, cut those out, too.
Alt text: Printable snow globe background and winter decorations cut out and ready to assemble
Step 2: Prepare your child’s photograph.
Have your child put on their winter coat, hat, and gloves for a fun winter-themed picture.
They can hold their arms out, reach up as though they’re catching a snowflake, or pose like they’re playing in the snow.
Print the photograph and carefully cut around the child’s body, removing the background.
You may need to experiment with printing the photograph at different sizes to find the best fit for your snow globe.
Step 3: Decorate the snowy background.
Let children add their own touches to the printed snowy scene.
They can draw snowflakes with a white crayon or colored pencil, make snow shapes with glue and glitter, or add one of the extra trees or the snowman from the printable.
The printed evergreen tree is already part of the background, so this step can be as simple or creative as you’d like.
Step 4: Add the child’s photograph.
Position the child in the center of the globe so it looks like they’re standing in the snow.
Glue the photograph and any additional paper decorations in place.
Make sure everything fits comfortably inside the area that will be visible through the clear plate.
Step 5: Add the snow.
Sprinkle a little loose glitter or artificial snow onto the snowy background.
If you’d rather skip the loose glitter, children can decorate the background with glued-on glitter or drawn snowflakes instead.
Step 6: Attach the clear plastic plate.
Apply a continuous bead of strong tacky glue around the entire rim of the clear plastic plate.
Carefully place the plate over the snow globe background, making sure the child’s photograph and decorations are inside.
The most important part is getting a complete seal around the plate so loose glitter or artificial snow doesn’t escape.
Allow the glue to dry completely before moving or shaking the snow globe.
If you’re using school glue, apply it generously and leave the project undisturbed for a full day. A teacher or other adult can also use a low-temperature hot glue gun if preferred.
Step 7: Attach the snow globe base.
Glue the black printable base behind the bottom of the globe.
Children can write their names, the year, or a cute winter saying on the base. They can also write their names on the back.
Let the project dry completely before displaying it.
Winter Bulletin Board Ideas with Snow Globes
Wouldn’t these make the cutest classroom bulletin board?
Imagine a whole class of little snow globes, each featuring a student bundled up in their winter clothes! Children can pose in different ways so every snow globe looks a little different.
Arrange the finished snow globes on a bulletin board or classroom door with paper snowflakes scattered around them.
You could even add a fun winter saying like “We Are Snow Much Fun!” or just like the bulletin board I shared in my Facebook Group “Who Shook the Snow Globe”.
Because the children are featured in their own snow globes, this is also a wonderful classroom keepsake to send home when it’s time to take the display down.
Easy January Bulletin Board Ideas
One of my favorite things about this project is that it isn’t limited to Christmas!
The blue sky, snowy ground, and evergreen trees make this a winter craft that can stay up after the holiday decorations come down.
For a January bulletin board, use the snow-covered trees and snowman decorations. Add paper snowflakes around the display for a winter wonderland look.
It’s an easy way to keep your classroom decorated for winter without starting an entirely new bulletin board project.
Melissa’s Tips for This Snow Globe Photo Craft
- Use cardstock. I recommend white cardstock for the printable background and base. It gives the craft a sturdier foundation than regular printer paper.
- Photograph children in winter clothes. Coats, hats, and gloves make the pictures look like they’re part of a snowy winter scene.
- Have fun with the poses. Children can hold their arms out, reach for snowflakes, or pose as though they’re decorating the snowman.
- Check your photo proportions. I tested the printable with a full-body child cutout and found that the size of the photograph makes a big difference in how everything fits. Try a few print sizes if needed.
- Let children personalize the snow. White crayon snowflakes, colored-pencil drawings, and glitter glued onto the background all make cute additions.
- Don’t overfill with glitter. A little loose glitter or artificial snow is enough to give the snow globe a snowy effect.
- Seal the plate completely. Be especially careful to glue around the entire circumference of the clear plate. You don’t want glitter escaping all over your classroom!
- Give the glue enough time to dry. I prefer a strong tacky glue, like Beacon 3-in-1. If you use school glue, allow plenty of drying time before moving the snow globe.
Snow Globe Template FAQs
Do I need cardstock for the snow globe template?
I recommend cardstock because it gives the printed background and base more structure. Regular printer paper is thinner and may not hold up as well when attaching the clear plastic plate.
What glue works best for a snow globe craft?
A strong tacky craft glue, such as Beacon 3-in-1, is a good choice. School glue is another option if applied generously and given plenty of time to dry. Adults can also use low-temperature hot glue. Whichever glue you choose, make sure the entire rim is sealed.
Can I use the snow globe template without a photo?
Yes! Children can decorate the snowy background using the trees and snowman included in the printable. They can also draw additional snowflakes or add glitter for a winter scene.
Can I use glitter or artificial snow inside the snow globe?
Yes. Add a small amount of loose glitter or artificial snow before attaching the clear plate. Make sure the plate is completely sealed and the glue is fully dry before moving or shaking the finished craft.
More Winter Crafts for Kids
Looking for more fun things to make on a snowy day? Here are some other winter crafts to try!
- Catching Snowflakes Craft – Another adorable winter craft featuring a child’s photo.
- DIY No-Sew Snowman Pillow Buddy – A cozy snowman craft for winter.
- Coffee Filter Snowflakes – Easy paper snowflakes for decorating classrooms and windows.
- Toilet Paper Tube Snowman Craft – A cute snowman made with simple craft supplies.
If you make this craft, I’d love to hear what you think! Please leave a star rating and comment below to let me know how it turned out. I love hearing from you, and your ratings help other readers find and enjoy the craft, too!
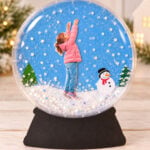
Snow Globe Bulletin Board Craft with a Printable Template
Equipment
- Scissors
- printer
Materials
- 1 printed two-page snow globe template packet
- White cardstock
- 1 clear plastic dessert plate approximately 7 inches in diameter
- 1 printed child photograph cut around the body (tested sample approximately 5 inches tall by 1 inch wide)
- Strong tacky glue such as Beacon 3-in-1
- Small amount of loose glitter or artificial snow
- Glue stick or craft glue
- Optional: white crayon colored pencils, white marker
Instructions
- Print the snow globe template onto white cardstock at actual size (100%). Cut out the blue circle and black base.
- Photograph your child in winter clothing. Print and cut around the child’s body, adjusting the size as needed to fit the globe.
- Decorate the snowy background with drawn or glued snowflakes and optional printable trees or snowman.
- Glue the child’s photograph onto the background so they appear to be standing in the snow.
- Add a small amount of loose glitter or artificial snow, if desired.
- Apply a continuous bead of strong glue around the rim of the clear plastic plate. Position it over the printed background and press into place.
- Allow the glue to dry completely. If using school glue, leave it undisturbed for at least 24 hours.
- Glue the black base behind the bottom of the globe. Add a name, date, or winter saying if desired.
Notes
- Be sure the plate’s rim is completely sealed before shaking.
- Plate shapes vary, so check the fit of the printable before gluing.
- Adult supervision is needed for scissors, glue, and loose craft materials.
- The optional decorations can be used instead of a child’s photograph.