Making Fun Soap Shapes With Ivory Soap Dough
This post may contain affiliate links – please read my disclosure statement.
Making Soap Dough from Ivory Soap is a fun and easy activity to do with the kids. Soap shapes are great gifts to give out, as well. Soap Dough is an exciting craft and a fun way to make bath time enjoyable.
Ivory Soup Dough Recipe
When my kids were little, I found myself constantly looking for more fun ways to create with them like making tie-dye flowers, tie-dying beach towels for summer fun, and marble painting with the kids.
This particular soap-making activity came about way back in 2012, when I was looking for an educational and fun way to teach my class about colonial America. I wanted to have a hands-on lesson in making soap. Making soap shapes from Ivory soap was a great, kid-friendly soap project for the class. The kids loved it, and my kids still can’t get enough of it. Over the years, I’ve perfected some techniques that make it easier for little fingers that I will happily share with you.
Supplies You’ll Need
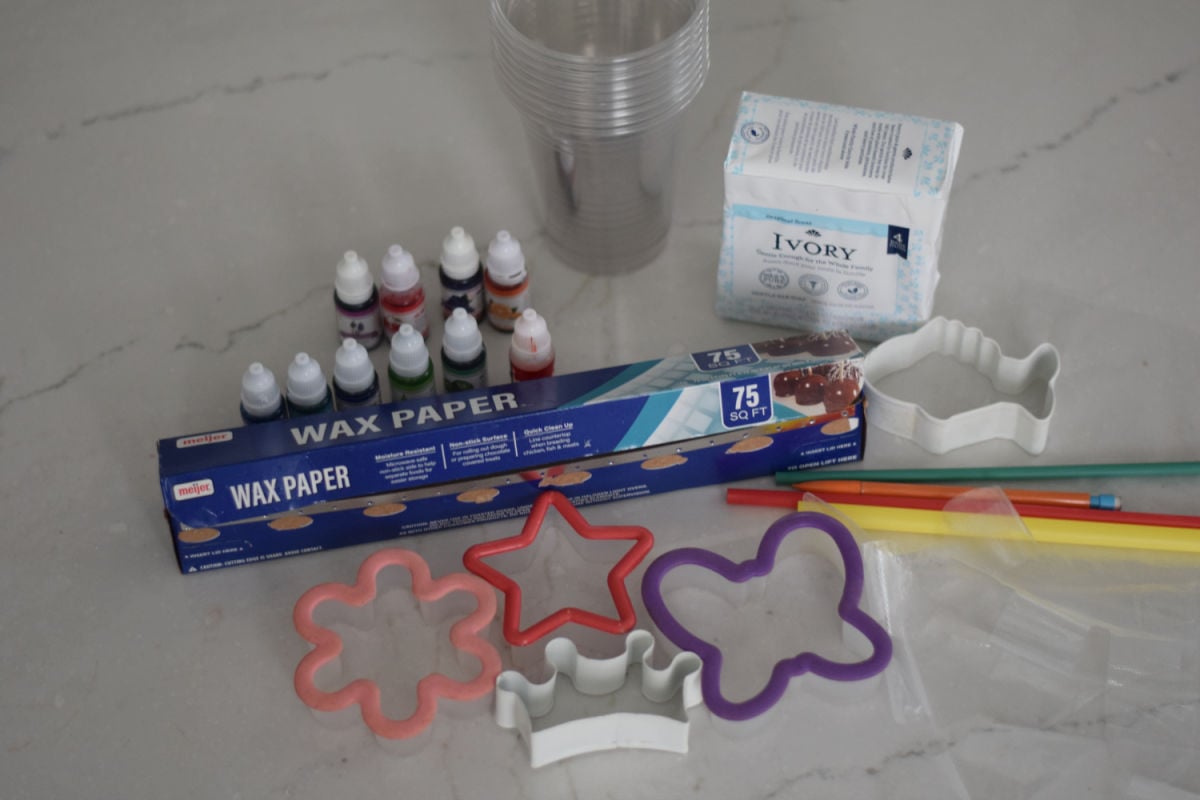
- Ivory Soap Bars – Ivory is a soft soap, and it’s pure white, which is great for adding color to
- Blender or Food Processor
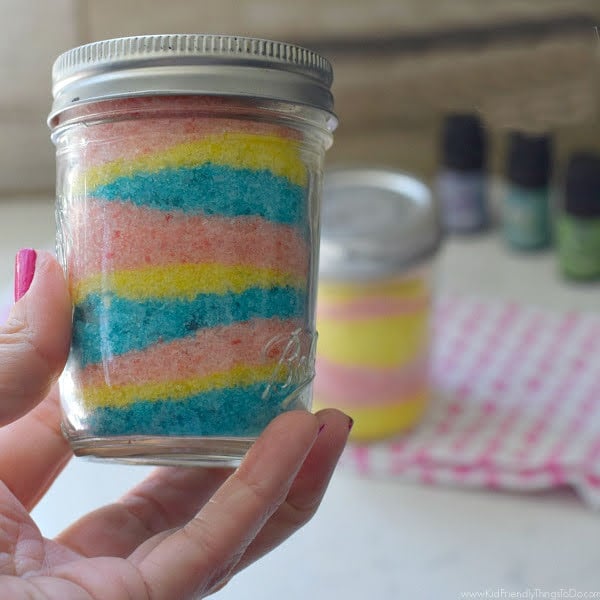
- Soap Colorant – If using food colorant, gel is preferred, but liquid soap colorant works just fine as well.
- Cookie cutters
- Wax paper
More equipment for Decorating
- Straws
- rolling pin
- Mechanical pencil or wooden skewer – something with a pointed tip
optional – food prep gloves to keep soap out of eyes
How to Make Soap Dough
Note* An adult will need to cut the soap and operate the blender. *The kids can have fun helping with the rest of this soap-making activity.
Use a knife to cut bars so they will fit into your food processor or blender.
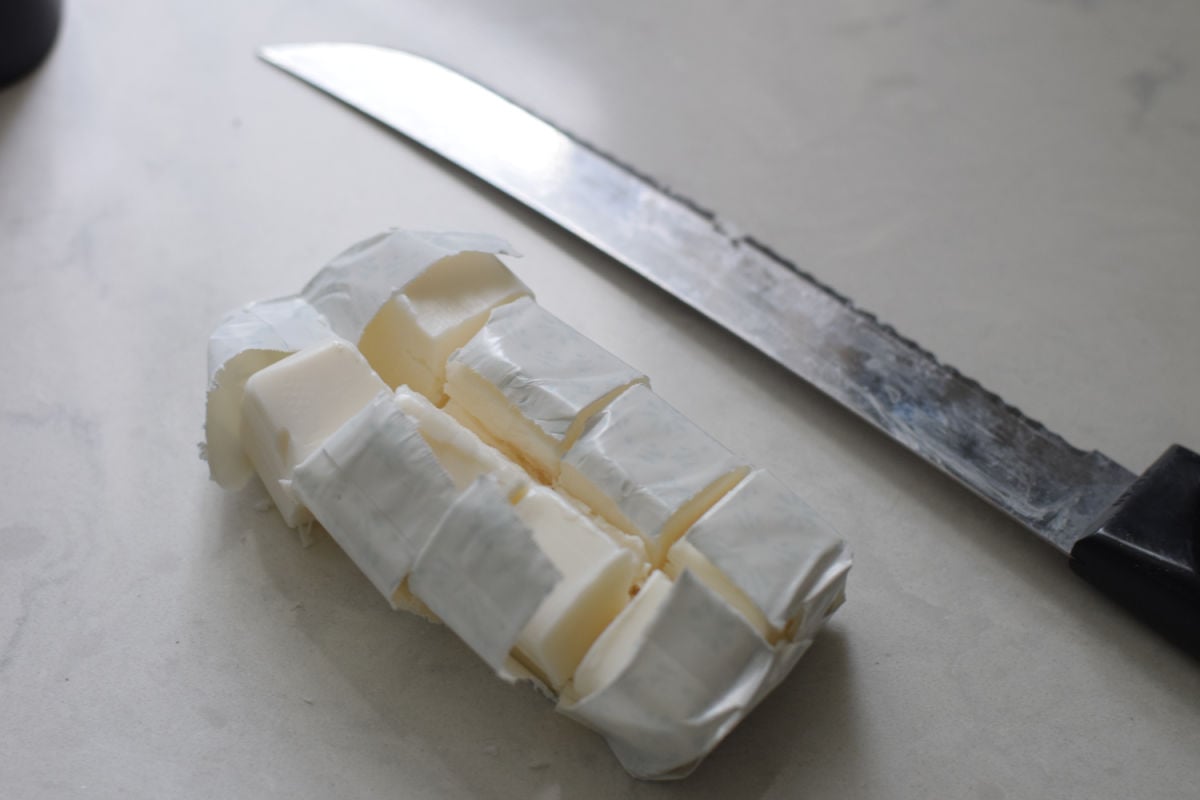
Quick Tip: I have found that if you cut the bar while it’s still in the wrapper, it’s easier to get out of the wrapper
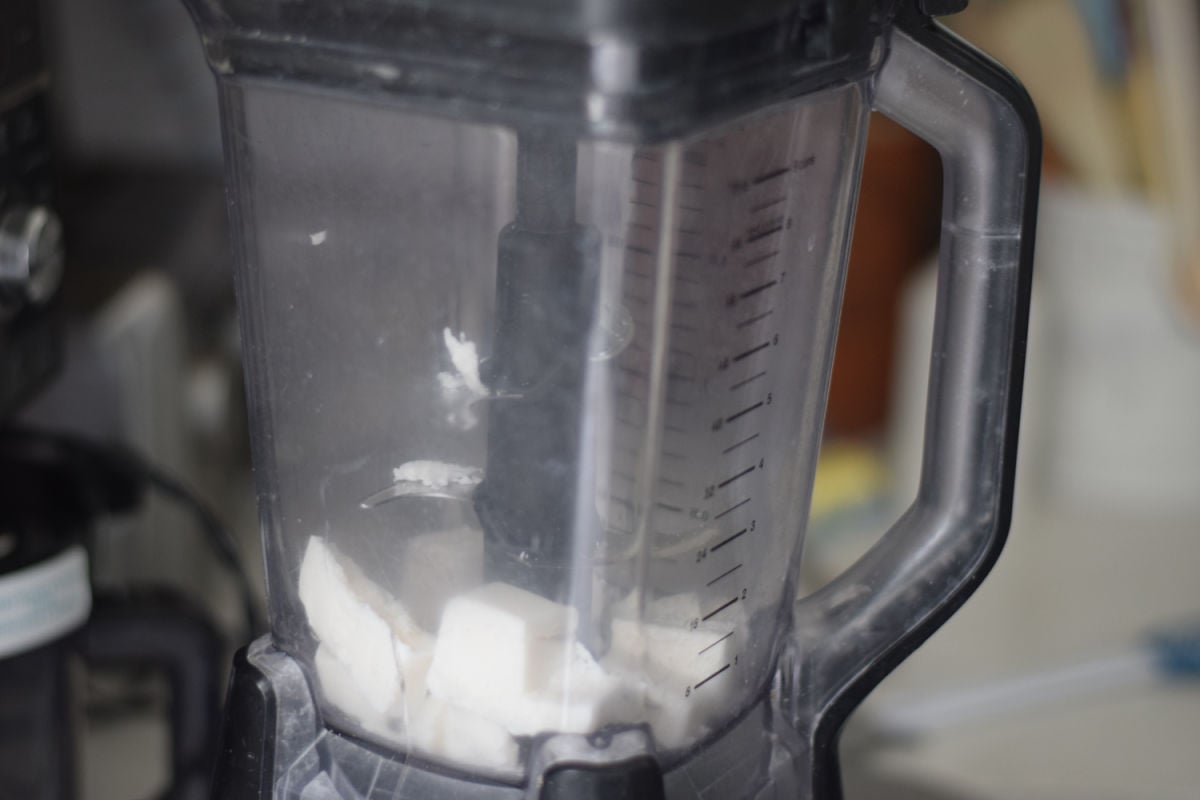
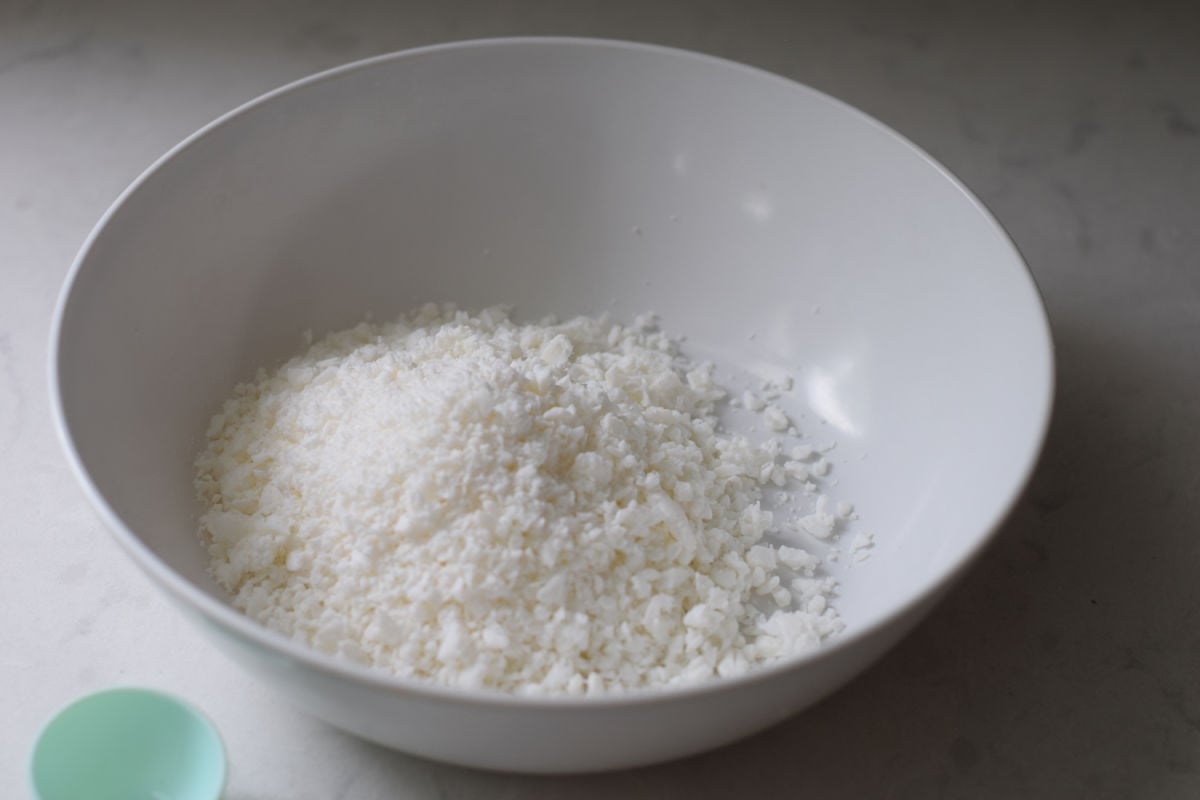
Place the soap bar bits into a blender and blend until it is cut into fine pieces
Pour it into a bowl
Add some colorant drops
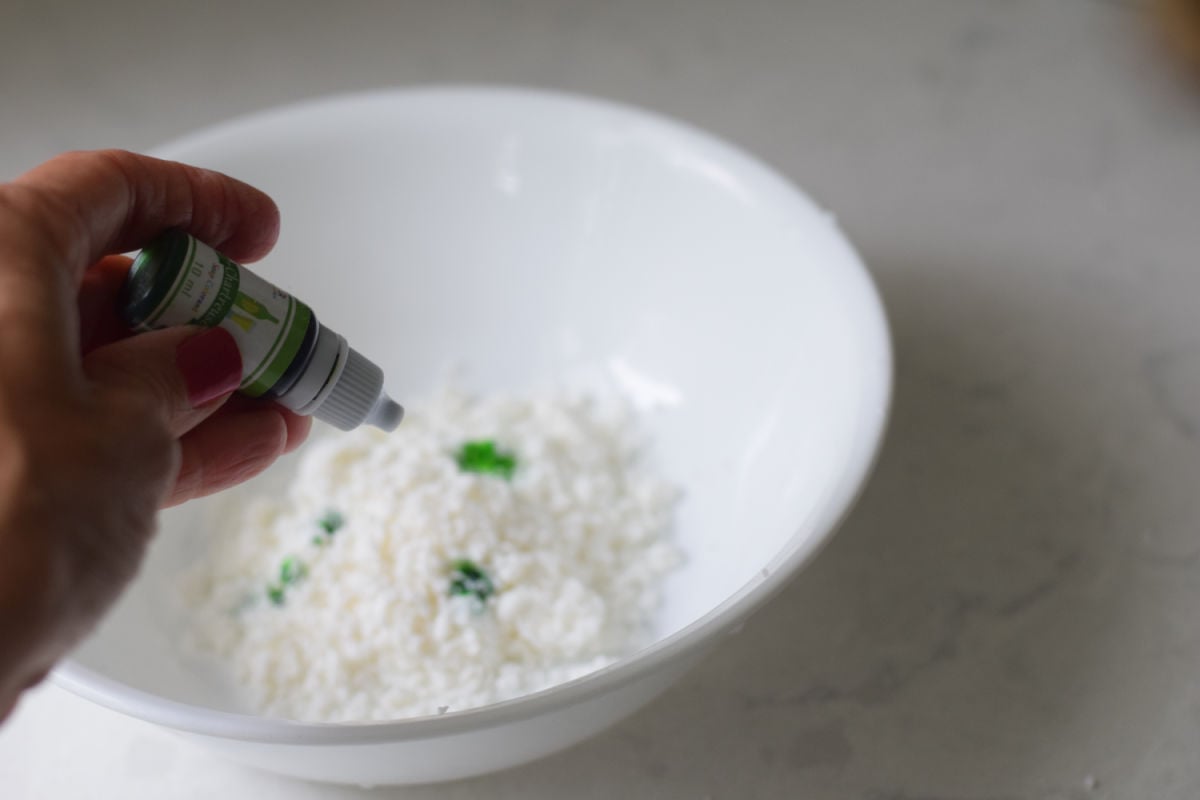
Add 1 – 1&1/2 Tbsp. of water. Only enough to make it doughy (like pie crust) – not watered down. The maximum you’ll need is 2 Tbsp. of water.
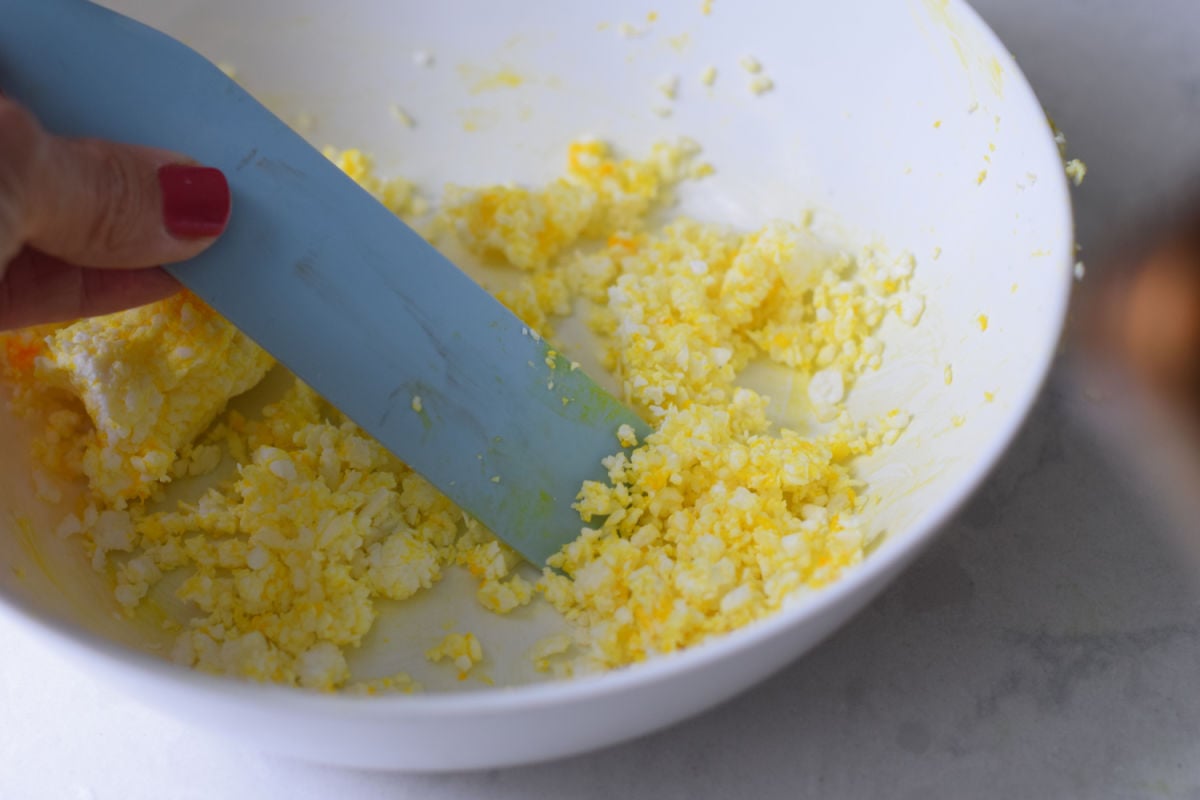
Stir the soap, water, and colorant
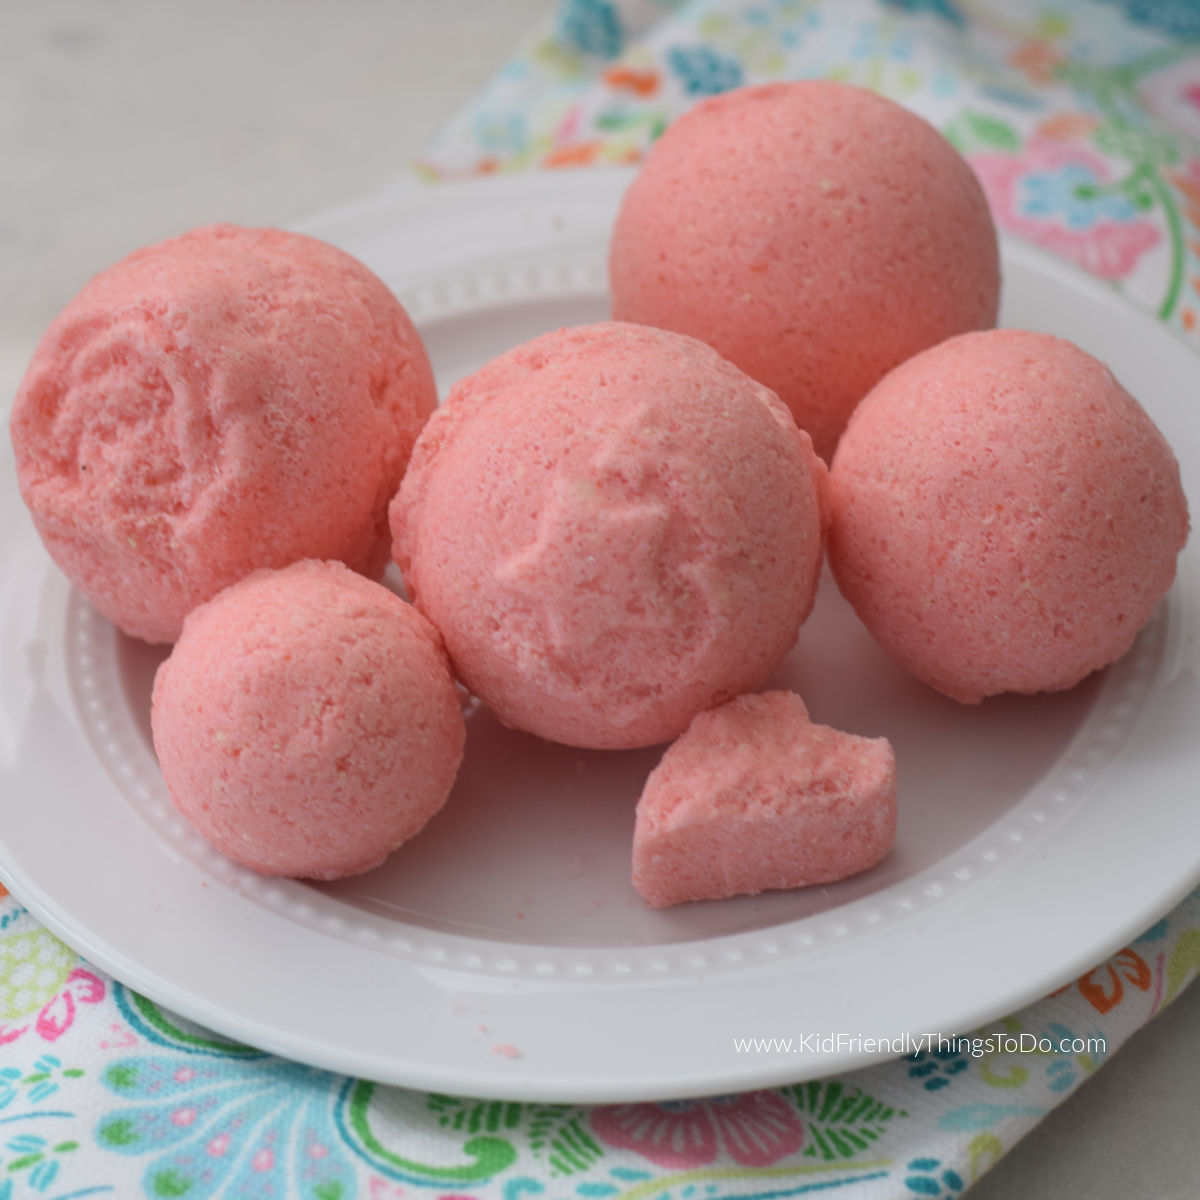
Use your hands to form the mixture into a dough
Note: if you are worried about getting soap in your eyes, use food prep gloves when handling the soap.
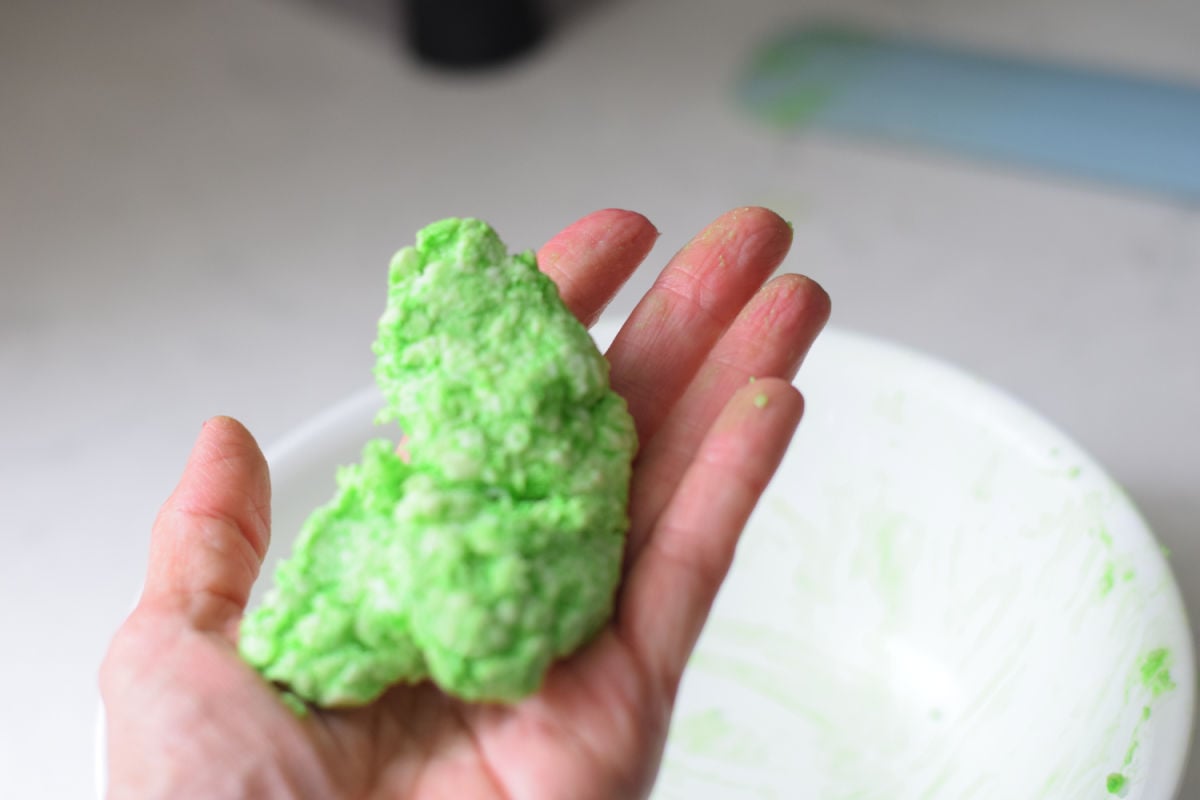
Note: There might still be bits of white, but don’t worry about that. It will still look adorable.
Decorating the Dough:
This is the really fun part.
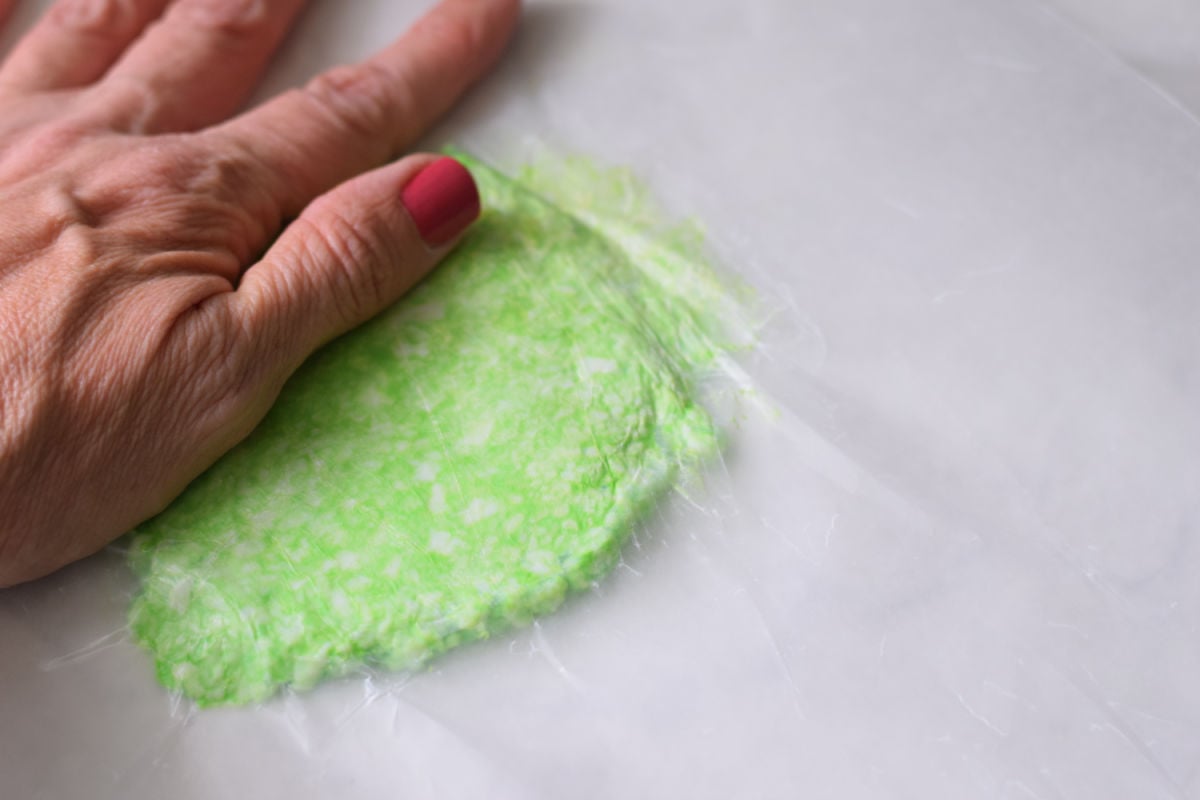
Place wax paper down to use as a table mat – The soap lifts right off of it
Put the soap dough onto the wax paper
Add a second sheet of wax paper over the soap dough
Press the dough down and use a roller to flatten it to the thickness you desire.
Pull the top wax paper off of the soap dough
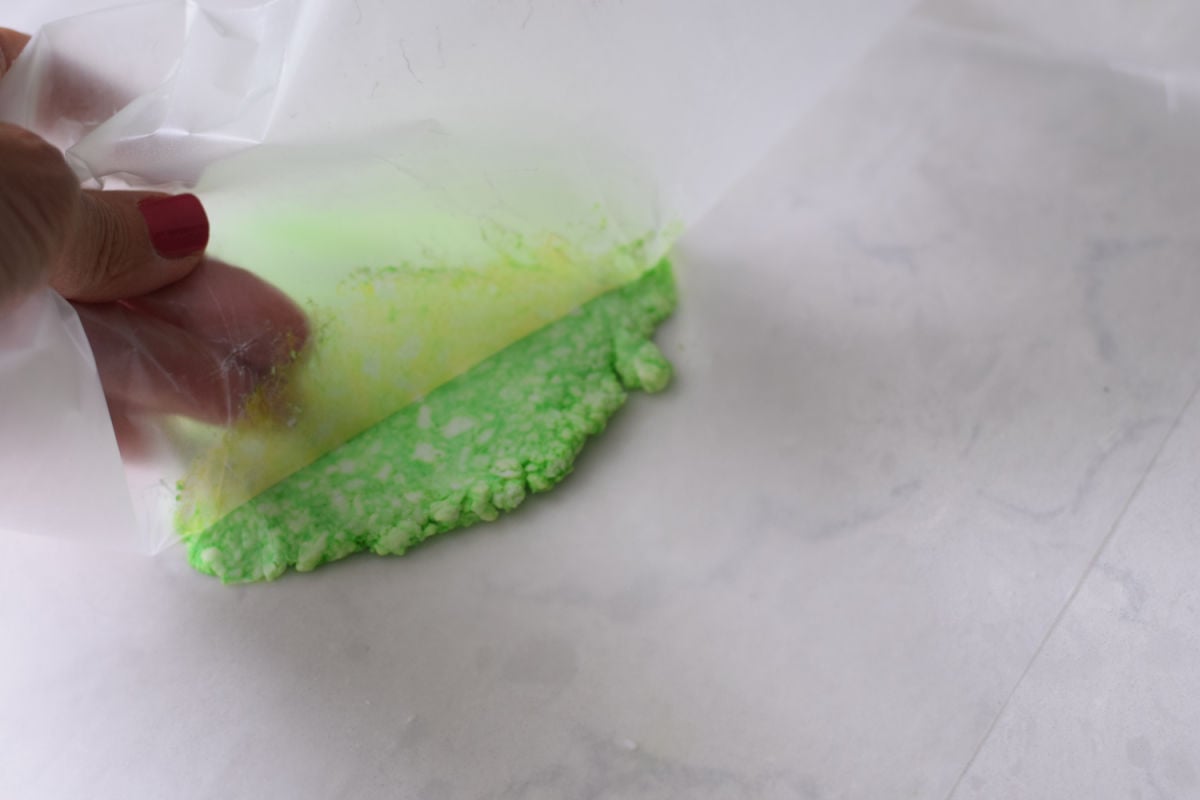
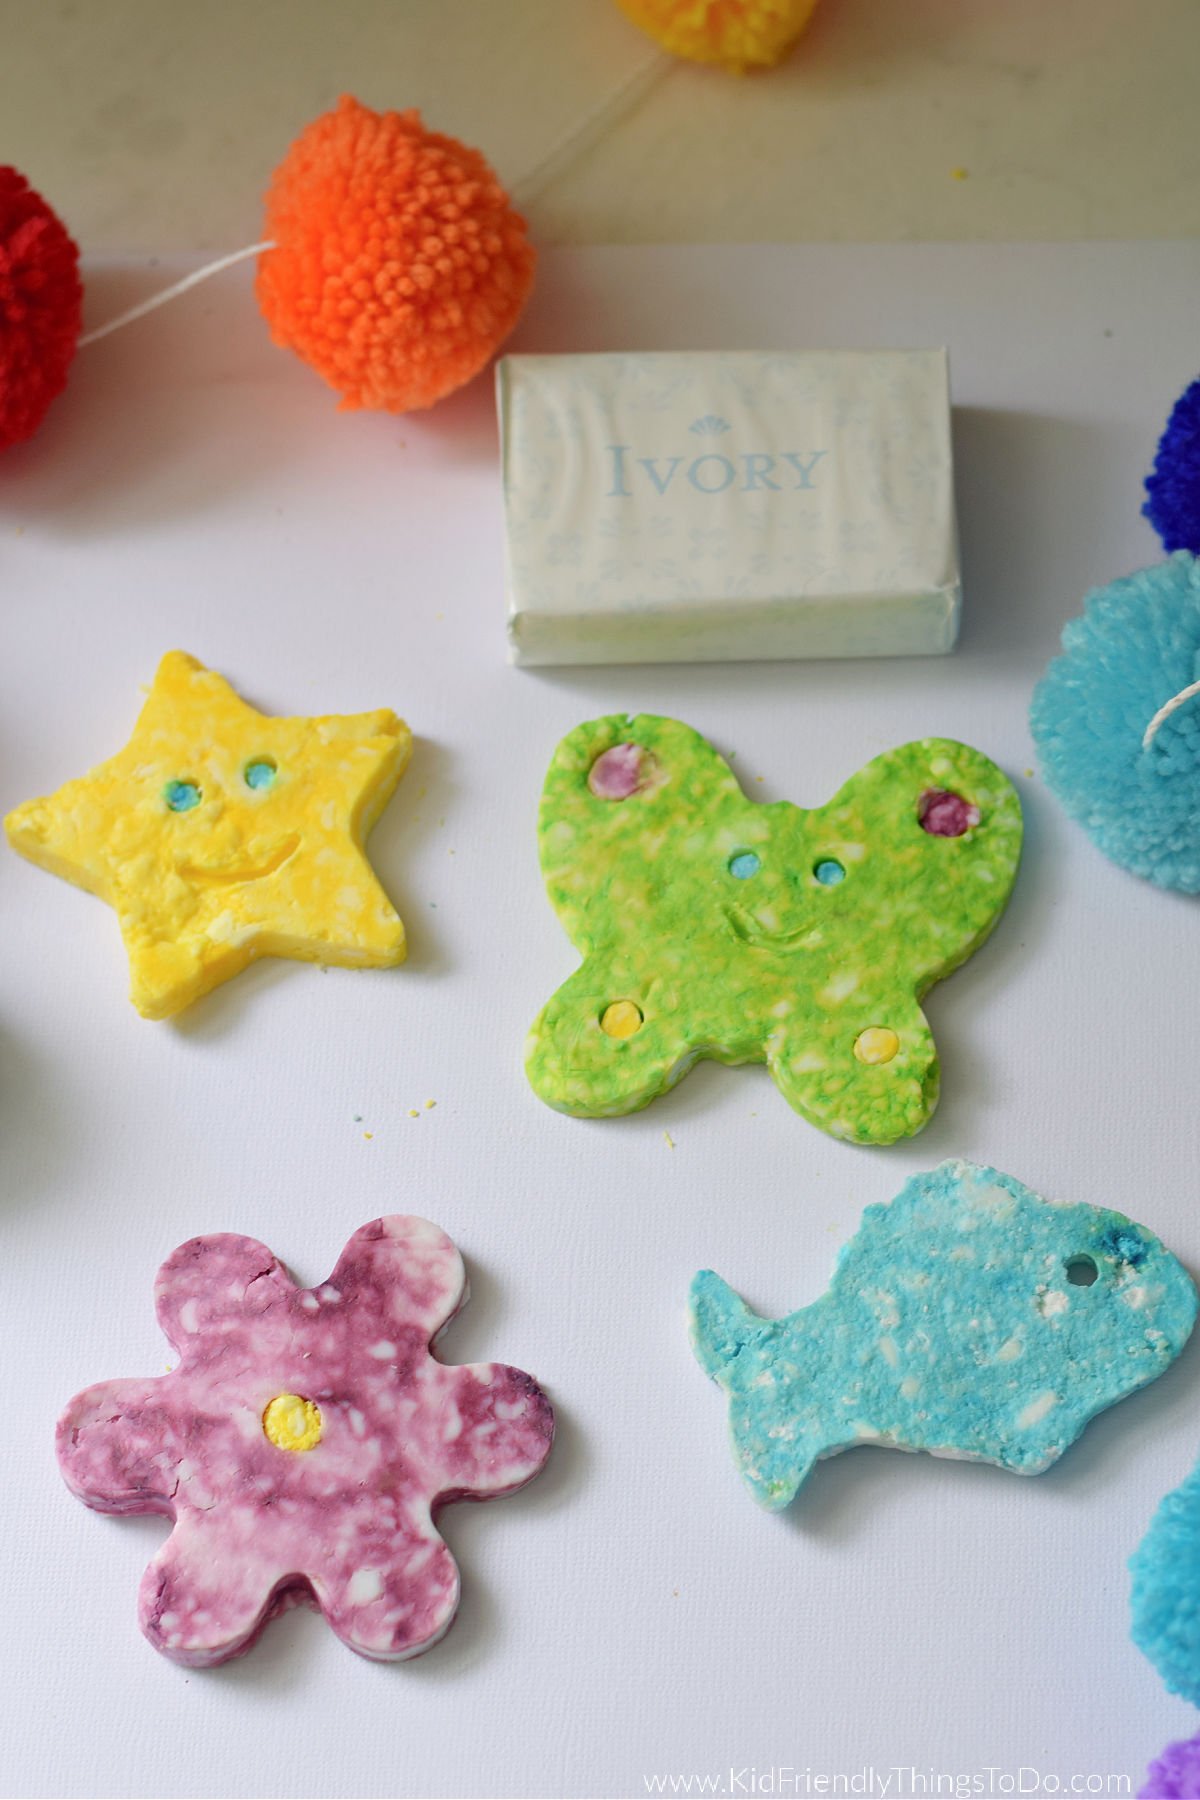
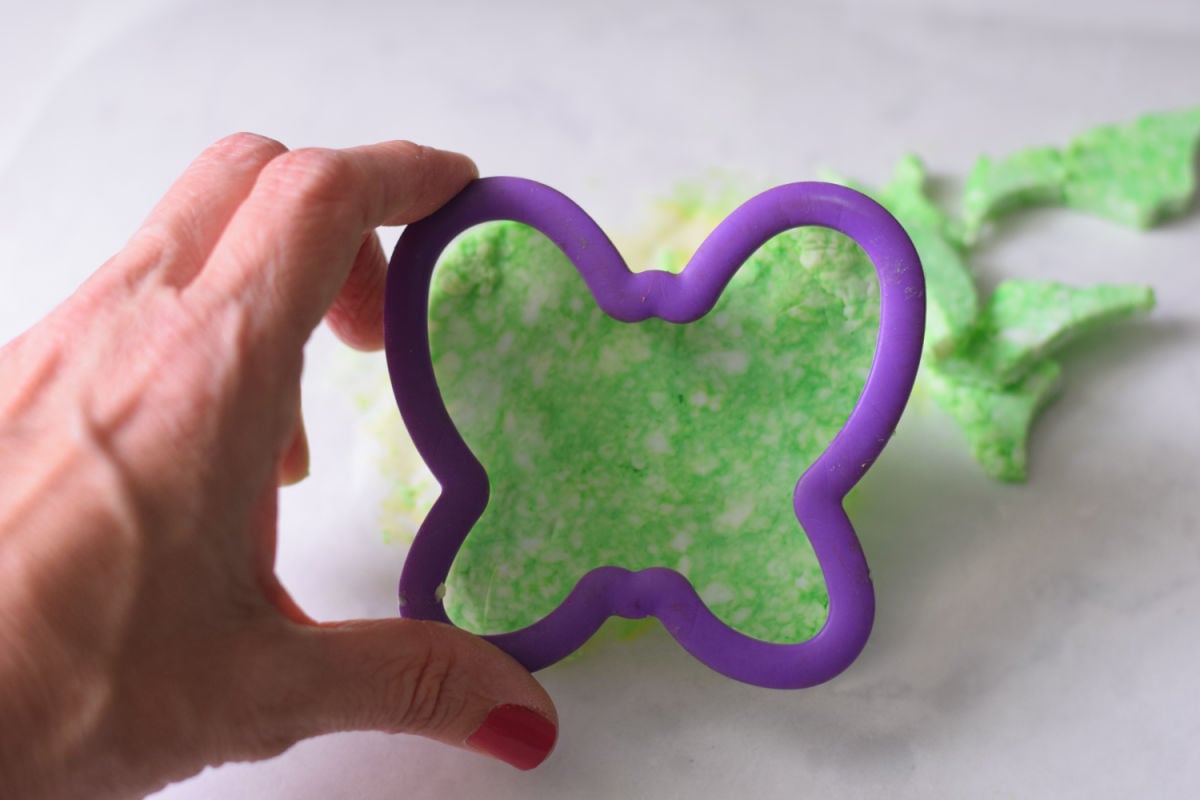
Press your cookie cutter into the soap
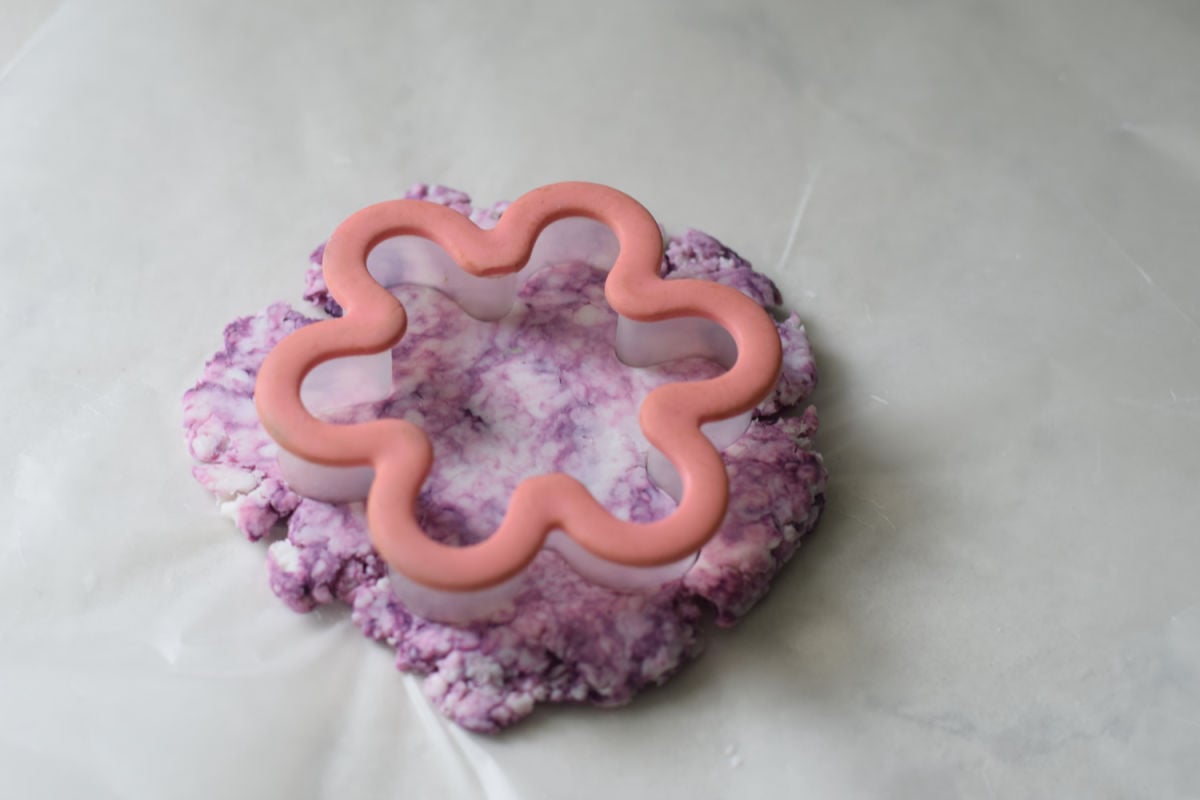
I found that it is easier to decorate the soap while the soap is still in the cookie cutter.
Use the techniques below to add features and decorate your soap shapes
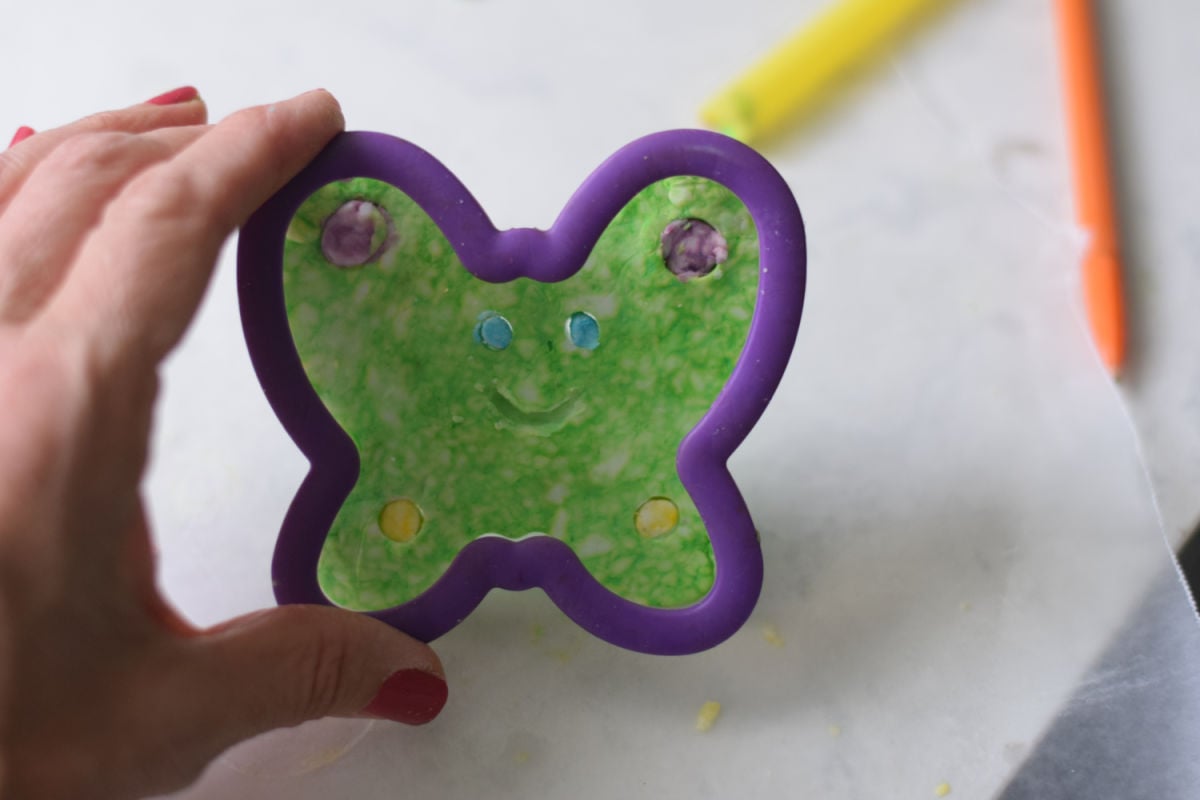
When you are done decorating the soap shape, take the cookie cutter off the shape. If it does not come off by itself, gently push the edges out of the cookie cutter.
To Make Circle Shapes
Using the size straw you like, push the straw into the soap – the soap will be extracted into the straw
Squeeze the soap out of the straw onto the wax paper. Save this in case you want to use it later.
Filling Circles
Using the other end of the straw – and the SAME technique – Extract the color of soap you want to fill the circle with
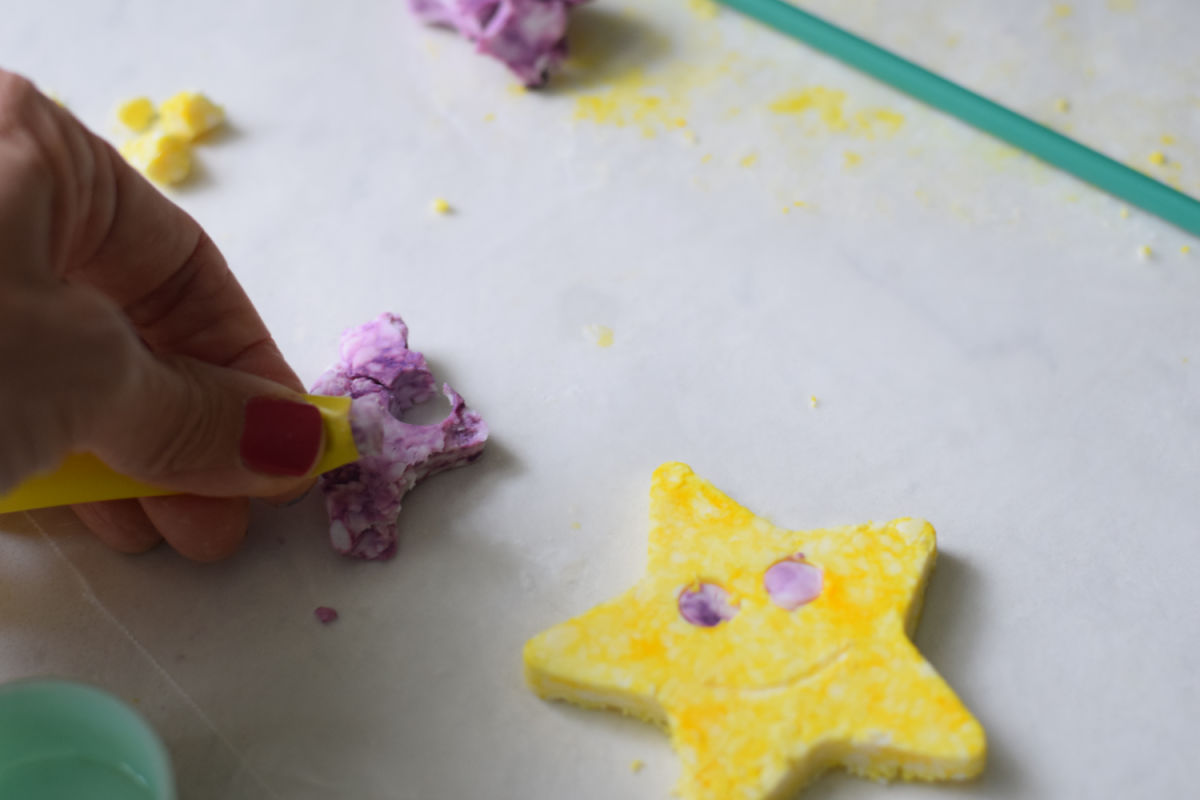
Squeeze the soap out of the straw, by pushing it up and out – like an “Ice Pop” and into the circle you want to fill.
Take any excess off and smooth it by pushing it with your finger
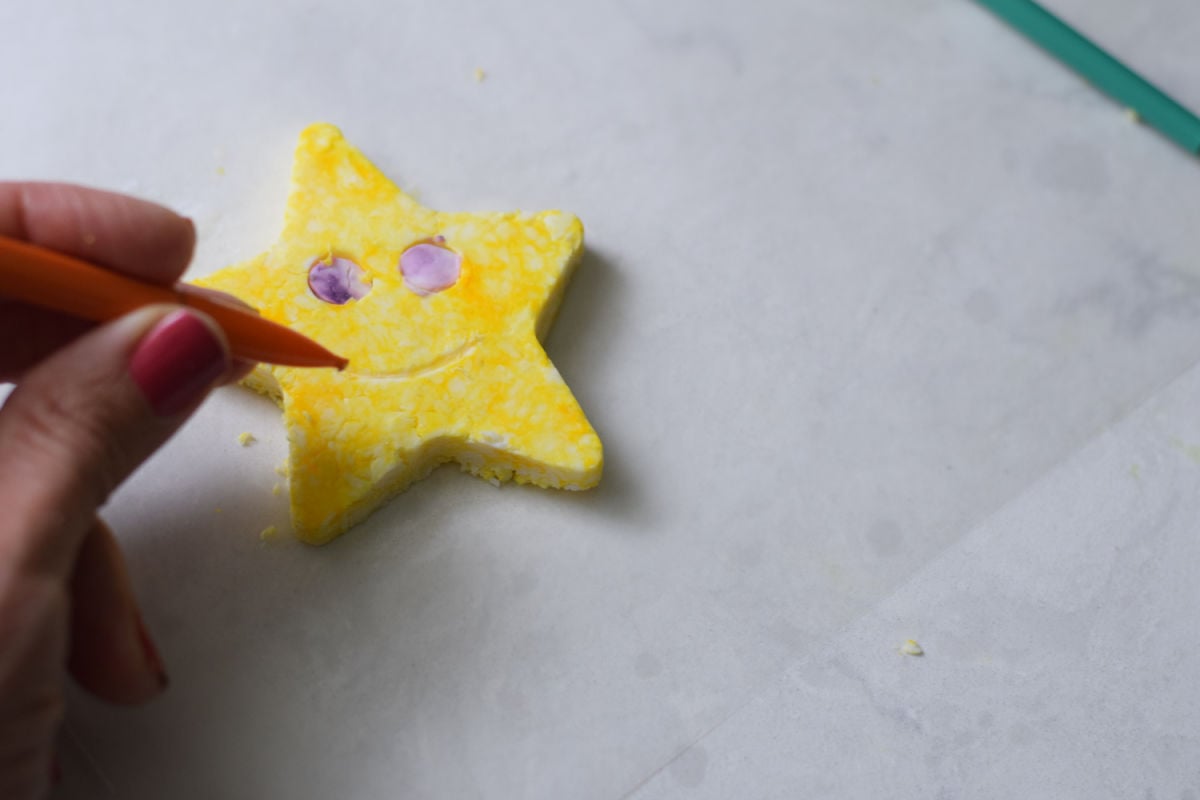
Making Lines
Again, it is easier if the soap shape is still encased in the cookie cutter, unlike what I’m showing you below.
Use a pencil or other sharp-pointed object to carve out lines for designs, such as smiles.
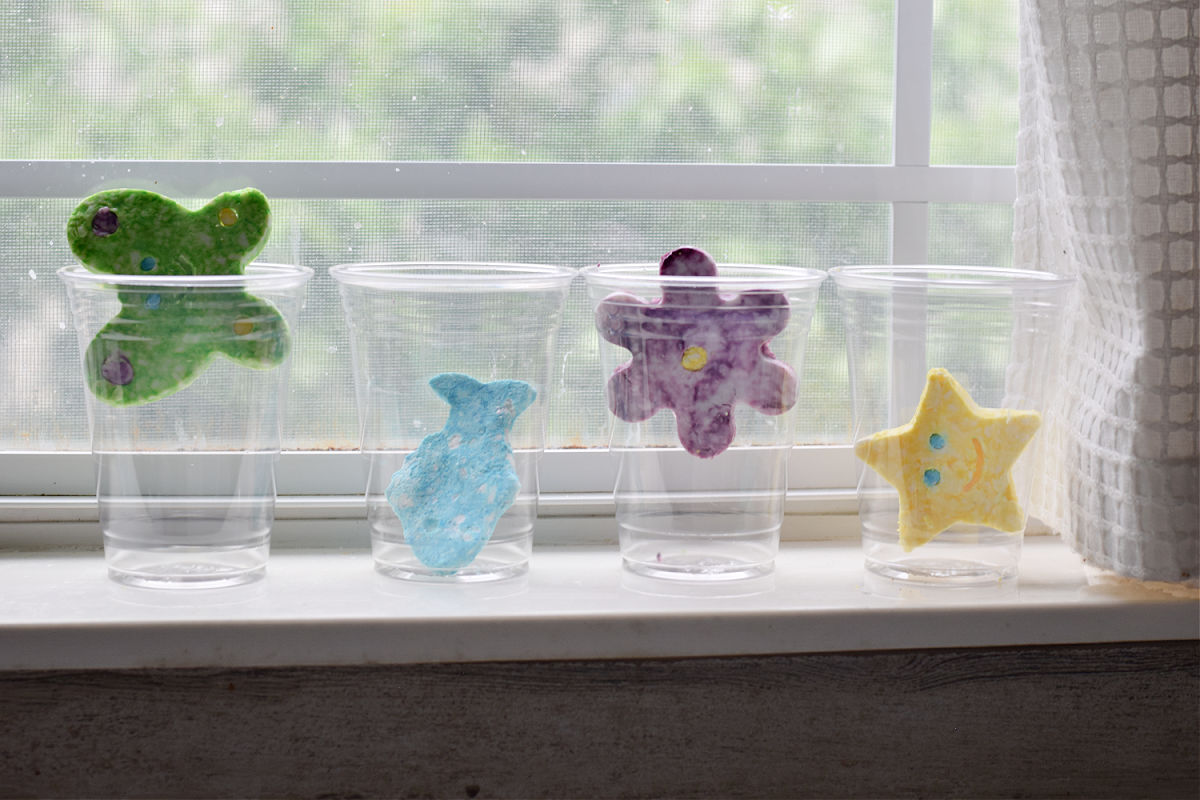
Drying the Soap
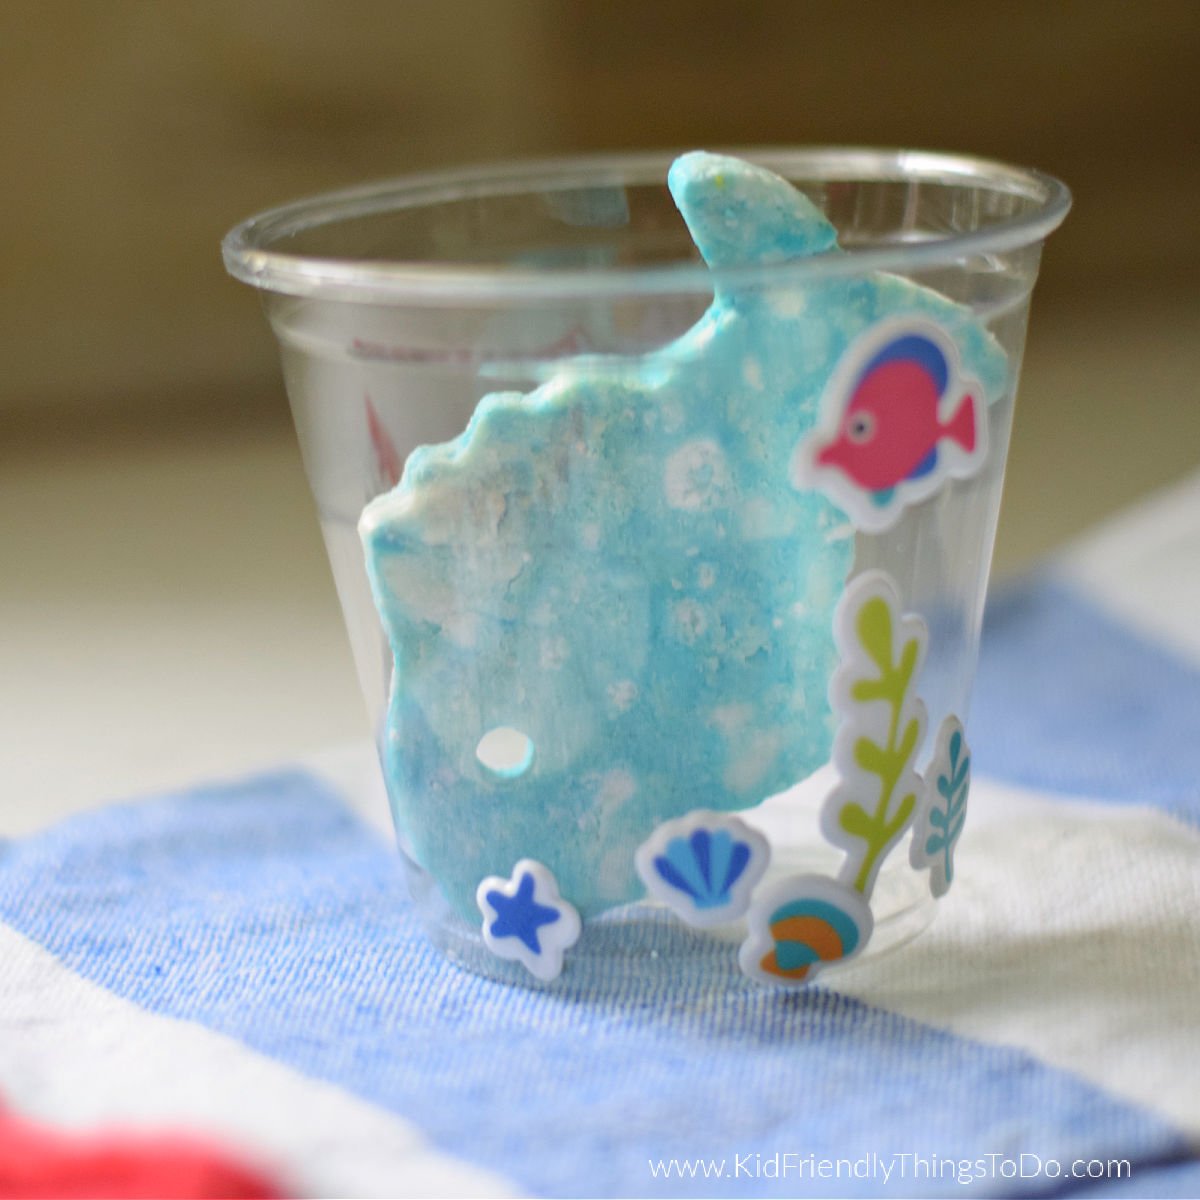
Great idea for drying soap, and keeping counters clean – Solo Cups

Note: If you are using a food processor to grind the soap, use the cheese attachment.
Fixing Broken Pieces
Wet the soap at the break. Push the pieces together and let them dry completely
More Ideas
Fish Soap Shapes – Extend the craft by decorating the plastic cup like an aquarium for the fish to dry inside of.
Use cookie cutters to make holiday soap shapes for the kids to use or give out as gifts
Gingerbread People – Use the straw technique to make buttons and the pencil to make a smile
Christmas Tree – Use the straw technique to make ornaments
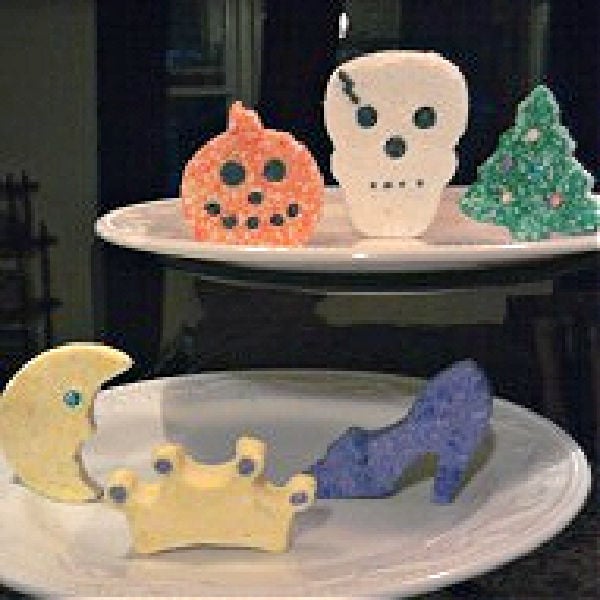
Halloween Soap Shapes
Skull – I have a really old and dark photo to share on how I decorated a soap skull shape. I used a pencil to make the lightning bolt and filled it in with black soap.
Jack-o’-Lantern – Use the straw method to create the face.
Here’s a picture from 2012 with some ideas for soap shapes.
Pro-Tips
Be careful not to rub the soap in your eyes
FAQs
Can I Microwave Ivory Soap for this Activity?
Over the years, I have seen all of the fun Pinterest images on making soap dough with Ivory soap using a microwave. This time, I thought I’d try that technique and I did. It was fun, but I do not recommend microwaving the soap for this project.
The reason the microwave method won’t work with this activity is that it dries the soap out. The soap is burning hot when you first take it out of the microwave, so you can not touch it. I tried and burned myself, so I definitely wouldn’t want the kids handling it. As it cools, the soap dries out so much that it turns into a paper-like texture.
More Bathtime Ideas You’ll Love

How long do you need to let the soap dry?
Oh wow! It’s been years since I’ve made this soap. I’d say about 24 hours. If you are keeping it on wax paper, then you’ll want to flip it over and allow the side that wasn’t exposed to air dry too. Give that side another 24 hours to completely dry.