
Easy Homemade Mounds Candy Recipe
This post may contain affiliate links – please read my disclosure statement.
I’ve made this Mounds bar recipe enough times to know that the chocolate and the temperature of the coconut center make a big difference. Dark chocolate melts give me the flavor and coating closest to a real Mounds candy bar, and they’re much easier to work with than chocolate chips.
The other trick I’ve learned is to freeze the coconut centers before dipping them. Refrigerating them isn’t quite the same—the centers are much easier to coat in warm chocolate when they’re frozen and firm.
And don’t worry if the coconut mixture feels really sticky—that’s normal! I wet my hands when shaping it, and if I’m working with an older bag of coconut that has dried out, a little extra sweetened condensed milk helps bring the moisture back.
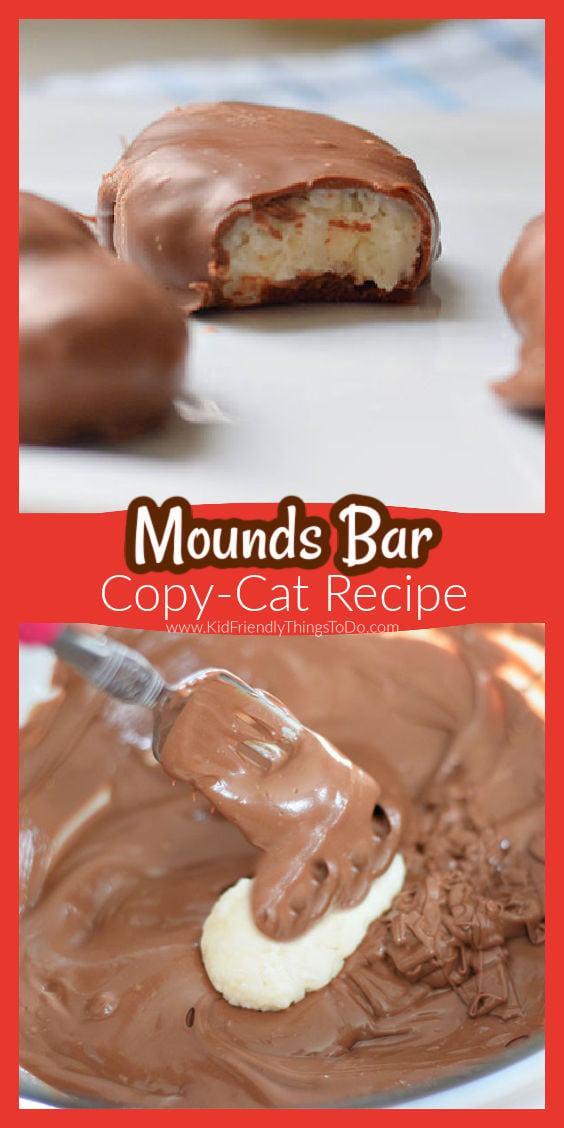
Why You’ll Love This Mounds Chocolate Bar Recipe
- It tastes like the classic candy bar. Sweet coconut covered in rich dark chocolate gives you that familiar Mounds flavor.
- You only need four ingredients. Sweetened coconut flakes, powdered sugar, sweetened condensed milk, and dark chocolate are all you need.
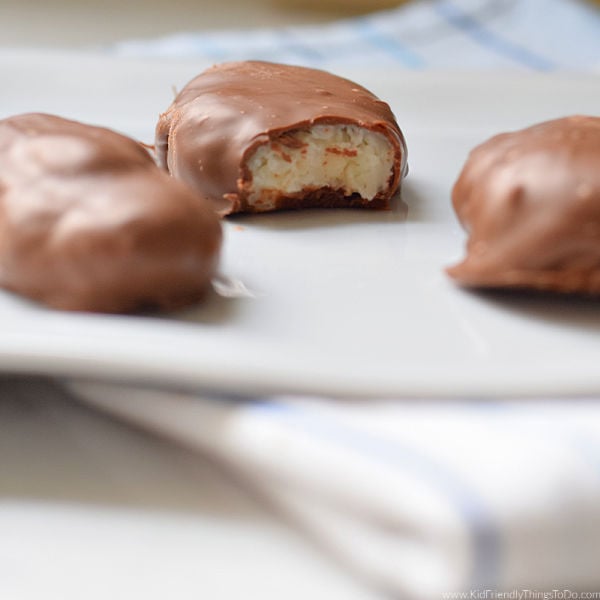
- They’re easy to shape. Leave the coconut centers round or flatten and shape them into the traditional elongated candy bar shape.
- You can make Almond Joys, too. Add an almond to the same coconut center and swap the dark chocolate for milk chocolate.
- They’re freezer-friendly. You can freeze the finished candy with wax paper between the layers for up to 12 months.
Mounds Bar vs. Almond Joy: What’s the Difference?
What is the difference between an Almond Joy and a Mounds Bar?
Almond Joy Bars have almonds on the coconut mixture and under the chocolate. They are also made with milk chocolate whereas mounds bars are made with dark chocolate.
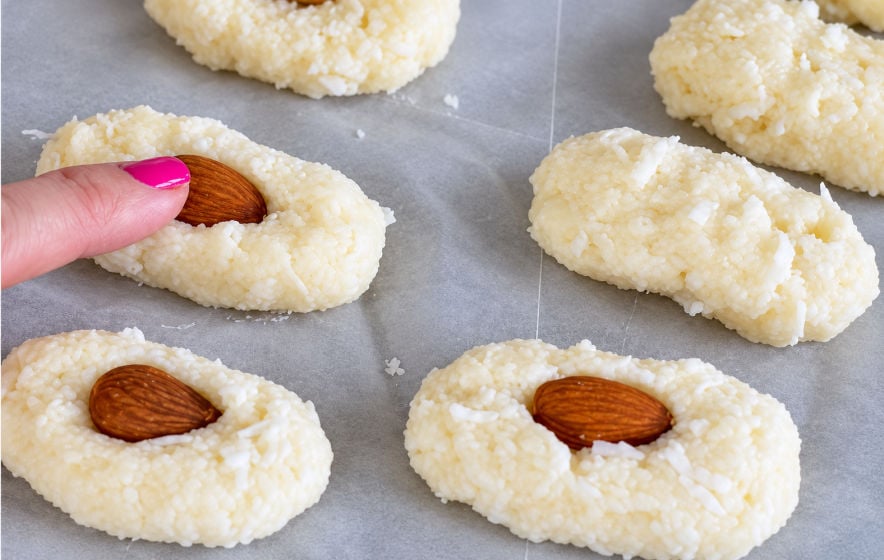
🥥 Mounds Bar vs. 🌰 Almond Joy at a Glance
| 🥥 Mounds Bar | 🌰 Almond Joy | |
|---|---|---|
| Chocolate coating | Dark chocolate. Richer and a little less sweet, so the coconut really shines. | Milk chocolate. Sweeter and creamier. |
| Nuts | No nuts at all. Just coconut and chocolate. | Whole almonds pressed into the top of the coconut center. |
| Coconut center | Sweetened coconut flakes. Soft, chewy, and sweet. | The same coconut center as a Mounds Bar. |
| Wrapper color | Red. | Blue. |
| First made | 1920, in Connecticut. | 1946, by the same Connecticut candy company. |
| Who makes it today | Hershey. | Hershey, too. They’re sister candy bars. |
| Homemade swap | Dark chocolate melts give you the closest match to the original. | Push an almond into each coconut center and dip in milk chocolate melts instead. |
What Is Mounds Candy? Everything to Know About the Mounds Bar
A Mounds Bar is a classic candy bar made with a sweet, chewy coconut center covered in dark chocolate. The combination is simple—coconut and chocolate without the almonds you’ll find in an Almond Joy.
Mounds Bars date back to around 1920 in Connecticut, and the Peter Paul Candy Company purchased them in 1929.
For this homemade version, I use dark chocolate melts because they give me the flavor and coating that’s closest to the original Mounds Bar.
Ingredients for Homemade Mounds Bars
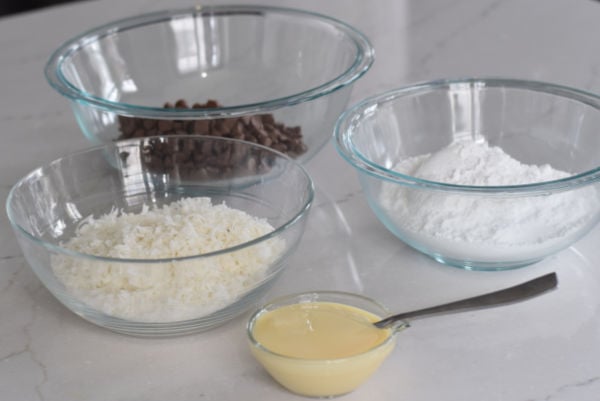
You only need four simple ingredients to make these homemade Mounds Bars.
| Ingredient | Purpose | Easy Substitute |
|---|---|---|
| Sweetened coconut flakes | Gives the center its chewy coconut texture and flavor. | I recommend sticking with sweetened coconut flakes for this recipe. |
| Confectioners’ sugar | Sweetens the coconut mixture and helps create the soft candy center. | Also called powdered sugar. |
| Sweetened condensed milk | Adds moisture and helps hold the coconut mixture together. | No tested substitute for this recipe. |
| Dark chocolate melts | Creates the rich chocolate coating that’s closest to a classic Mounds Bar. | Almond bark or chocolate melting chips work, too. Chocolate chips can also be used but may need tempering. |
Almond Joy Variation
To turn these into homemade Almond Joy bars, make the same coconut center with sweetened coconut flakes, confectioners’ sugar, and sweetened condensed milk.
Press a whole almond snugly into the top of each shaped coconut center, then use milk chocolate melts instead of dark chocolate for the coating.
Mounds Bar Ingredient Notes and Substitutions
Sweetened coconut flakes: Use fresh coconut if possible. Once a bag has been opened for a while, the coconut can dry out and the mixture may not hold together as easily. If yours seems dry, add a little more sweetened condensed milk to bring back some moisture.
Confectioners’ sugar: This is the same thing as powdered sugar. It combines with the condensed milk and coconut to make the sweet, soft center.
Sweetened condensed milk: This provides the moisture that helps the coconut mixture come together. I haven’t tested a substitute for condensed milk in this recipe.
Dark chocolate: Dark chocolate melts give me the results closest to an original Mounds Bar. You can also use almond bark or chocolate melting chips. Chocolate chips can work, but they’re a little trickier for dipping and may need to be tempered.
How to Make Mounds Bars
Step 1: Mix the confectioners’ sugar, sweetened coconut flakes, and sweetened condensed milk until well combined. The mixture will be sticky, so wet your hands if needed when you begin shaping it.
Step 2: Scoop out about a 1-inch ball of coconut mixture. Leave it round, or flatten and shape it into the traditional elongated Mounds shape, which will be approximately 2 inches long.
Step 3: Place the shaped coconut centers on a baking sheet lined with wax paper and freeze for about 30 minutes. Freezing them until firm helps keep the centers from falling apart when they’re dipped into the warm chocolate.
Step 4: Place the dark chocolate in a microwave-safe bowl. Microwave in 30-second intervals, stirring between each interval, until melted and smooth. This usually takes about 1 to 1½ minutes total.
Step 5: Dip one frozen coconut center at a time into the melted chocolate using a fork. Spoon chocolate over any uncovered areas, then lift it out and allow the excess chocolate to drip back into the bowl.
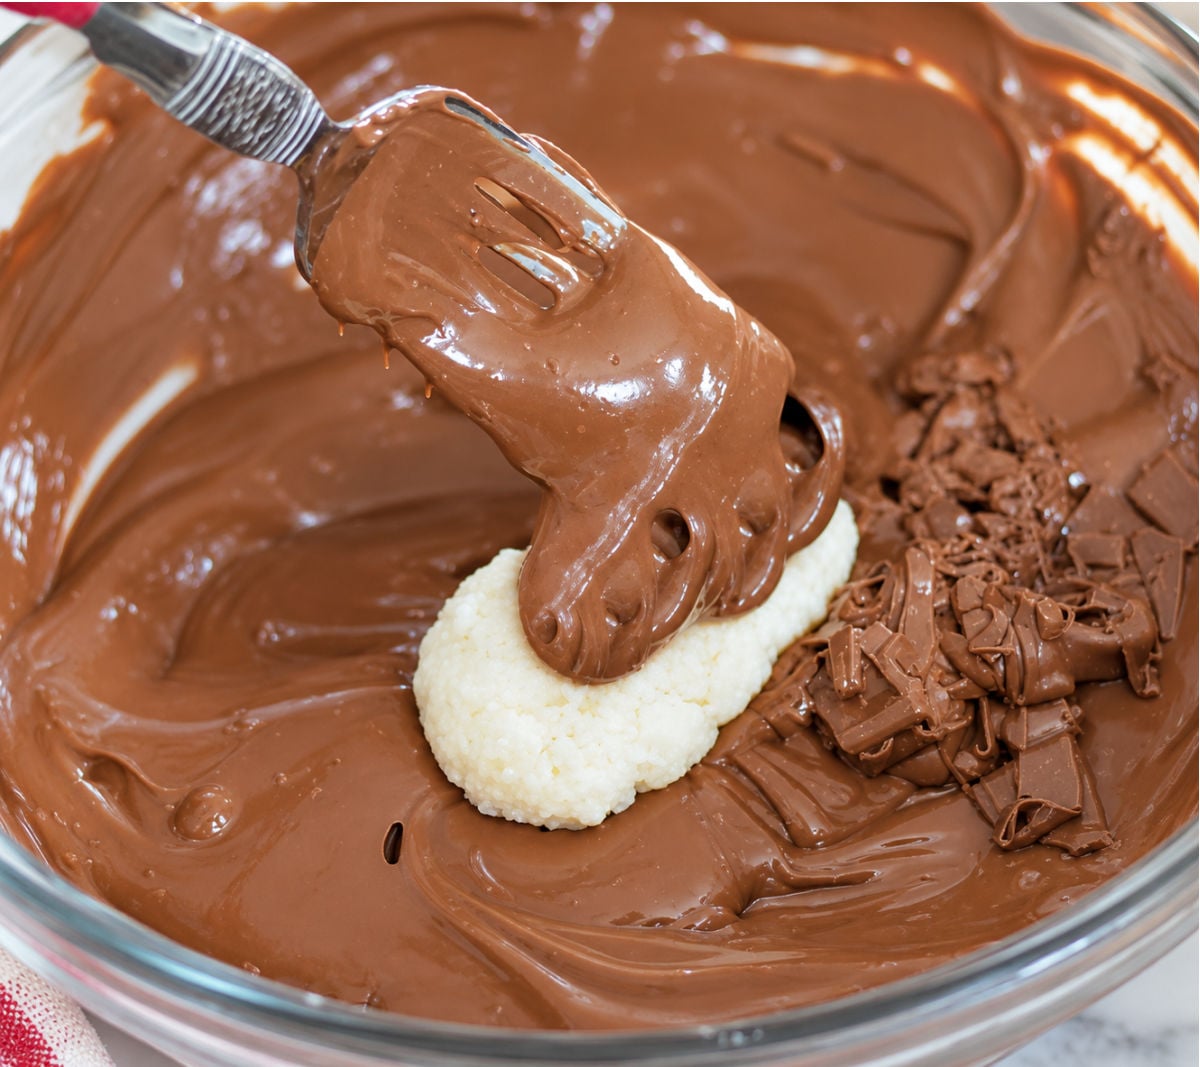
Step 6: Use a toothpick to gently slide the chocolate-covered candy from the fork onto wax paper. Repeat with the remaining coconut centers.
Step 7: Let the chocolate set, or place the Mounds Bars in the freezer for about 10 minutes to quickly firm the chocolate coating.
Melissa’s Tips for the Perfect Mound Bars Recipe
- Use dark chocolate melts for the closest flavor. I’ve found that dark chocolate melts give these the flavor and coating that’s most like an original Mounds Bar. Semi-sweet chocolate chips can work, but they’re harder to dip with and may need tempering.
- Use fresh sweetened coconut flakes. Coconut from an older opened bag can lose moisture, making the centers harder to hold together. If the mixture seems too dry, add a little more sweetened condensed milk.
- Wet your hands. The coconut mixture is naturally wet and sticky. Damp hands make it much easier to shape.
- Freeze the centers before dipping. Don’t skip this step. Firm, frozen coconut centers are much easier to dip into the warm chocolate without having them fall apart.
- Use wax paper for the dipped candy. The wet chocolate releases easily from wax paper once it has set.
- Use a toothpick to help with dipping. After lifting each candy out of the chocolate with a fork, use a toothpick to gently slide it onto the wax paper without disturbing the coating.
How to Store Homemade Mounds Bars
Store homemade Mounds Bars in an airtight container at room temperature for up to 5 days.
For longer storage, place wax paper between the layers of candy and store them in a freezer-safe bag or airtight container. Mounds Bars can be frozen for up to 12 months.
Let frozen Mounds Bars thaw before serving.

FAQs about Mounds Bars
I’d Love to Hear From You

If you make this recipe, I’d love to hear what you think! Please leave a star rating and comment below to let me know how it turned out. I love hearing from you, and your ratings help other readers find and enjoy the recipe, too!
Homemade Mounds Bars Recipe
Ingredients
- 1¾ cups confectioners sugar also known as powdered sugar
- 1¾ cups sweetened coconut flakes
- ½ cup sweetened condensed milk
- 2 cups dark chocolate – like dark chocolate melts
Instructions
- 1. Make the coconut mixture.Mix the confectioners' sugar, sweetened coconut flakes, and sweetened condensed milk until well combined.
- 2. Shape the centers. Scoop out about a 1-inch ball of coconut mixture. Roll it round, or flatten and shape it into an elongated Mounds shape, about 2 inches long. Wet your hands if the mixture is too sticky to work with.
- 3. Freeze. Place the coconut centers on a baking sheet lined with wax paper and freeze for about 30 minutes.
- 4. Melt the chocolate. Place the dark chocolate melts in a microwave-safe bowl. Microwave in 30-second intervals, stirring between each interval, until melted and smooth, about 1 to 1½ minutes total.
- 5. Dip. Using a fork, lower one frozen coconut center at a time into the melted chocolate. Spoon chocolate over any uncovered areas. Lift it out and allow the excess chocolate to drip back into the bowl.
- 6. Transfer. Use a toothpick to gently slide the chocolate-covered candy from the fork onto wax paper.
- 7. Set the chocolate. Allow the chocolate to set, or place the finished Mounds Bars in the freezer for about 10 minutes to quickly firm the coating.
Notes
Nutrition
More Chocolate Recipes to Try
- Oreo Cookie Truffle – Football Shape
- Chocolate Bundt Cake with coffee
- Homemade Chocolate Coca-Cola Cake
- Chocolate Whipped Cream
- how to make fancy striped strawberries
- homemade chocolate-covered cherries
- Reese’s Butter Cups
- Zucchini Brownies
[box] 


 [/box]
~Melissa – KidFriendlyThingsToDo.com
I bought sweetened coconut by mistake, can I still use it?
That’s perfect. You’ll need sweetened coconut flakes for this recipe. 🙂
I am making these now. Super sticky. What can I do to make it roll better?
The mixture will be really sticky. You can try wetting your hands with water before handling the mixture. You’ll probably need to do this after making 4-5 bars just to get the sticky residue off of your hands that the mixture might cling to. You might even try popping the mixture into the fridge for about 30 minutes. The mixture might harden and be less sticky.
These are my favorite candy.
What is the confectioner sugar for? It it listed in the instructions but not the receipt
Maybe it is confusing to see confectioner sugar in the recipe, but referred to as powdered sugar in the post. They are the same thing. I wrote a little side note on the recipe card to hopefully clear it up. However, I do see it in the recipe card. It is the first ingredient and in the first step of instructions. It is used as a thickening and sweetening agent in the recipe. Sorry for the confusion. Hope this helps.
Made them. So good.!!
I’m so excited that you liked them! Yay! Thank you so much for coming back to let me know. 🙂
I just made these .I used semi-chocolate chips and I had trouble dipping the candy. The chocolate started getting hard and I did everything the recipe called for. Soon as I put them in the chocolate the candy got limp and I had them in refrigerator for 30 min. The shape got odd but they were good. Is there anything I can do to make them
better.Thank you so much for the recipe.
Hey there! I’m sorry you didn’t have the best results from the recipe. I’m glad they at least tasted good. 🙂 A couple of things that I noticed from your notes were that your used semi-sweet chocolate chips and you refrigerated them for 30 minutes. With a couple of quick tweaks like using dark chocolate melting wafers and placing them in the freezer for 30 minutes, I think you’ll get the result that you hoped for. Let me know how that works for you and we will go from there. 🙂