A Haunted Castle Bean Bag Toss
This post may contain affiliate links – please read my disclosure statement.
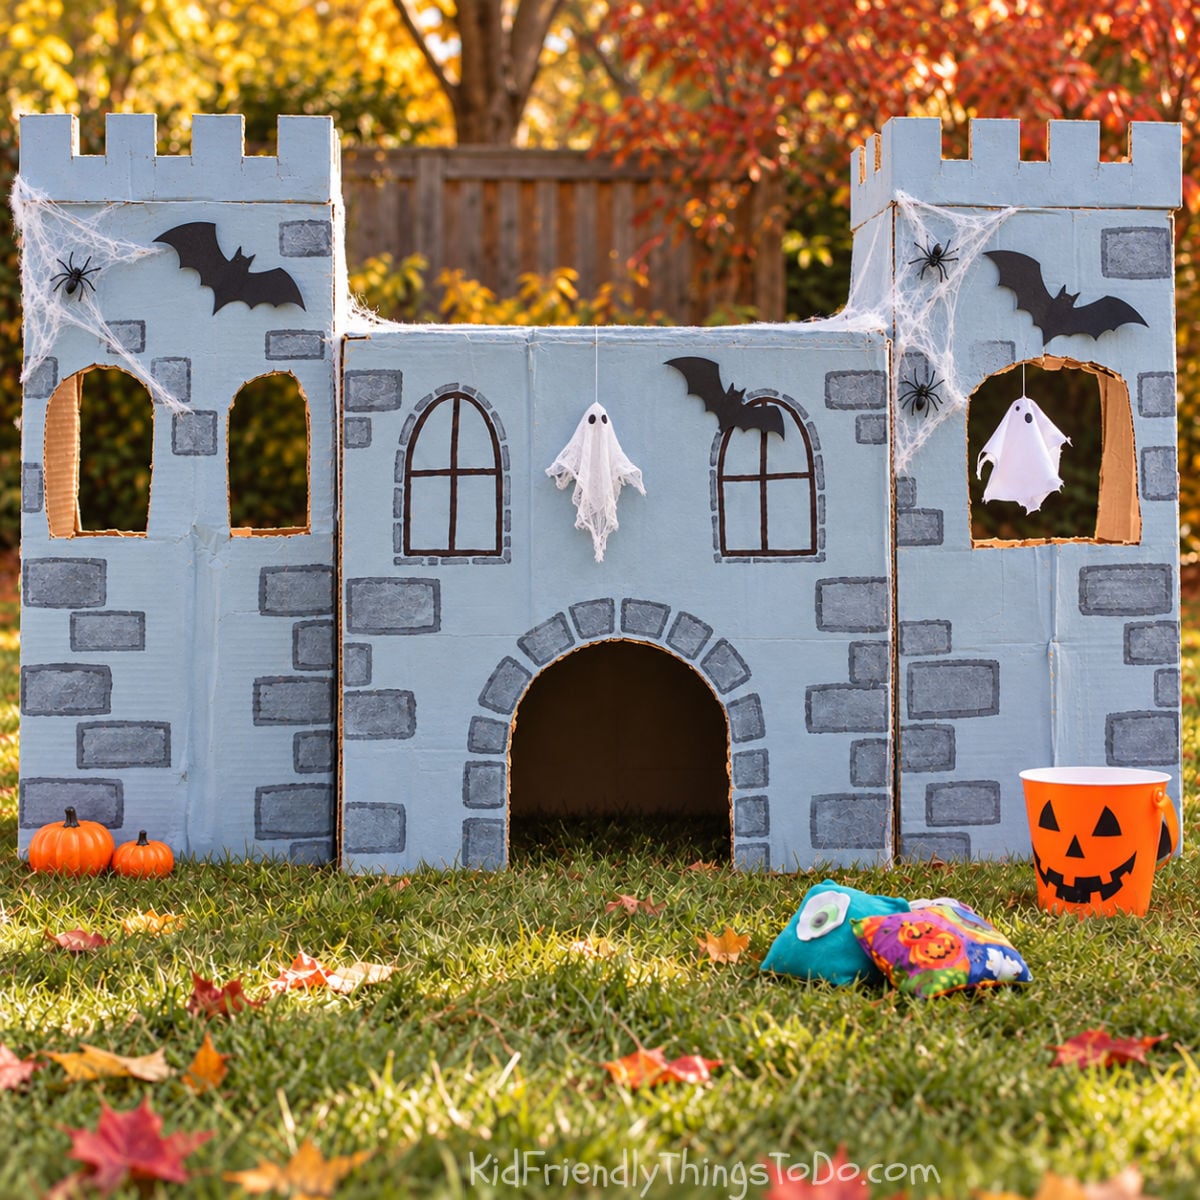
This DIY Halloween bean bag toss started with my love of haunted-house decorations. Instead of making a plain target, I turned cardboard boxes into a haunted castle with windows and a doorway for tossing bean bags.
I’ve made this castle with purchased boxes and reused delivery boxes. The sizes don’t have to match mine—the important part is choosing a larger center box and two narrower boxes for the towers, with openings big enough for your bean bags to fit through.
For an earlier version, I used black paint with sponge-stamped gray bricks. For another, I used gray paint I already had in the garage. My mom even sews our bean bags from Halloween fabric, which gives this homemade game an extra personal touch!
All activities, recipes, crafts, and games with children should be supervised by an adult. Small parts are a choking hazard.
Haunted Castle Bean Bag Toss Halloween Game
Players toss bean bags through the castle’s windows and doorway to earn points. You can play individually or divide players into teams.
What You’ll Love About This Halloween Game
- Uses cardboard boxes you may already have.
- Lets you personalize the castle with paint and Halloween decorations.
- Works as a backyard game or classroom party activity.
- Includes individual and team play options.
Supplies You’ll Need for This Haunted Castle Halloween Game
- Three cardboard boxes: One larger box for the center and two narrower boxes for the towers.
- Tape: To attach the boxes.
- Paint: Gray or black for the castle.
- Scissors or a sharp knife: An adult should cut the cardboard openings.
- Bean bags: Purchased or homemade.
Decorating Supplies
Choose the decorations you want to use:
- White polyester fabric and a black Sharpie for ghosts
- A sponge cut into a small rectangle and gray paint for stamped bricks
- Black puffy paint for cracks in the bricks
- Fake spider webs and plastic spiders
- Cardboard window cutouts for gravestones
- Skeleton bones
- Glow sticks or strobe lights for a nighttime version
How to Build the Cardboard Haunted Castle
Step 1: Arrange the boxes with the larger box in the middle and the narrower boxes on either side. Assemble any boxes that need it, then tape them together.
Step 2: Paint the boxes gray or black.
Step 3: Cut a large arched doorway at the bottom of the center box. Remove the cutout completely or leave the bottom attached like a drawbridge.
Step 4: Draw or cut two arched windows near the top of the center box. Any windows used as targets should be large enough for the bean bags to pass through. Save the cutouts for gravestones.
Step 5: Use cardboard flaps or scraps to make the castle towers’ tops, cutting square notches along the upper edge.
Step 6: Cut arched window targets in the towers. Save these cutouts for decorations, too.
Decorating Your Bean Bag Game
Make a Painted Block Design
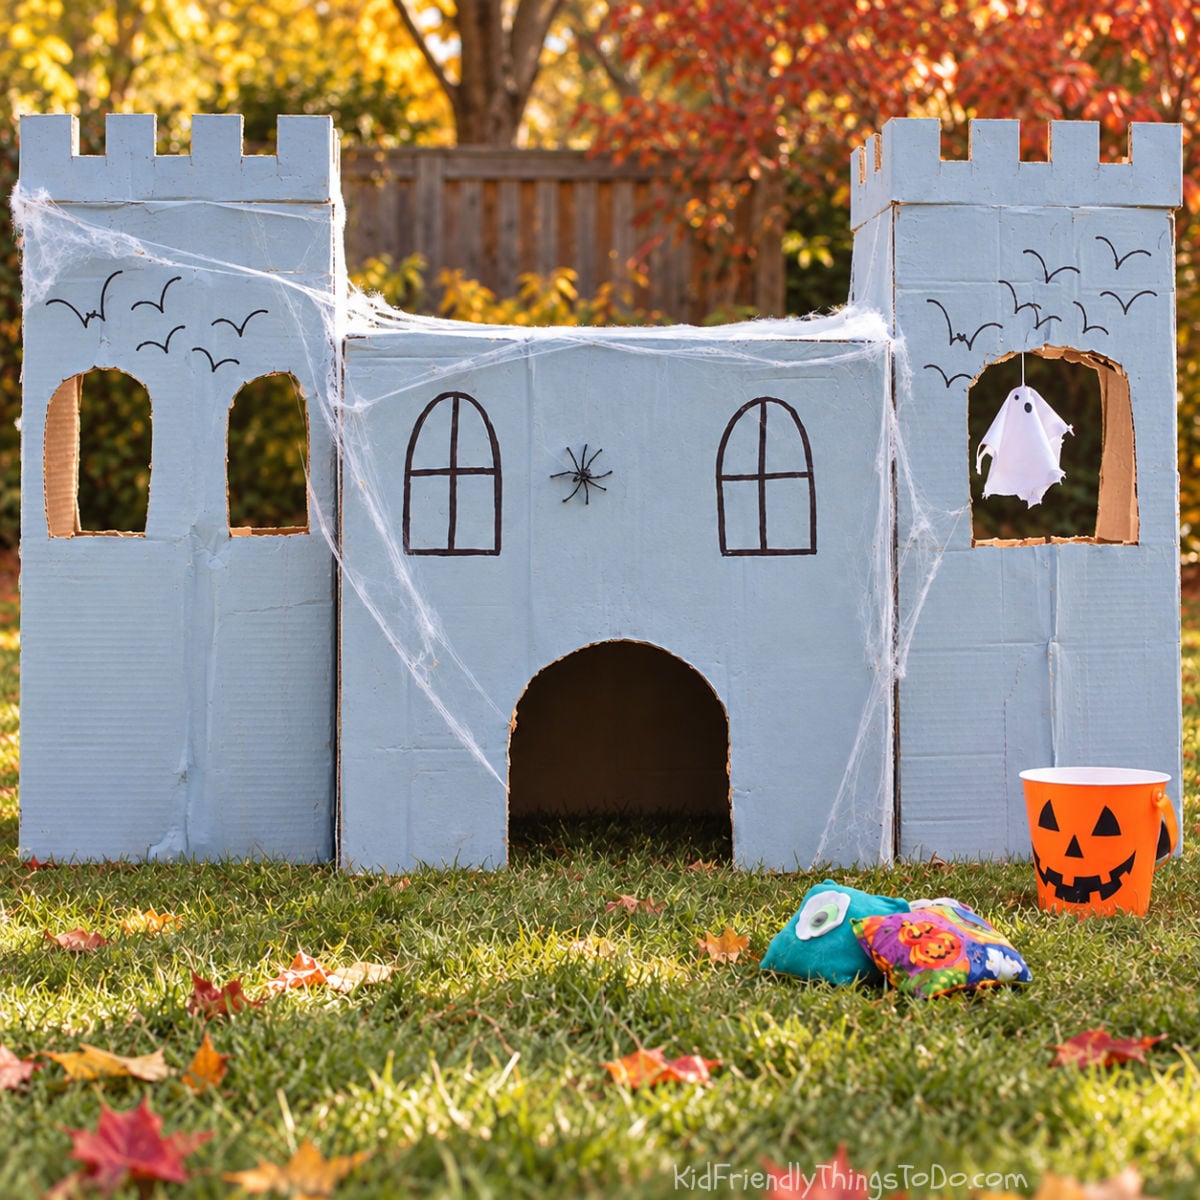
For my earlier castle, I used a small rectangular sponge dipped in gray paint to stamp bricks along the corners. Once the paint dried, I added cracks with black puffy paint.
Make Ghosts
Draw ghost faces on scraps of white polyester fabric with a black Sharpie, then hang them in the windows.
Add More Halloween Decorations
Add fake spider webs and plastic spiders. Draw bats or extra windows with a black Sharpie, and write “RIP” on the saved cardboard cutouts to make gravestones.
How to Play this Halloween Bean Bag Toss Game

Assign a point value to each target opening. Smaller windows should be worth more points than wider windows or the large doorway. Write the values beside the openings.
Decide how many throws each player gets before starting. Players toss their bean bags through the openings and add up their points. The goal is to score the most points.
Team Play
Divide players into teams and alternate turns. Allow teams to have 3 throws per turn.
Choose a winning score before starting, such as 21 points. Keep alternating turns until a team reaches that score. The first team to reach the goal wins.
Halloween Toss Game Variations
Eyeball toss: Use rubber eyeballs instead of bean bags.
Nighttime game: Add glow sticks or strobe lights around the castle for play after dark.
More Halloween Party Games for Kids


- Halloween games
- Pumpkin Bowling Game
- Eyeball Dig Game
- Glow in the Dark Halloween Candy Hunt
- Halloween Activities for Preschoolers
Printable Instructions
Haunted Castle Halloween Bean Bag Game
Materials
- 3 Cardboard Boxes ( One larger box and two narrower boxes
- Paint In the past, I have used cheap black spray paint and used gray paint as an accent. This time, I had lots of gray paint in my garage, so I just went with that.
- Scissors or a sharp knife for cutting out windows and doors
- Bean Bags You can purchase bean bags or make them. My mom sews them for me out of Halloween material.
Instructions
- Place all three boxes in a row with the larger box in the middle and the two more narrow boxes on each side.
- Tape the boxes together
- Paint the boxes gray or black
- Cut a large arch in the center bottom of the large box for the door. You can cut it out completely, or leave the bottom attached much like a draw bridge would be
- Draw or Cut two more arches for windows toward the top of the box. If you cut them out, cut them large enough for bean bags to fit through. If you cut them out, then save them to make gravestones for decoration
- If needed, assemble the two small boxes
- Using a piece of cardboard from the cardboard flaps, or scrap cardboard, cut out square open spaces to make the "battlement" ridge. This is the classic design you see at the top of castle towers with square cut-outs for soldiers to fight from.
- Cut out an arch or arches for windows in each tower – you can keep the arch shapes to make into gravestones for decoration
Playing the Game
- Assign a value to each door and window. You can write the numbers around the windows and doors. Narrow windows should be worth more points than wide windows or the large door
- Kids will have a designated number of turns to try and score the most points
Team Play
- Teams will alternate turns with each getting three turns per team
- They can keep taking turns until a designated number of points has been earned (say 21 points)
- The first team to reach the goal number is the winner of the game
~Melissa – KidFriendlyThingsToDo.Com –