How to Make a Giant Spooky Spider out of Yarn
This post may contain affiliate links – please read my disclosure statement.
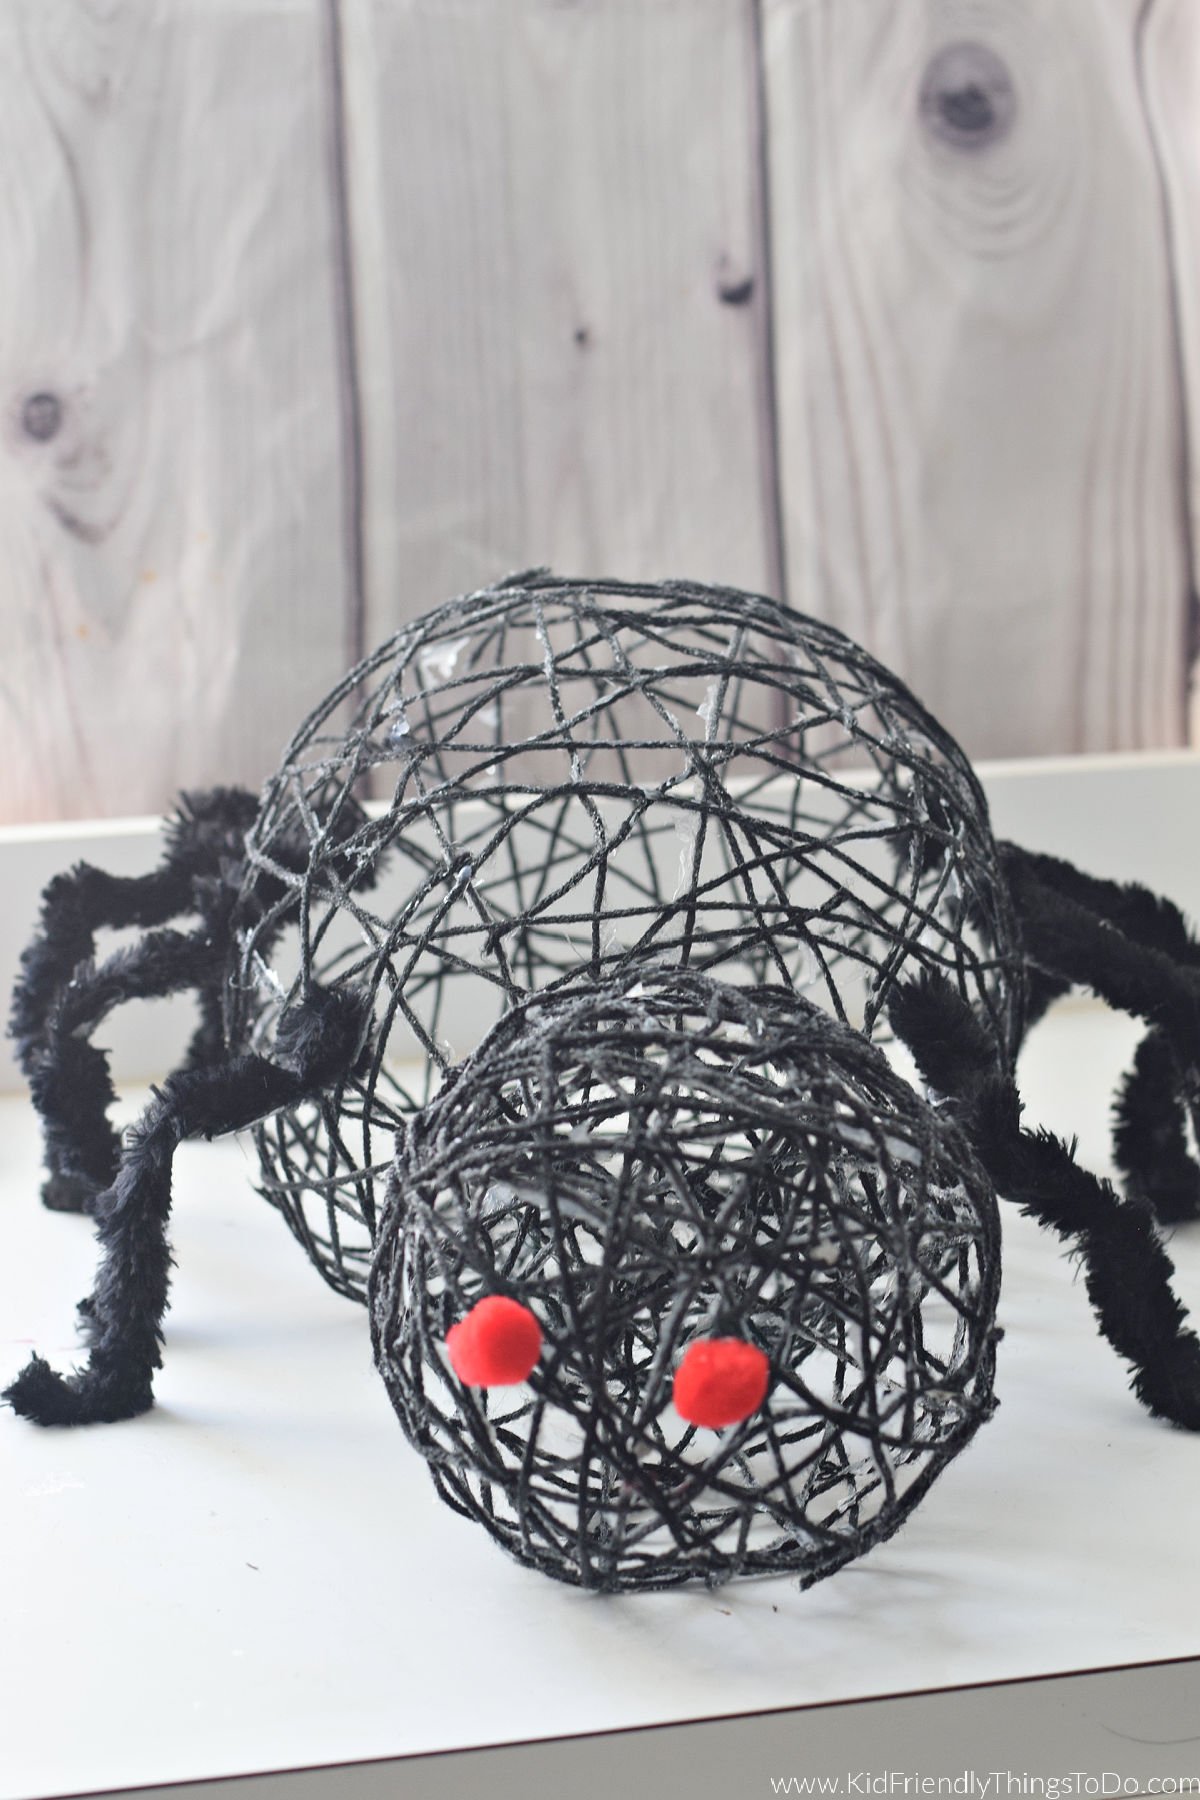
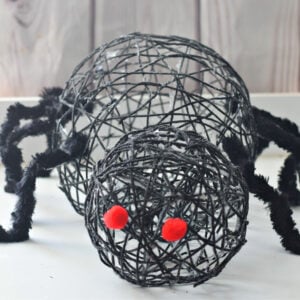
You can make a Giant Spider Decoration for Halloween with simple supplies like balloons and black yarn. An easy craft to make and a fun Halloween Decoration.
All activities, recipes, crafts, and games with children should be supervised by an adult. Small parts are a choking hazard.
DIY Spider for Halloween
My favorite holiday crafts to make are Halloween crafts. There are so many fun characters to make craft with like this mummy craft, these fun Halloween bags to make, and paper witch hat craft.
Years ago, when the yarn and balloon crafts started to circulate, I started thinking of ways to put a spin on that idea. I loved how the yarn crafts were formed from yarn, a balloon, and some glue. I started thinking that two balloons of different sizes facing each other would resemble a cool spider. I gave it a shot, and I’m thrilled with the creation. It’s so spooky and a cool decoration for Halloween.
What You’ll Love about this Spider Craft
- It is an easy craft to make
- The kids will have fun helping you make this spider decoration for Halloween.
- It is a craft that will last for years, so you can enjoy it each Halloween season
Homemade Spider Supplies
- Black yarn cut into strips that will fit the length of your balloons
- Balloons- don’t use punch balls you want the curved look for the spider that you get from classic party balloons
- Glue – don’t use washable or school get strong glue like Tacky Glue for Crafts
- Water
- Something to set the balloon in to dry like kitchen containers, bowls, or buckets
- A bowl to squeeze glue into
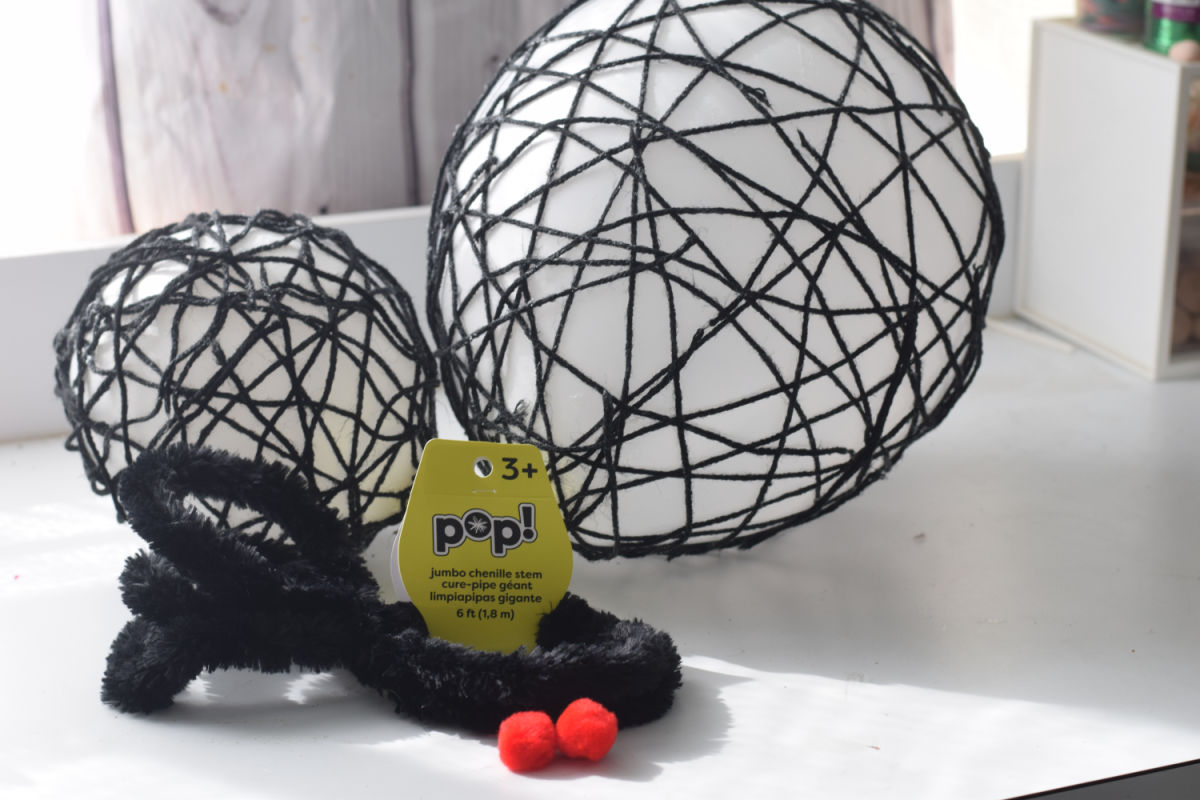
- Black Giant Chenille Pipe Cleaner – You can find these at Michael’s Craft Store or Joann Fabrics
- Two large red pom-poms for the eyes
Suggested Equipment
- An apron to wear & some protection for the table you’re working on
How to Make a Giant Spider for Halloween
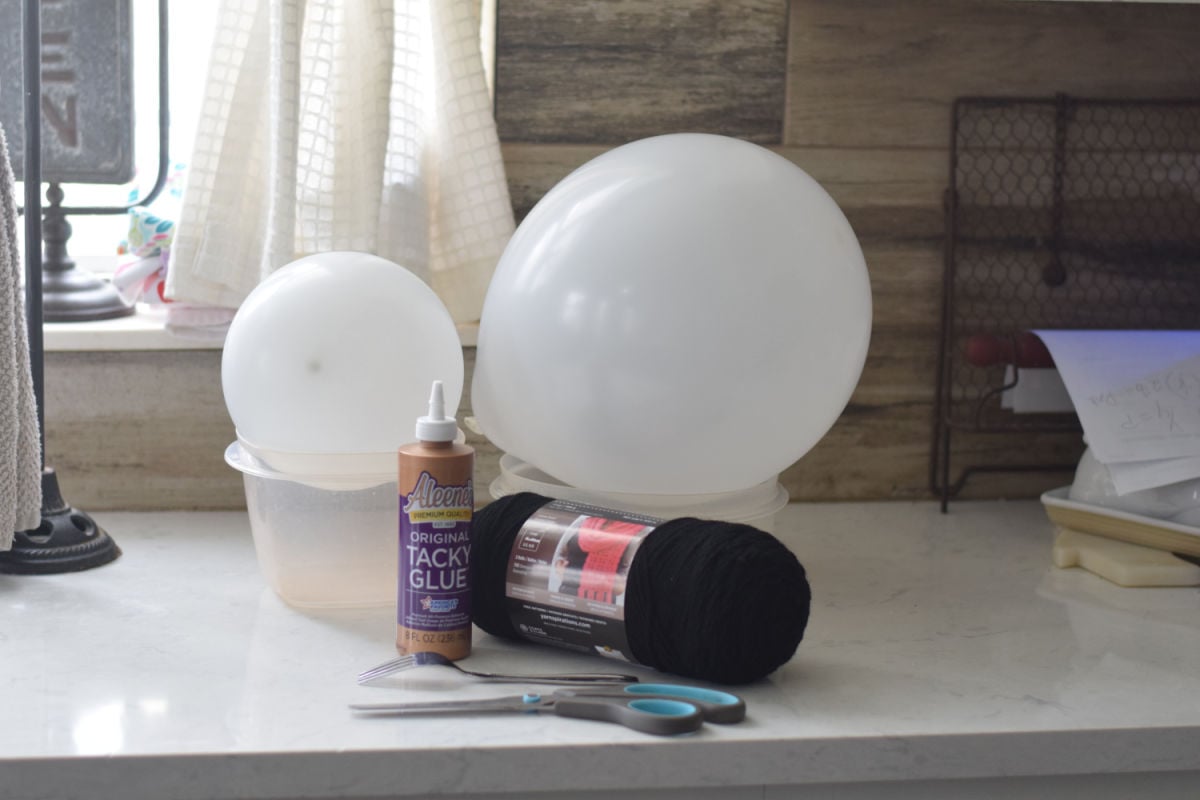
- Blow one balloon up to a very large size—as far as you can go without popping it—this will be the spider’s body. Mine is about one foot from the tied part of the balloon to the bottom.
- Blow one balloon up to a small size, holding it up to the large one so it looks like the size a head should be for the spider. Mine is about six inches from the tied part of the balloon to the bottom.
- Squeeze some glue into a bowl.
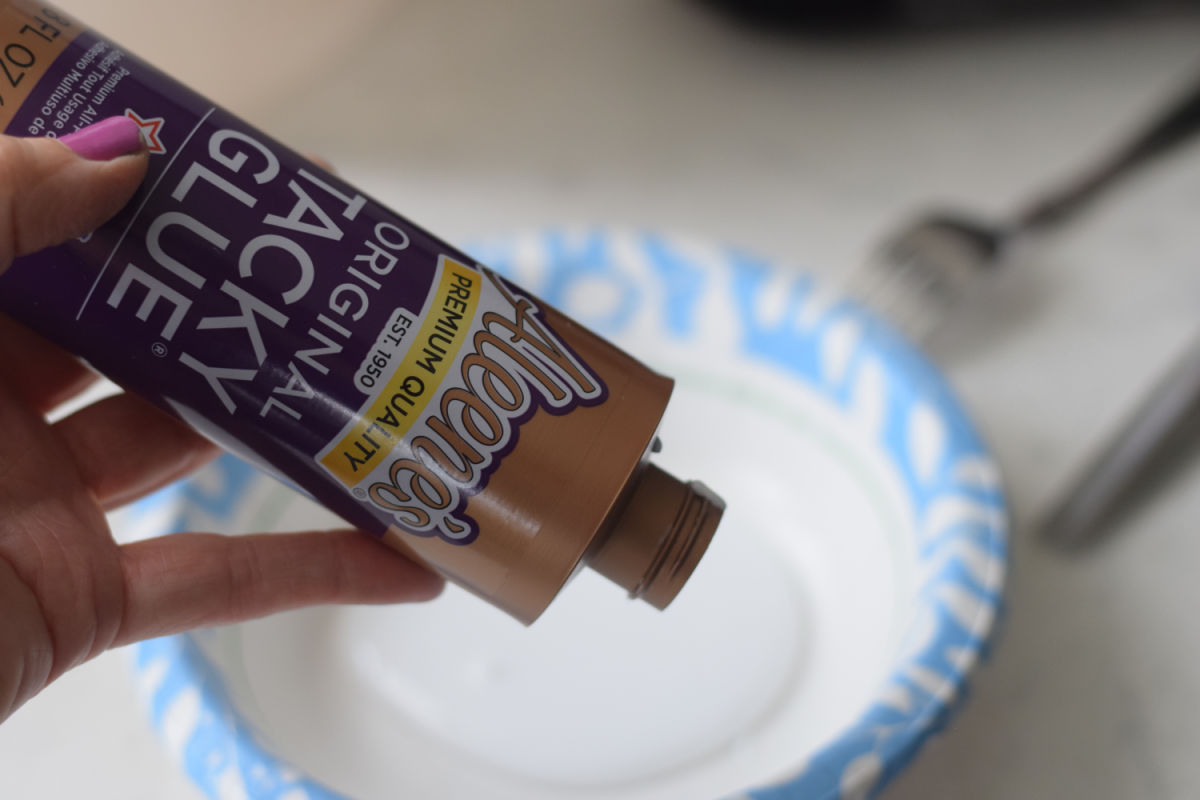
- Pour in enough water to make a paste with the glue. You want the glue a little thinner so it is easier to work with. You’ll probably have a ratio of 70:30 glue to water.
- Dip a piece of yarn into the glue paste and swirl it around to soak it.
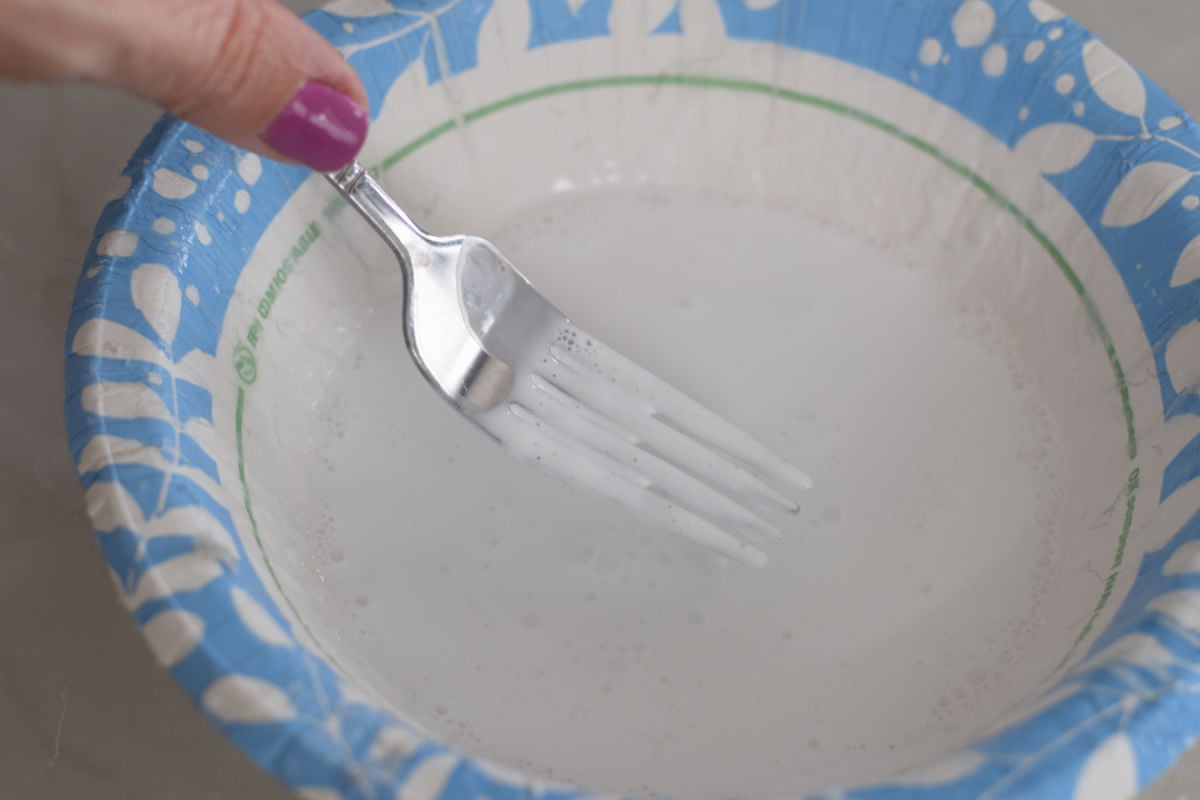
- To get rid of excess glue, you can run the yarn through a fork you hold on the edge of your bowl. This will get excess glue off of the yarn. You can also squeeze some of the glue out with your fingers
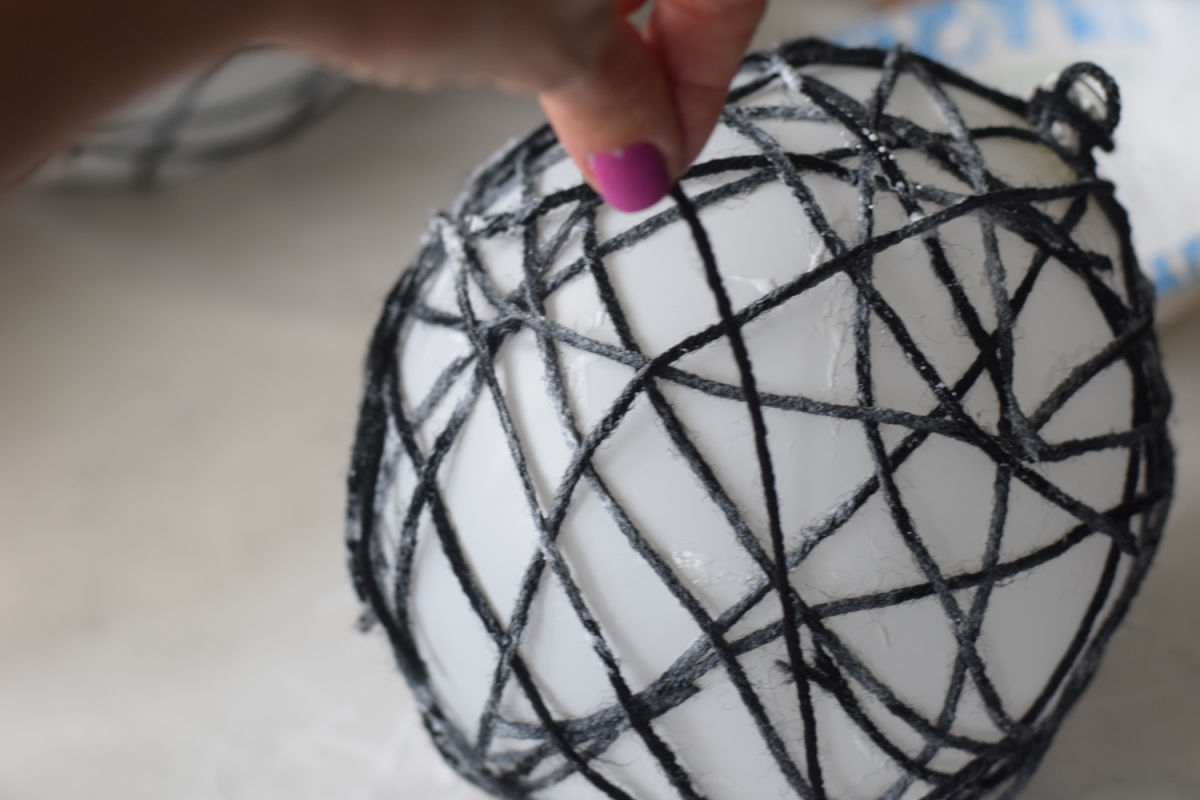
- Using the balloon’s tied tip as a good starting point, wrap the yarn around the tip and tie a knot to secure it in place. Then, pull the yarn down one side of the balloon and up the other—back to the tip again—and wrap it around the balloon tip to secure it.

- Continue doing that going vertically down the balloon in different areas to create a yarn base.
- Glue more yarn all over the balloon, going vertically, diagonally, and horizontally across the yarn pieces so they glue together—you’ll end up with glued yarn going every which way.
- Do the same for your other balloon.
- You’ll want to let them dry overnight, resting them in the bowls or cups you have ready. The next day, add second and third layers, adding more of a webbed look each time. Keep going until you’re satisfied with the amount of yarn covering the balloons.
- Let the yarn dry thoroughly – give them a couple of days – I know that’s hard, but you want them to be stiff.
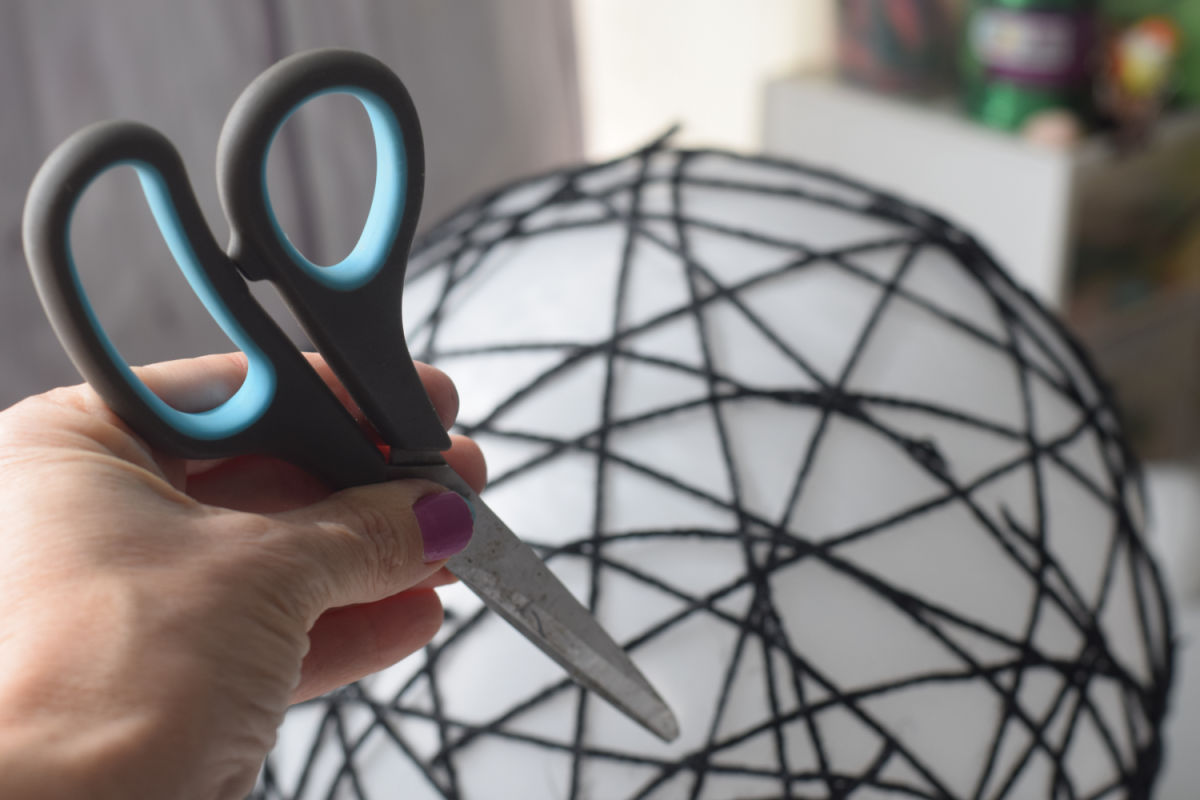
- Finally, pop the balloons and pull out any remaining balloons – clean the extra glue pieces off of the yarn.
How to Assemble the Giant Spider
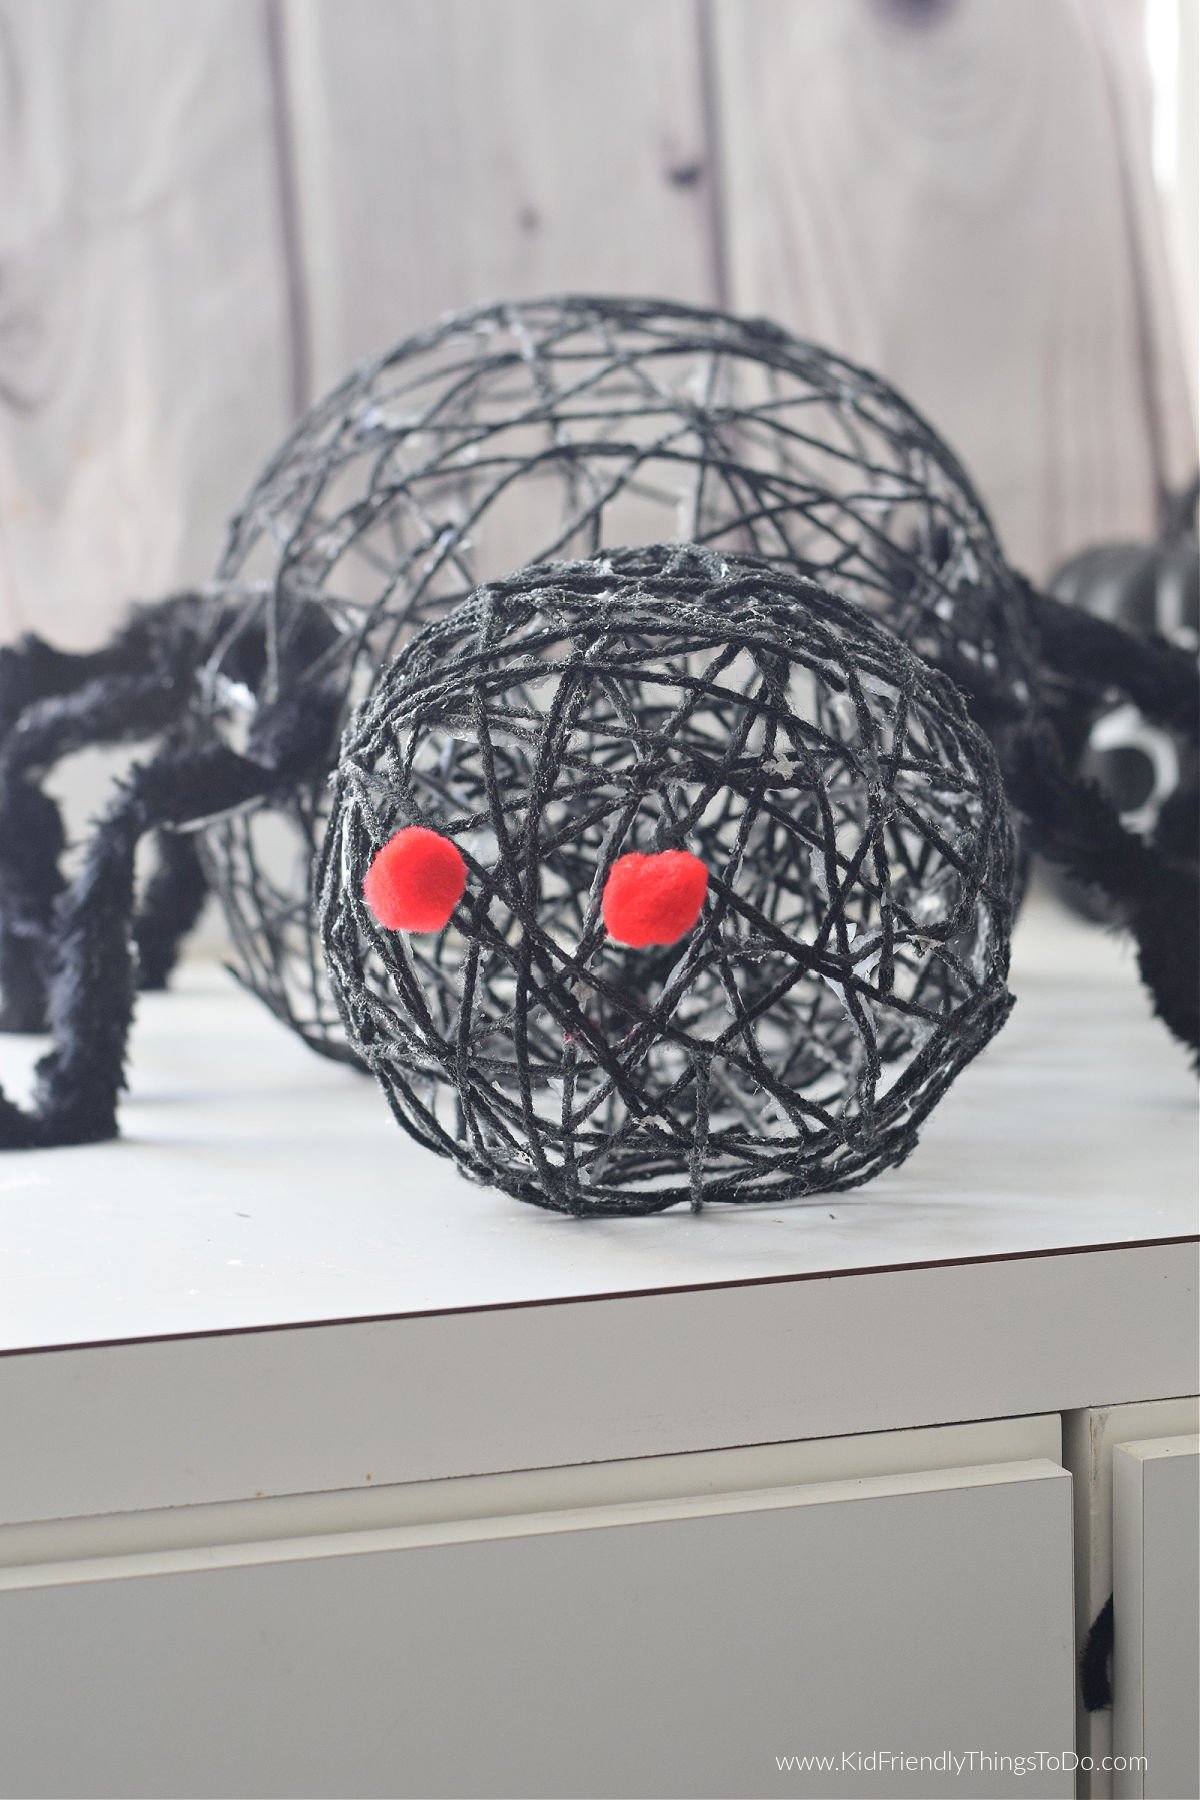
- Facing yarn balls tip to tip (the narrow ends facing each other) – secure them with a low temp. glue gun, a black pipe cleaner, or wire
- Add the red pom-poms to the smaller balloon for the eyes with glue
- Cut the giant chenille into eight pieces. Add the large bendy strips to the body – bending them to resemble the legs of a spider. You can secure the legs with glue.
Expert Tips
Make more paste as needed while you are making the spider
If Your Spider Yarn Balls Flatten and Won’t Hold Their Shape…
If your spider flattens out after you pop the balloon, try to reshape it. Usually, that is all it takes.
If your spider still doesn’t hold its structure, slip a new balloon into the yarn ball. Blow the balloon up until it is inflated to the right size again. Add more glue paste to the yarn pieces that are not stiff. Let it dry, and repeat the steps for removing the balloon the next day.
Variation
Use red glass beads for spooky eyes on your DIY giant spider
If you can not find giant chenille strips, you can make your own with a fur boa and wire.
More Halloween Crafts You’ll Love
Let’s Hang Out!
Come and find me on Pinterest and Facebook for more recipes, crafts, party treats, and holiday games!
Printable for DIY Giant Spider Craft
How to Make a Giant Spooky Spider out of Yarn
Equipment
- Something to set the balloon in to dry like kitchen containers, bowls, or buckets
- A bowl for the glue paste
- Fork optional
Materials
- 1 package Black yarn cut into strips that will fit the length of your balloons
- 2 Balloons
- Glue don't use washable or school get strong glue like Tacky Glue for Crafts
- Water
- 6 feet Giant Chenille Pipe Cleaner Black – for legs
- 2 large red pom-poms for the eyes
Instructions
- Blow one balloon up to a very large size—as far as you can go without popping it—this will be the body of the spider. Mine is about one foot from the tied part of the balloon to the bottom.the yarn.
- Blow one balloon up to a small size, holding it up to the large one so it looks like the size a head should be for the spider. Mine is about six inches from the tied part of the balloon to the bottom.
- Squeeze some glue into a bowl. Pour in enough water to make a paste with the glue. You want the glue a little bit thinner so it is easier to work with. You'll probably have a ratio of 70:30 glue to water.
- Dip a piece of yarn into the glue paste, and swirl it around to soak it
- You can run the yarn through a fork that you hold on the edge of your bowl, or you can use your fingers to squeeze the excess glue out of the yarn. This will get excess glue off of the yarn
- Using the balloon's tied tip as a good starting point, wrap the yarn around the tip to secure it in place.
- Then, pull the yarn down one side of the balloon and up the other—back to the tip again—and wrap it to secure it.
- Make more vertical strips around the balloon to use as a base
- Continue doing that all over the balloon and place yarn sideways and diagonally, too—you'll end up glued yarn going every which way
- Do the same for your other balloon. You'll want to let them dry overnight, resting them in the bowls or cups you have ready.
- The next day, add second and third layers, adding more of a webbed look each time. Keep going until you're satisfied with the amount of yarn covering the balloons.
- Let the yarn dry thoroughly – give them a couple of days – I know that's hard, but you want them to be stiff.
- Finally, pop the balloons and pull out any remaining balloons – clean the extra glue pieces off of
Assembling
- Facing yarn balls tip to tip (the narrow ends facing each other) – secure them together with a wire strip or small black pipe cleaner
- Add the red pom-poms for the eyes with hot glue.
- Cut the fur chenille into eight equal strips. Add the large bendy strips to the body – bending them to resemble the legs of a spider. If needed, use a low temp. glue gun to secure them to the sides
Notes
If Your Spider Yarn Balls Flatten and Won’t Hold Their Shape…
If your spider flattens out after you pop the balloon, try to reshape it. Usually, that is all it takes.
If your spider still doesn’t hold its structure, slip a new balloon into the yarn ball. Blow the balloon up until it is inflated to the right size again. Add more glue paste to the yarn pieces that are not stiff. Let it dry, and repeat the steps for removing the balloon the next day.
Variation
Use red glass beads for spooky eyes on your DIY giant spider
If you can not find giant chenille strips, you can make your own with a fur boa and wire.
This post may contain affiliate links. As an Amazon Associate, I earn a small commission from qualifying purchases. See my disclosure policy to read more. Adult supervision is required for each step of activities, recipes, crafts, and games with children. Small parts are a choking hazard. Sharp objects can cause injury.
~Melissa – KidFriendlyThingsToDo.Com

Thank you for sharing this. 🙂 I love the crafts you post.
Thank you so much for leaving that comment. You made my day! I hope you enjoy the spider craft. 🙂